4 Animations in PowerPoint That Grab Student Attention Instantly (Tutorial, Bonus Interactive Hacks, and a Free Downloadable!)
Get link
Facebook
X
Pinterest
Email
Other Apps
If you’re tired of using the same basic animations in PowerPoint and want to upgrade your slides with more sophisticated effects, you’re in the right place. Below, you will find an upgraded twist on 4 animations in PowerPoint that you can integrate into your presentations, PLUS 4 tips on how to make your slides even more engaging and interactive to go along with each animation.
data-title="Add ClassPoint to Your PowerPoint" data-description="Join 800,000 others who are transforming their presentations with ClassPoint. Pair creative PowerPoint animations with ClassPoint's interactive tools for a truly dynamic and engaging experience!" data-cta-text="" data-cta-link="">
Let’s dive into these four creative ideas and see how animations in PowerPoint can do more than just add flair, but also guide attention, simplify complex ideas, and keep students engaged. Follow along with the blog using the downloadable template below, and let’s see how you can level up your animations!
Creative Animations in PowerPoint Trick #1: Fly-In Animation
The Fly-In animation is perfect for introducing content gradually as you progress through your presentation. It brings in new elements one-by-one, helping students focus on specific pieces of information without being overwhelmed. Let me show you how to upgrade it.
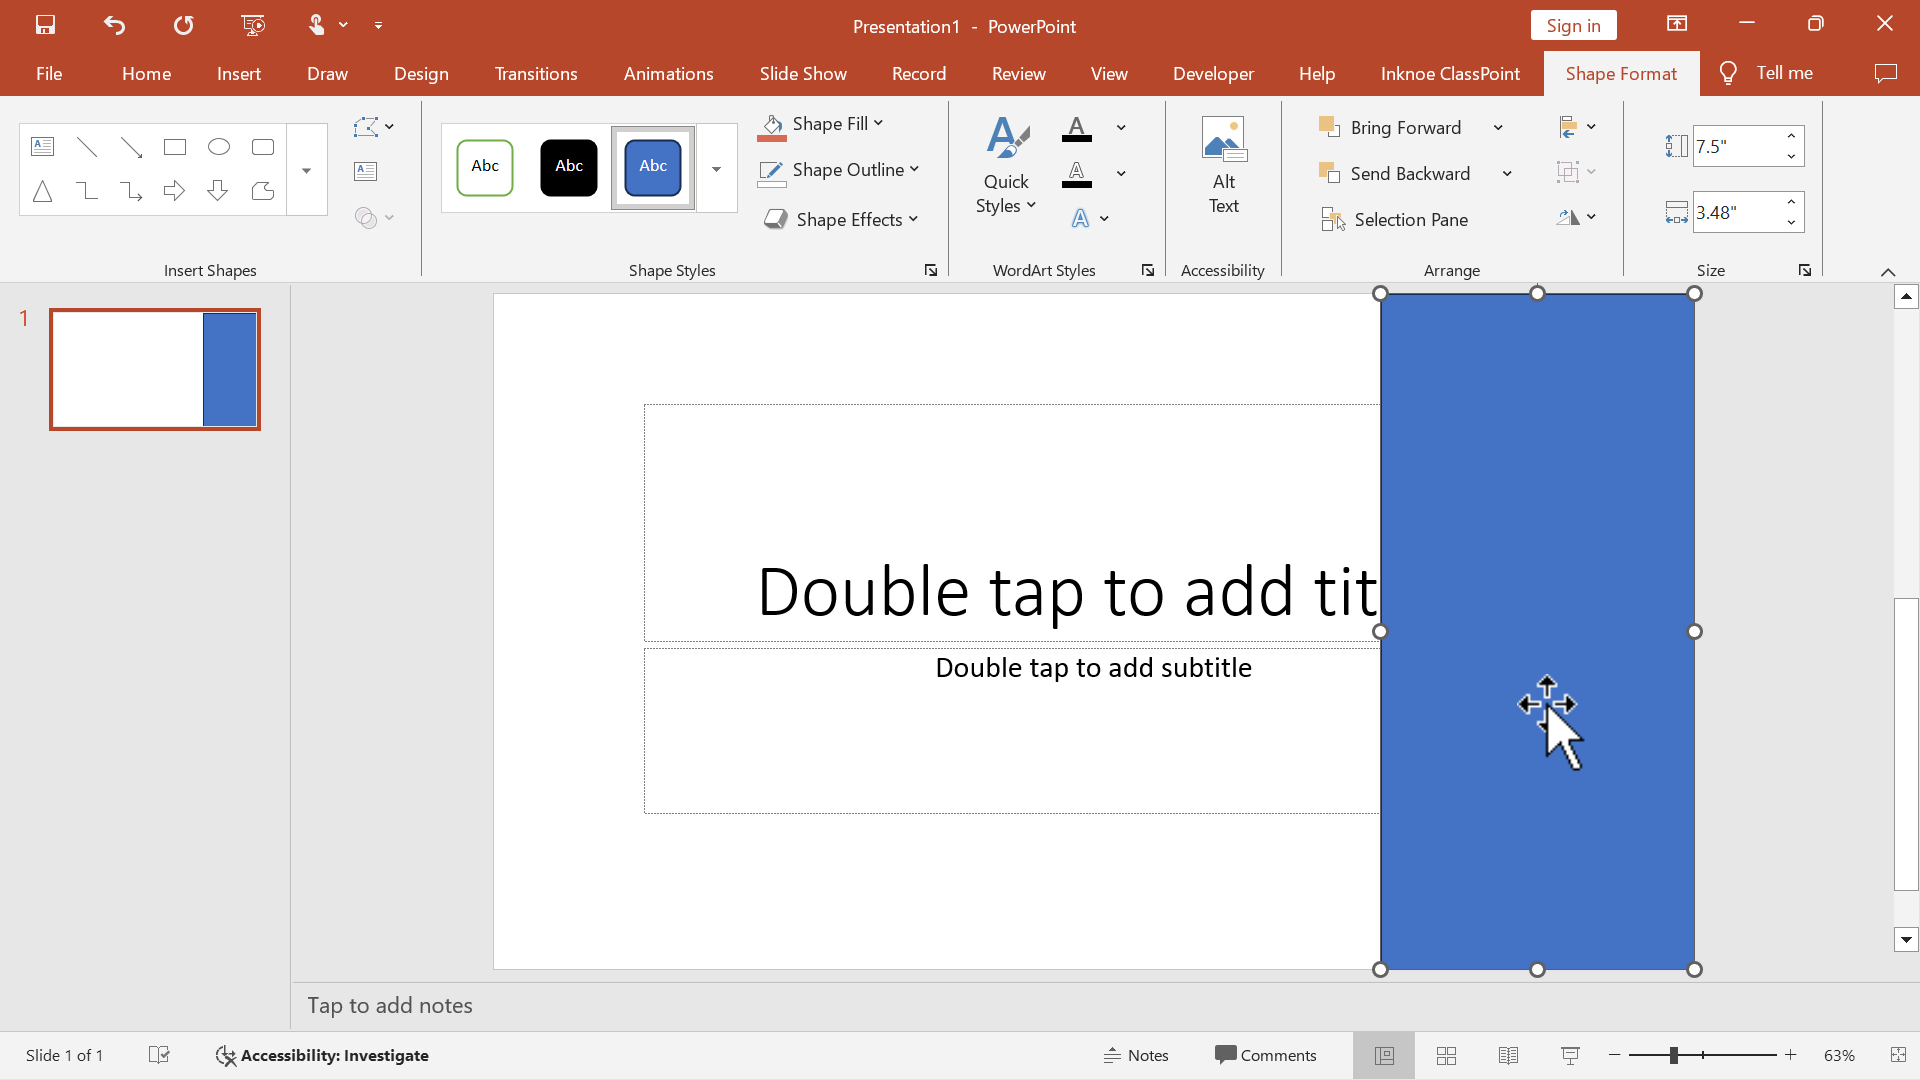
Step 1: Insert & Format Shape
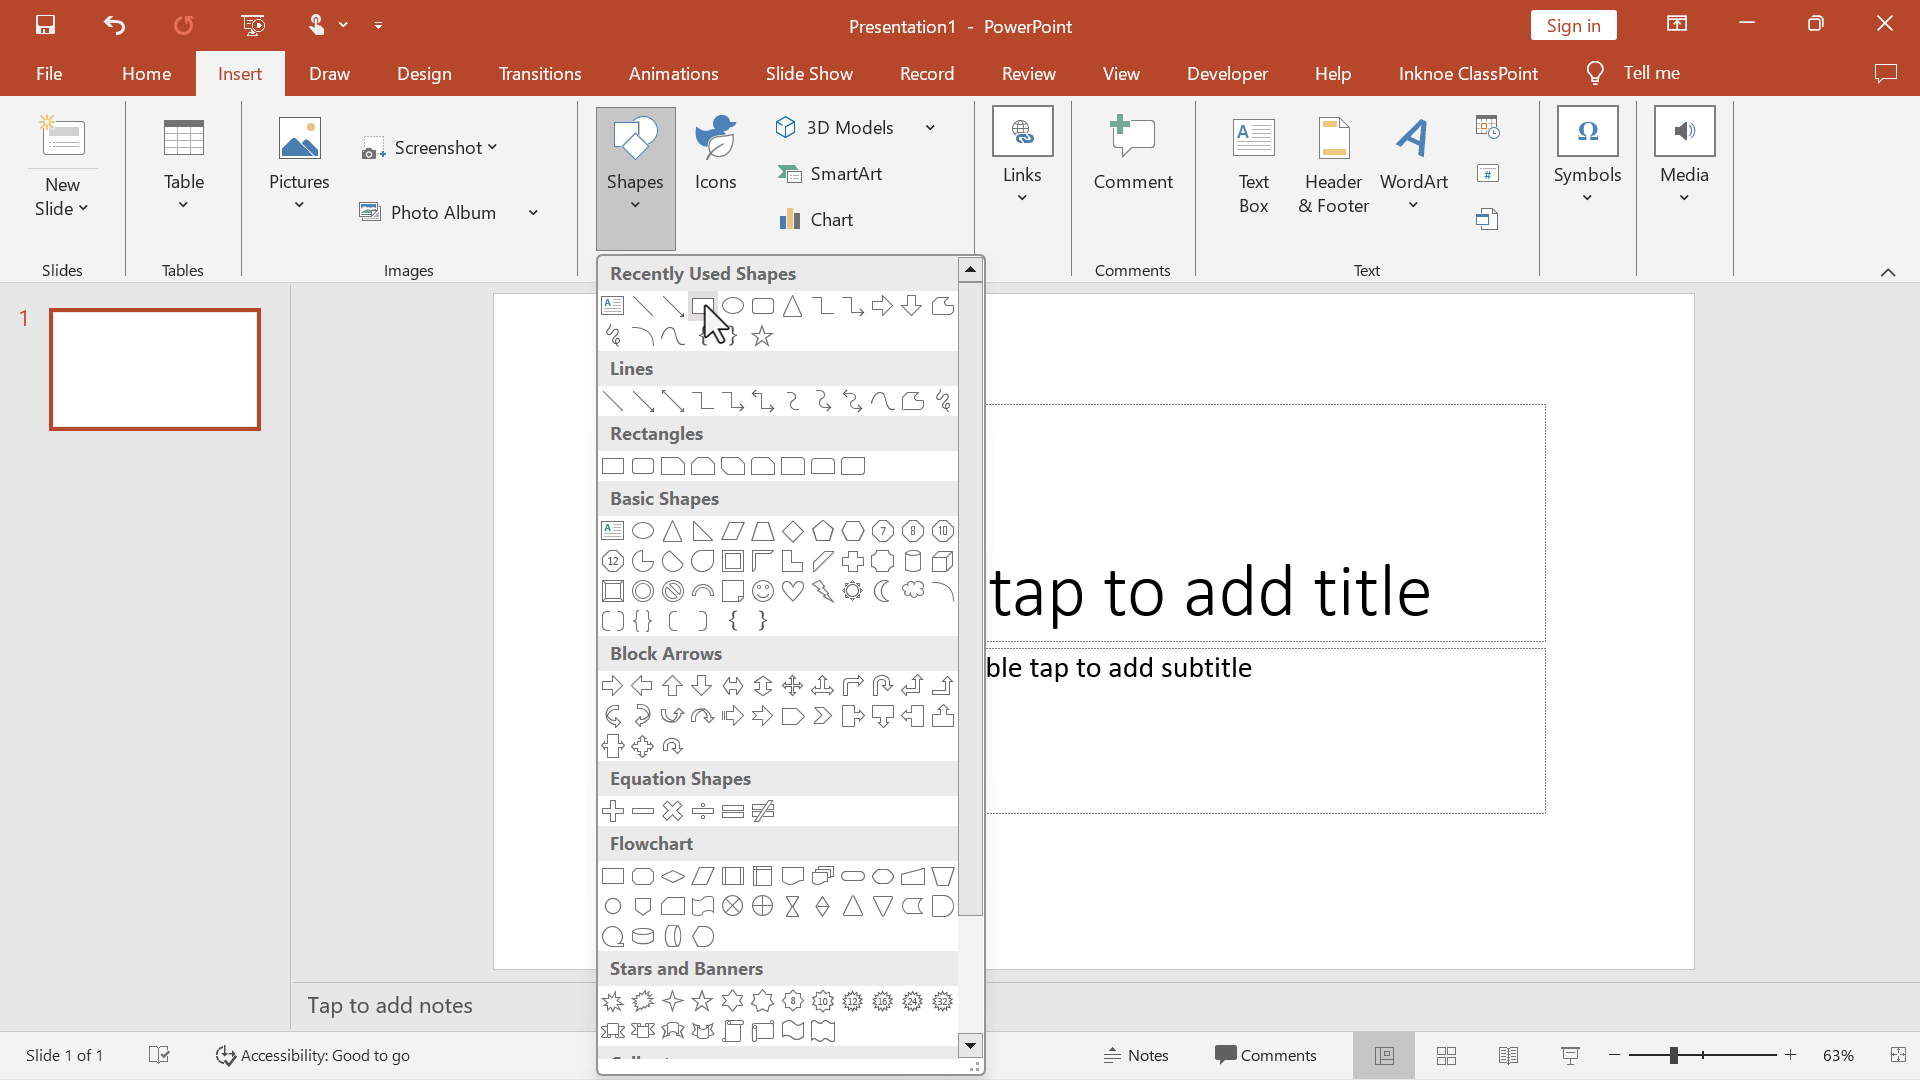
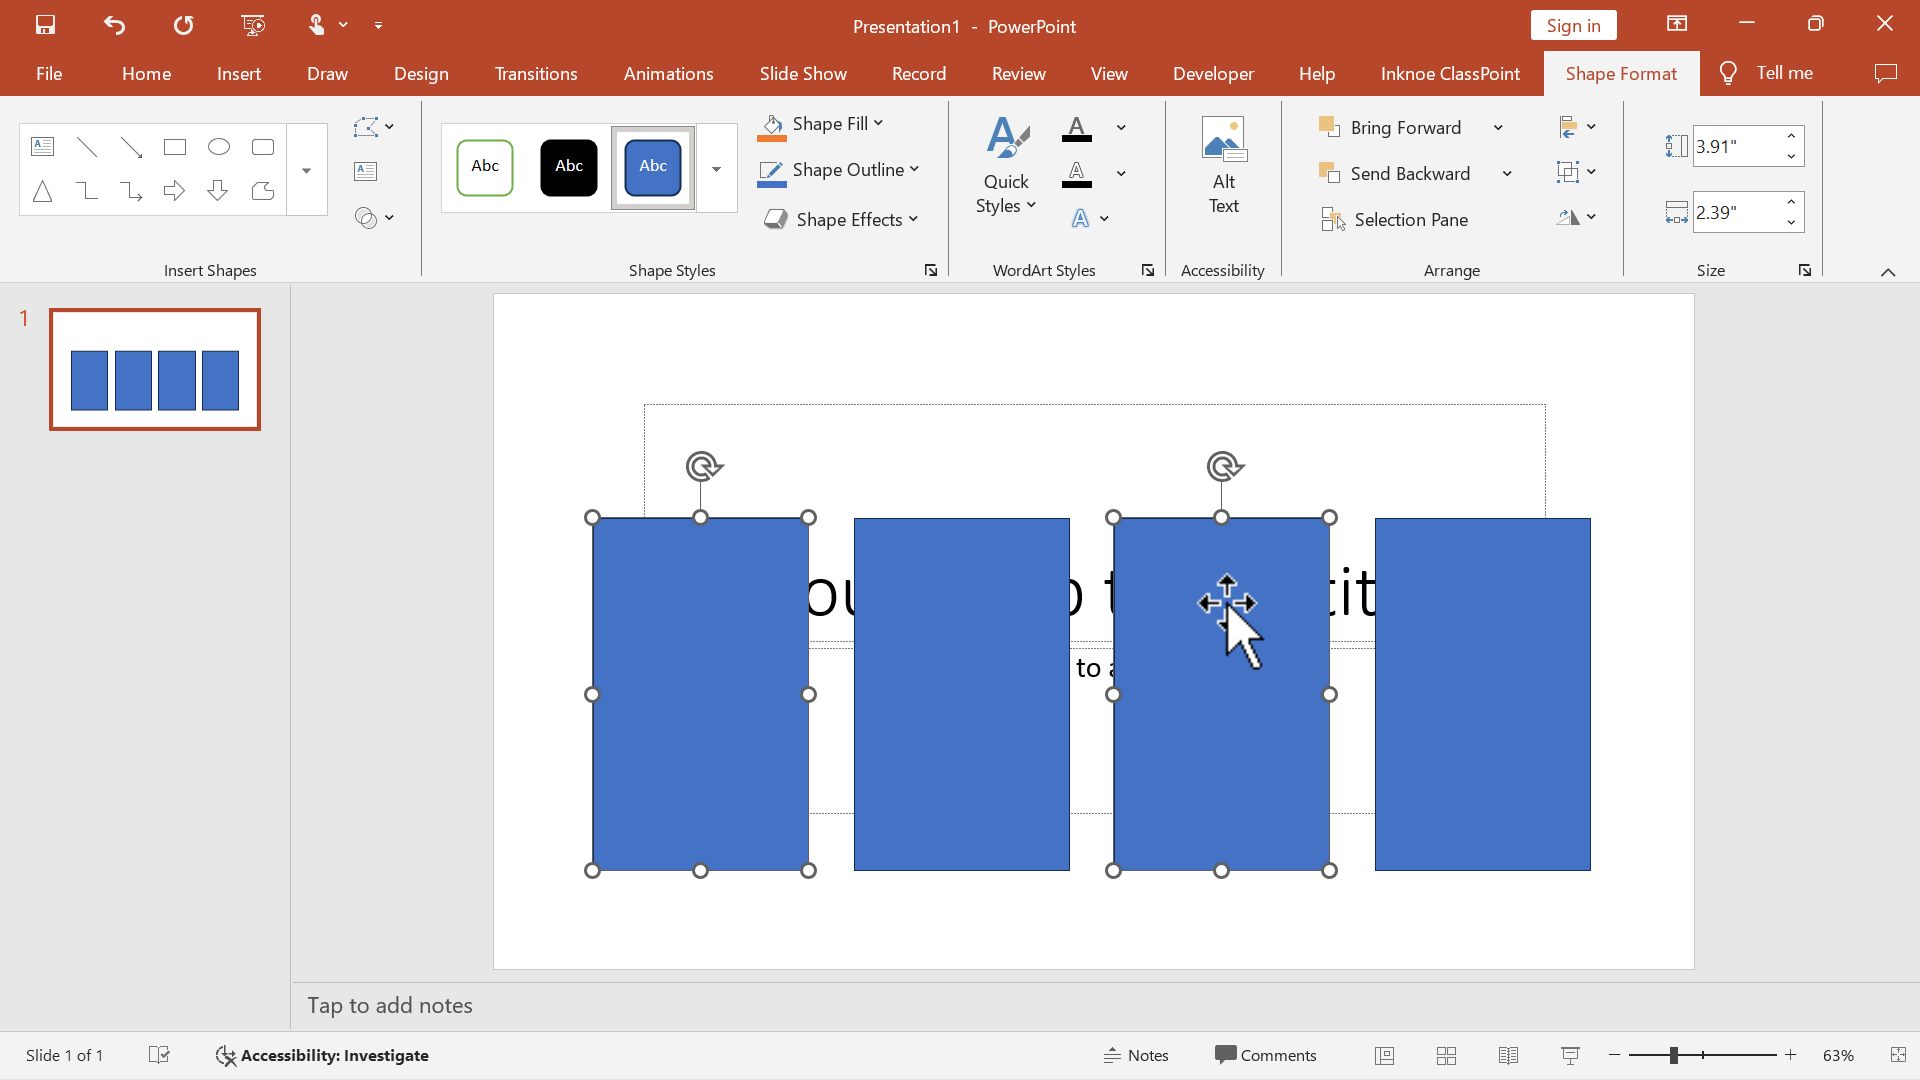
Insert a Rectangle shape on the far-right side of the slide.
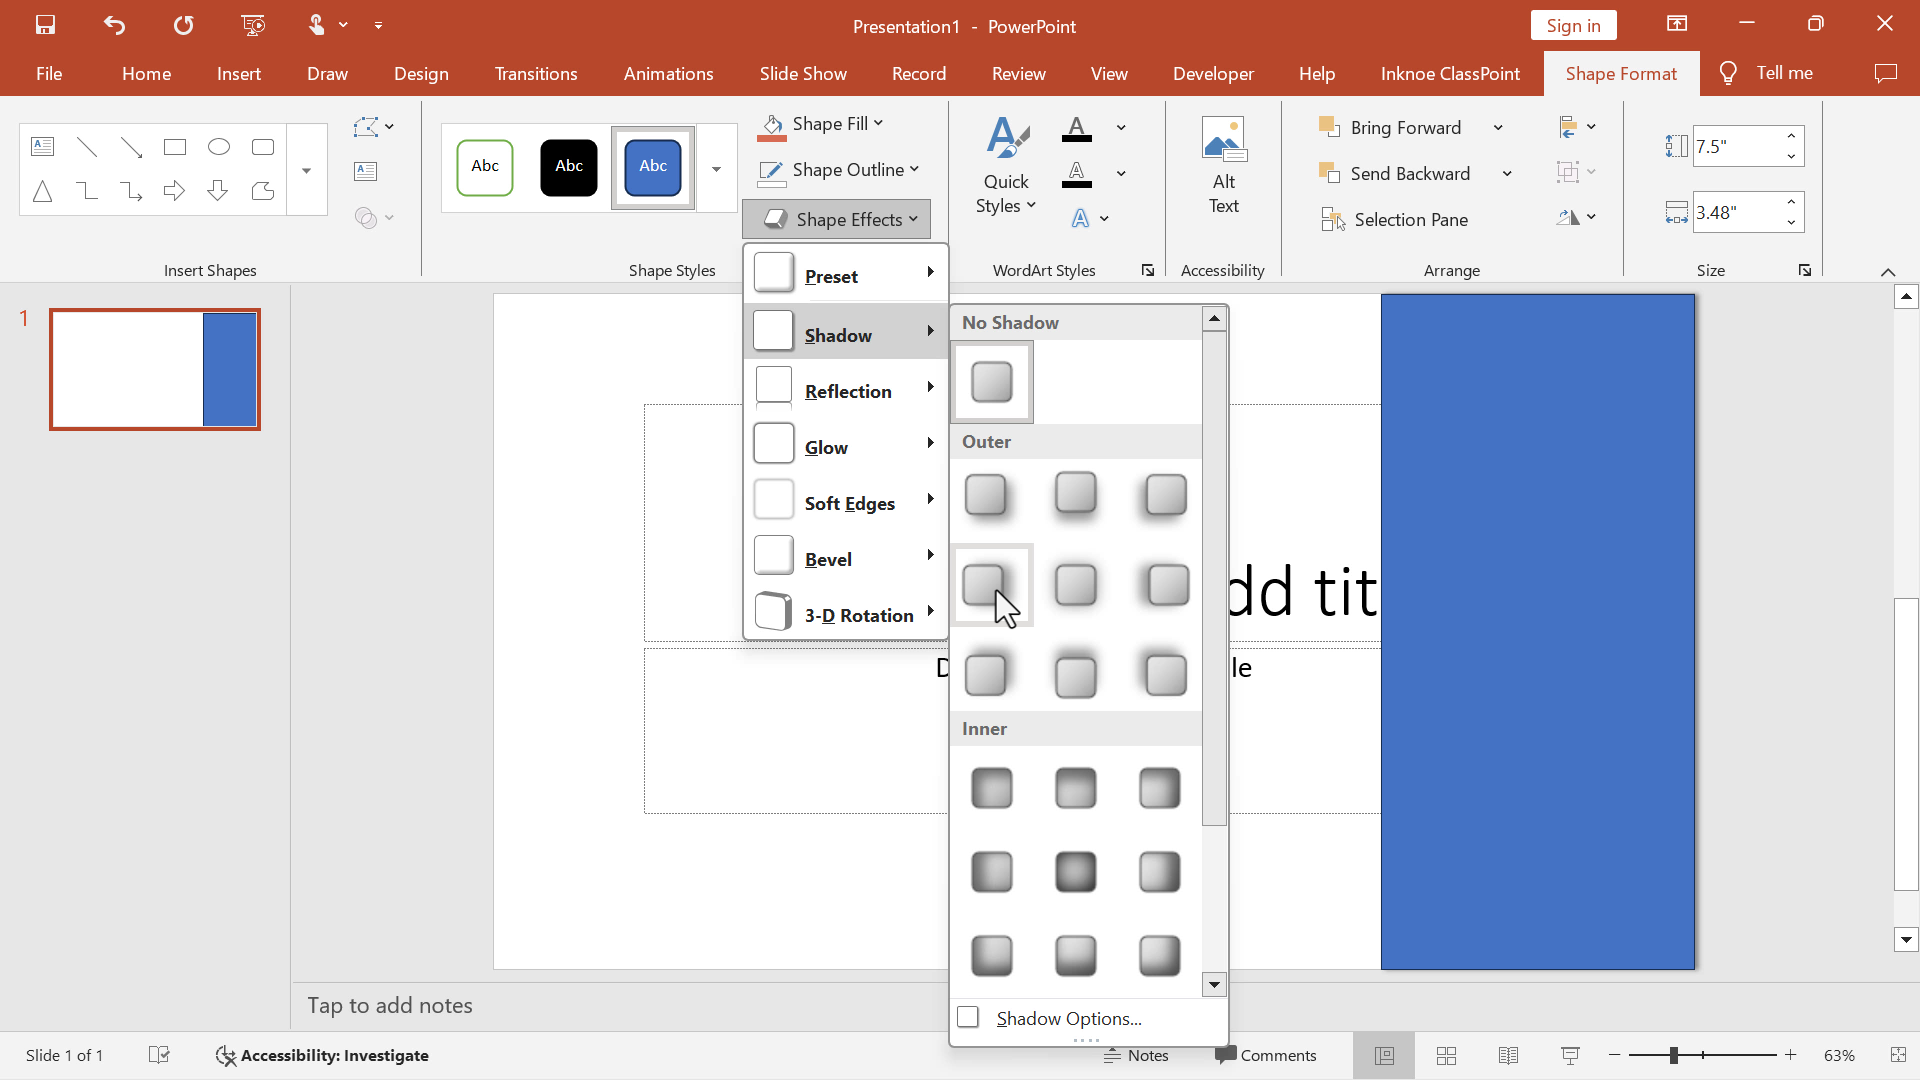
Then, Format the shape with the Shadow Effect Offset Right.
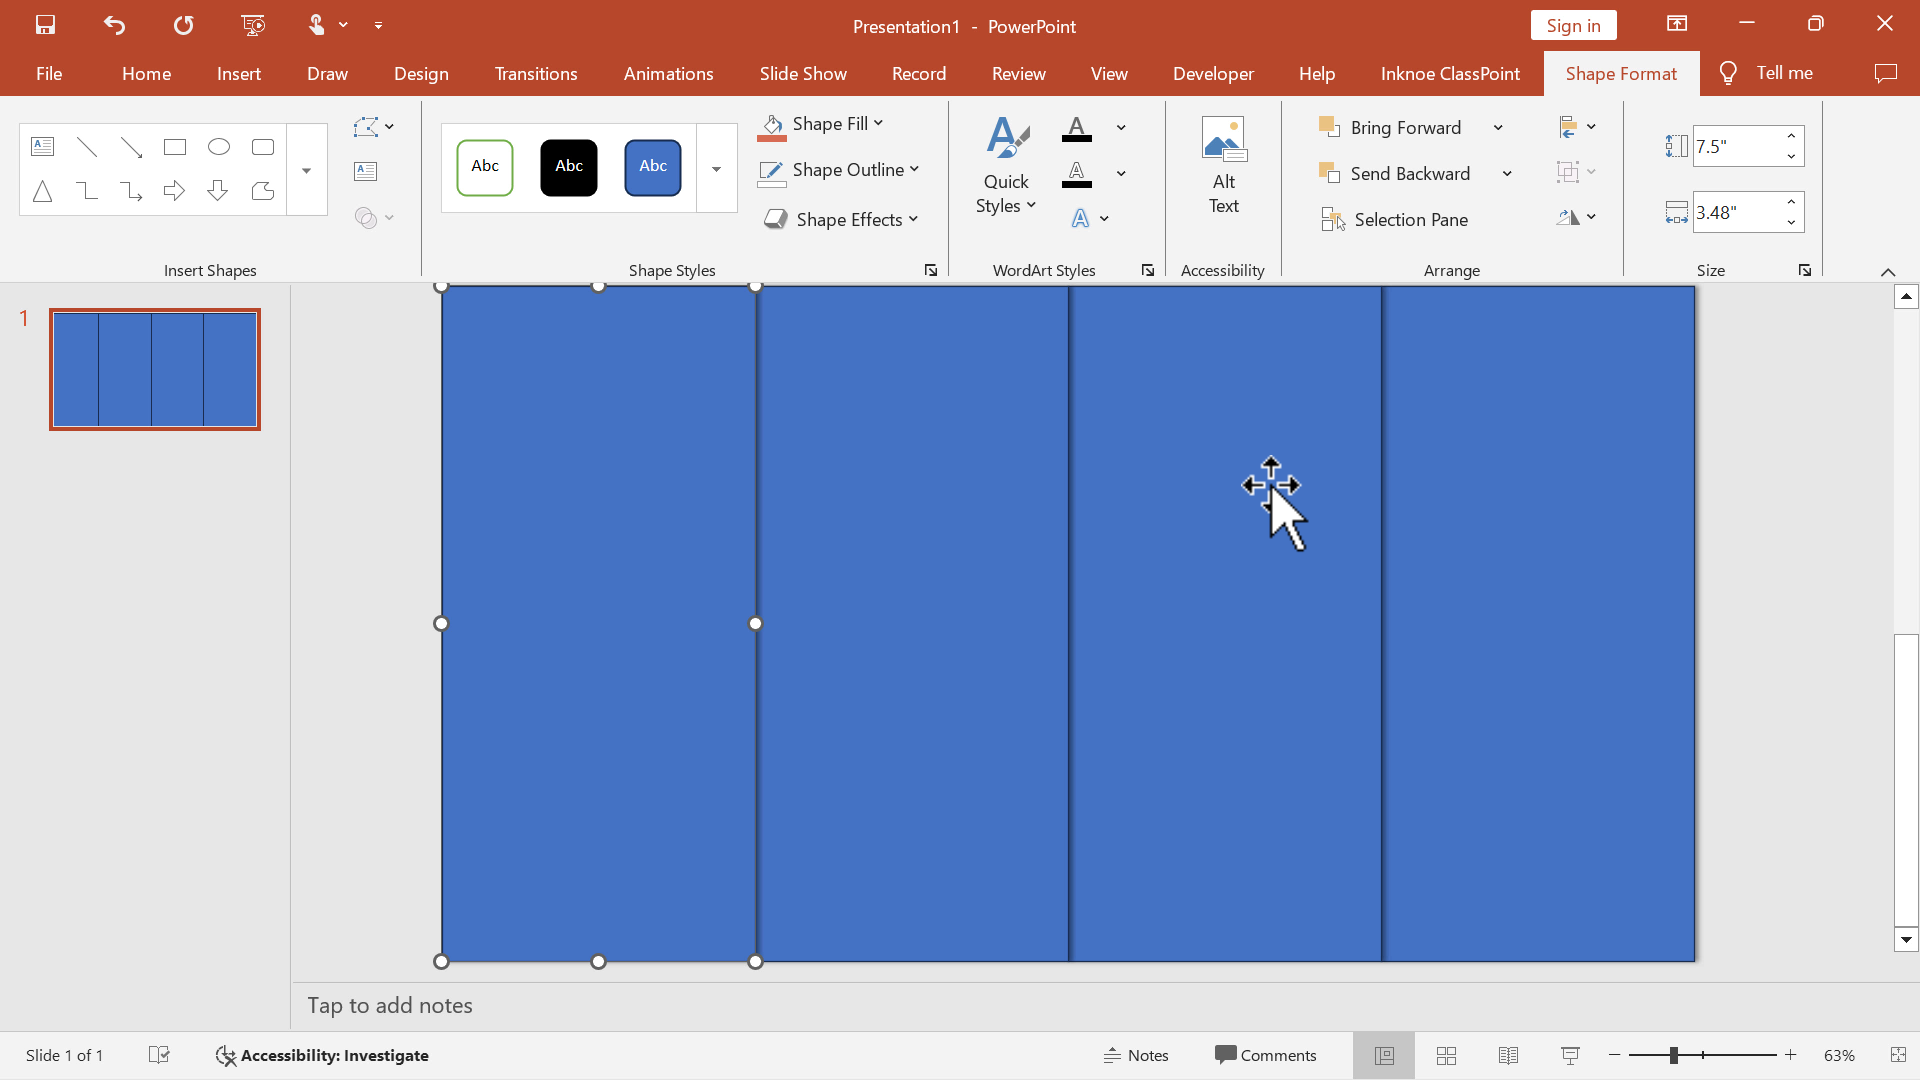
Step 2: Duplicate Shape
Duplicate the shape (CTRL + D) and move it to the left of the 1st shape. Then, duplicate 2x more to fill the whole slide.
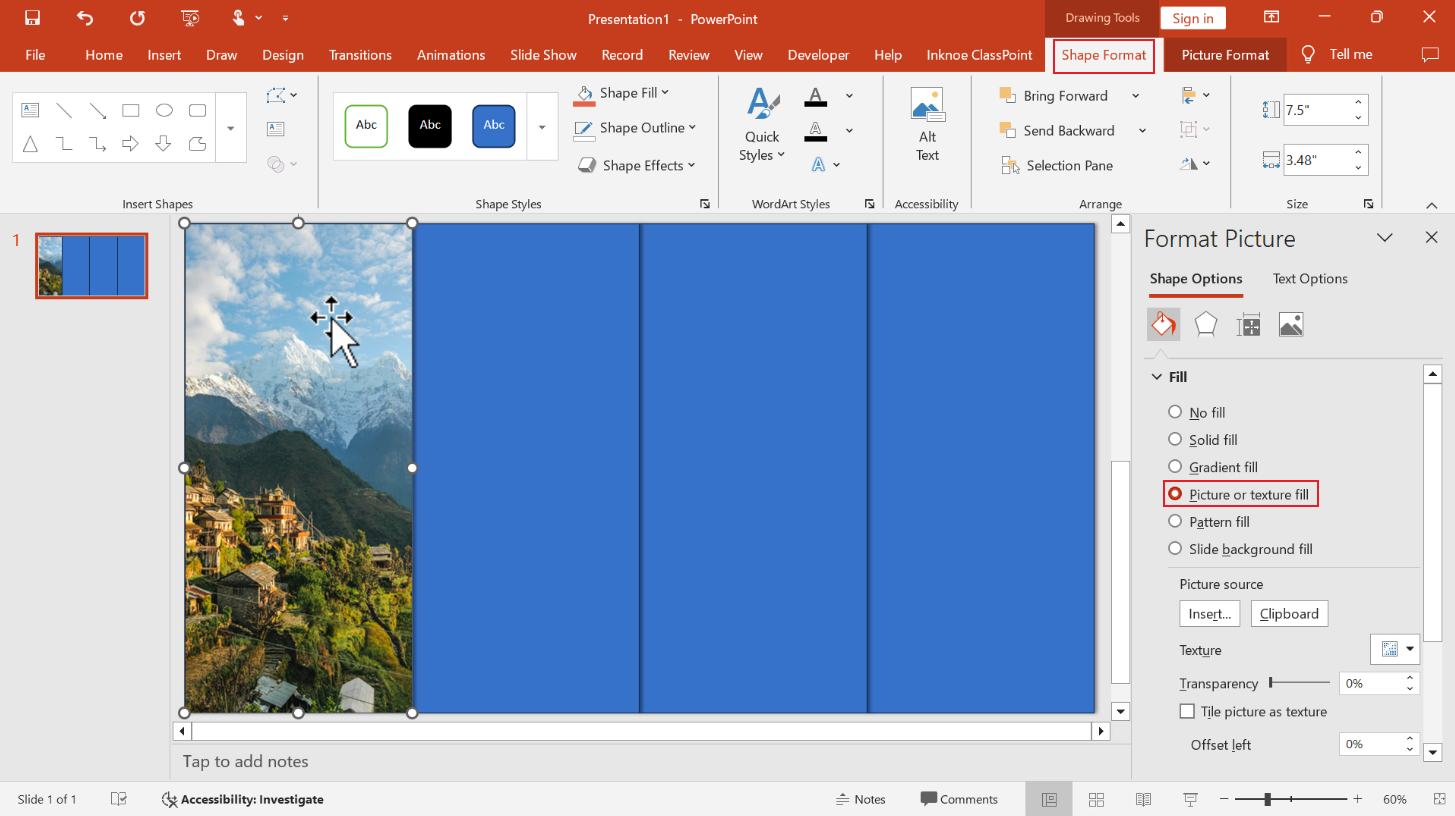
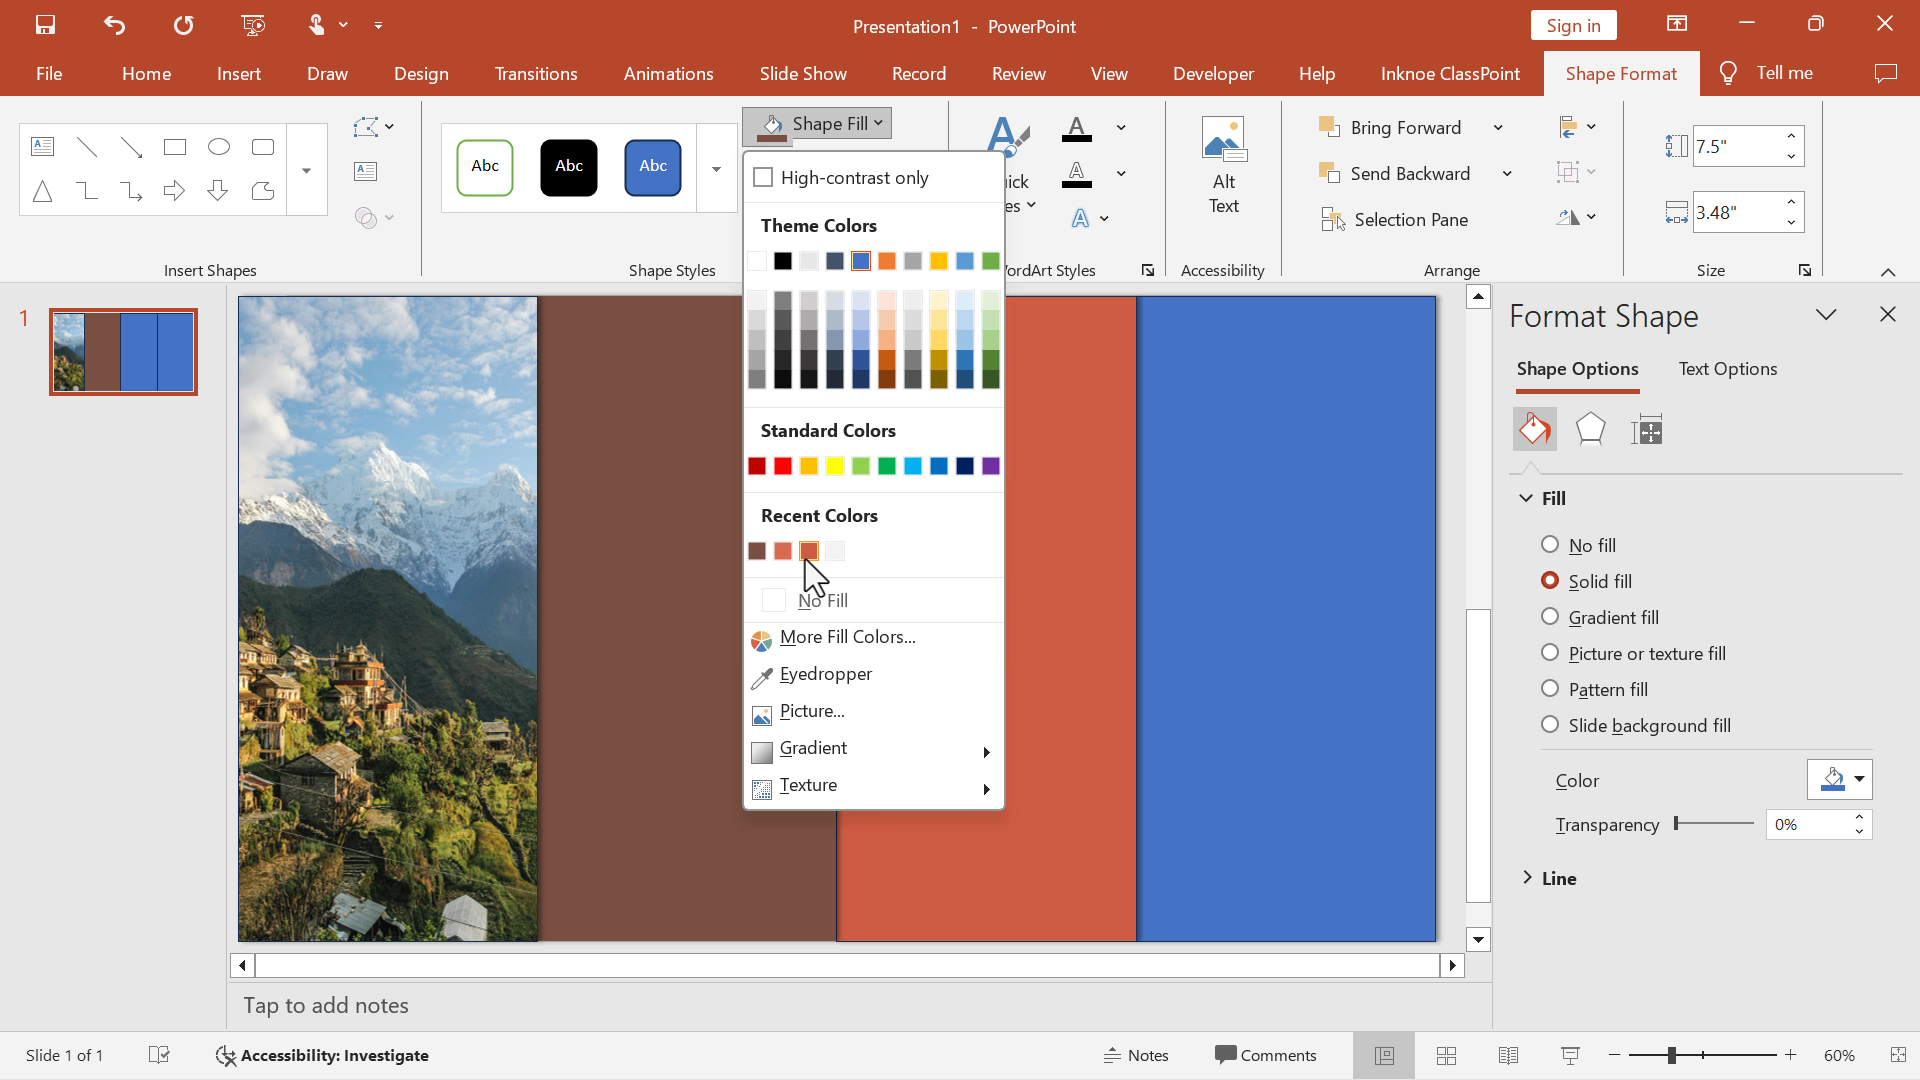
Step 3: Format Shape
Right-click on the 1st rectangle on the left. In Shape Format, Insert Picture.
For the other three rectangles, change the fill color.
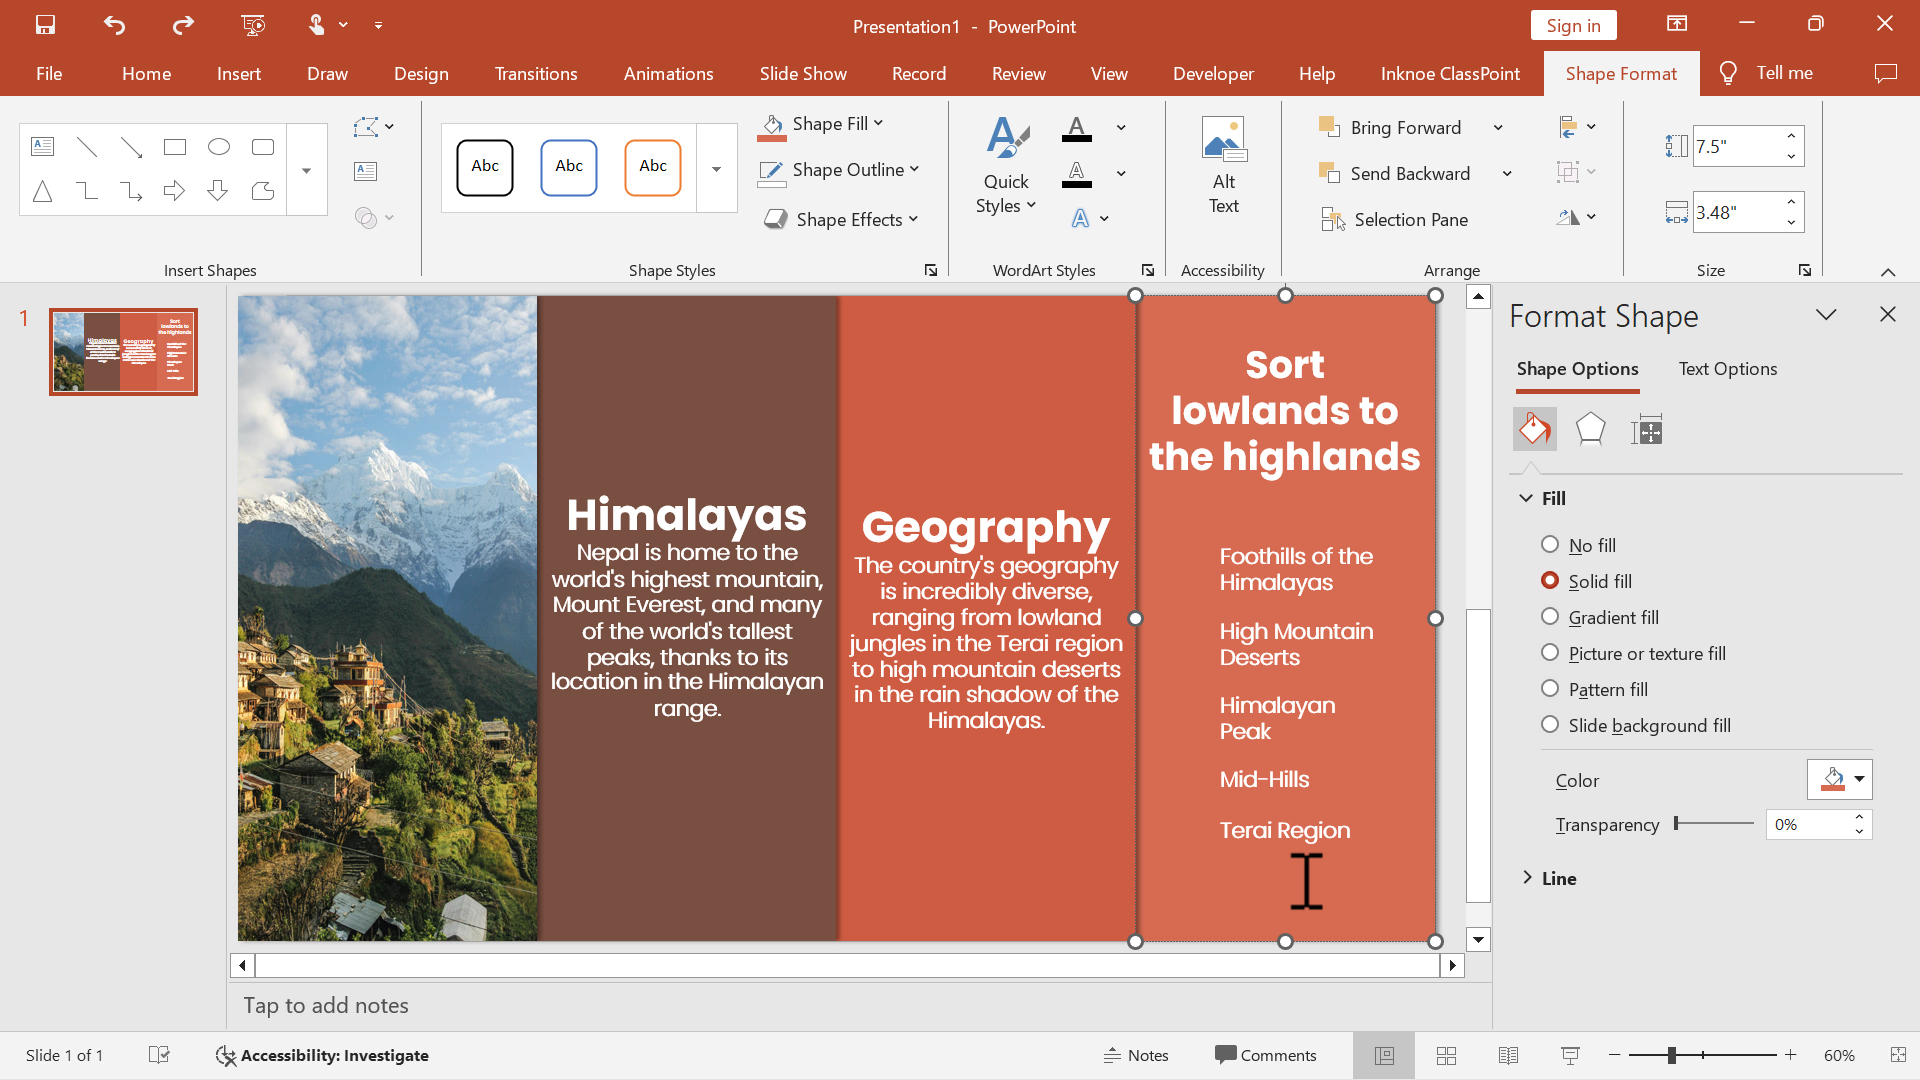
Step 4: Add Text
Double-click on each rectangle to add text content and format as needed.
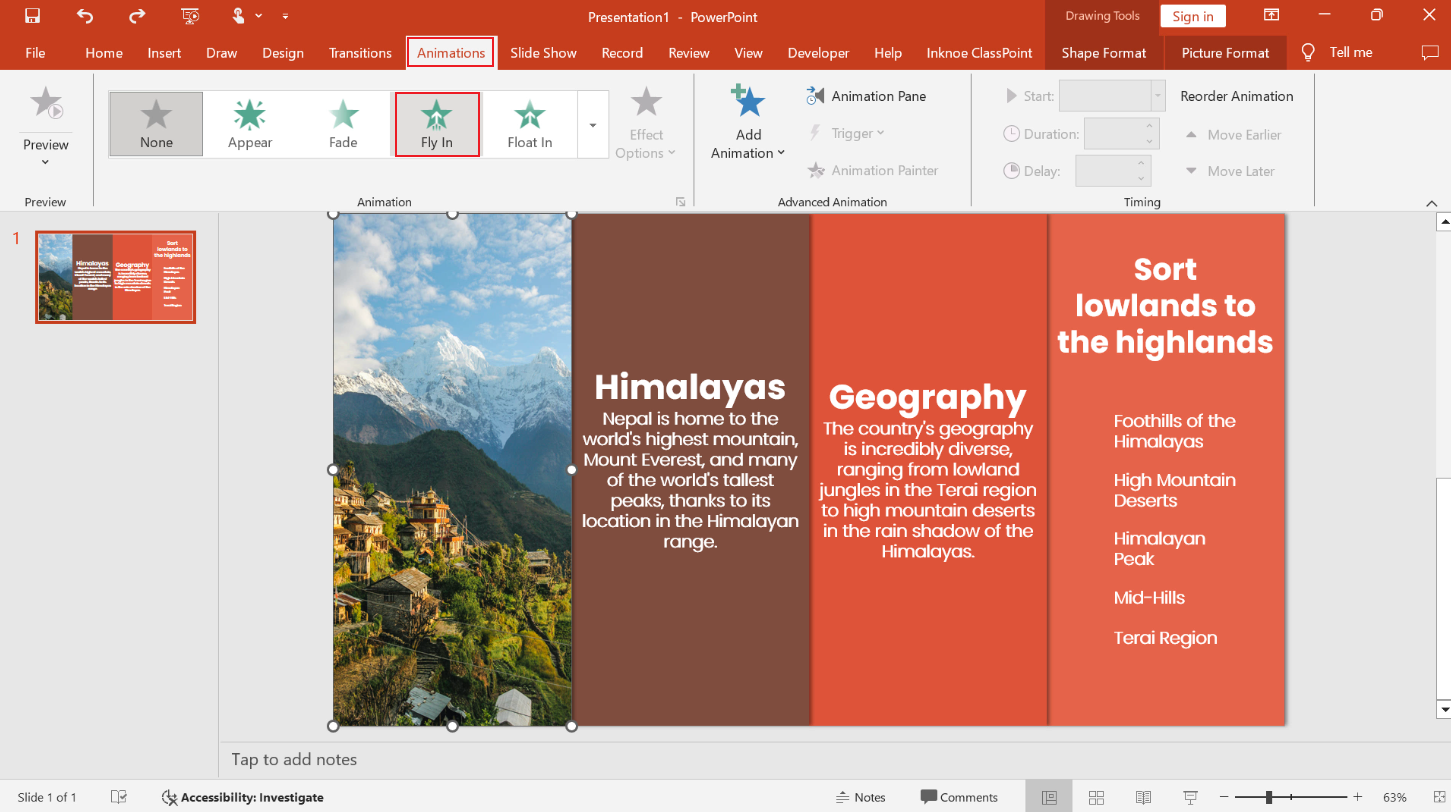
Step 5: Add Animations
Click on the first rectangle, then click the Animations tab in the PowerPoint ribbon. Select Fly In.
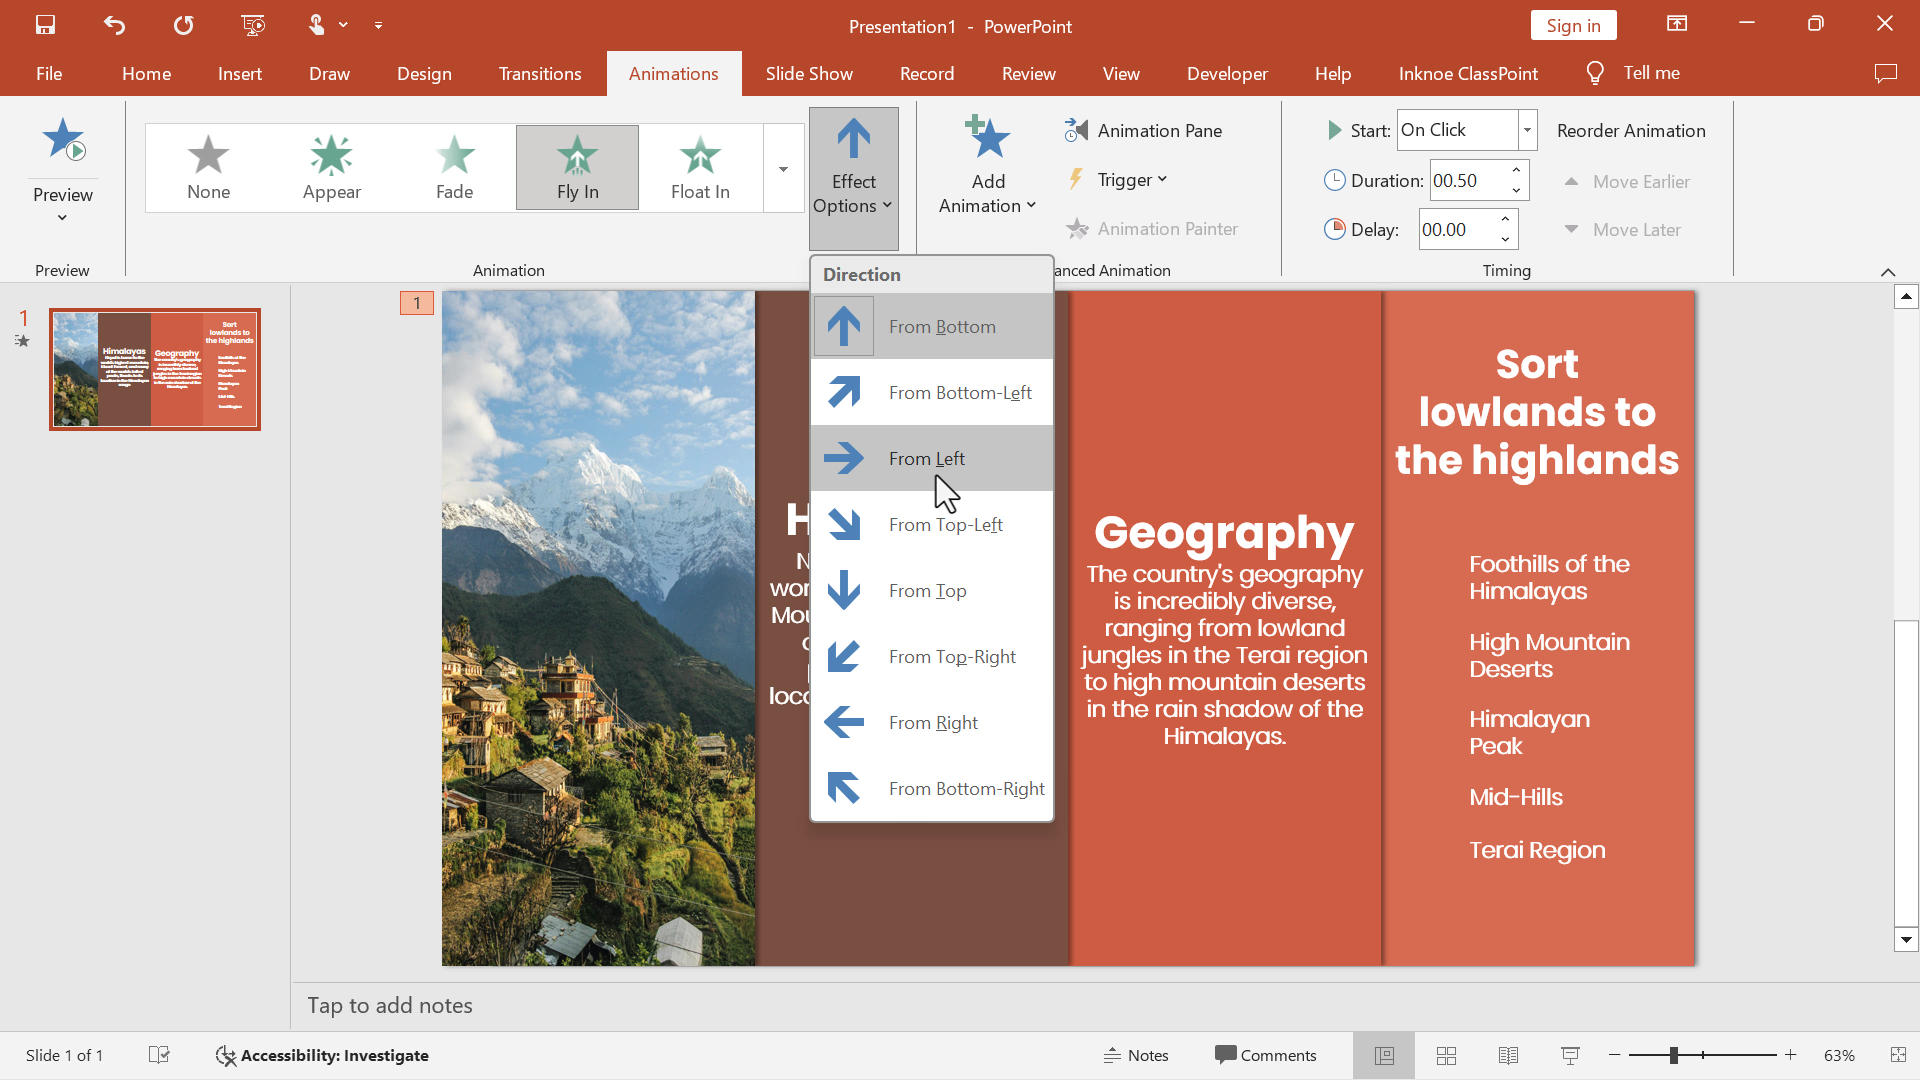
Then in the Effect options, select From Left.
Step 6: Repeat
Repeat the addition of animations for each shape. Doing them individually helps them appear one at a time, instead of all at once.
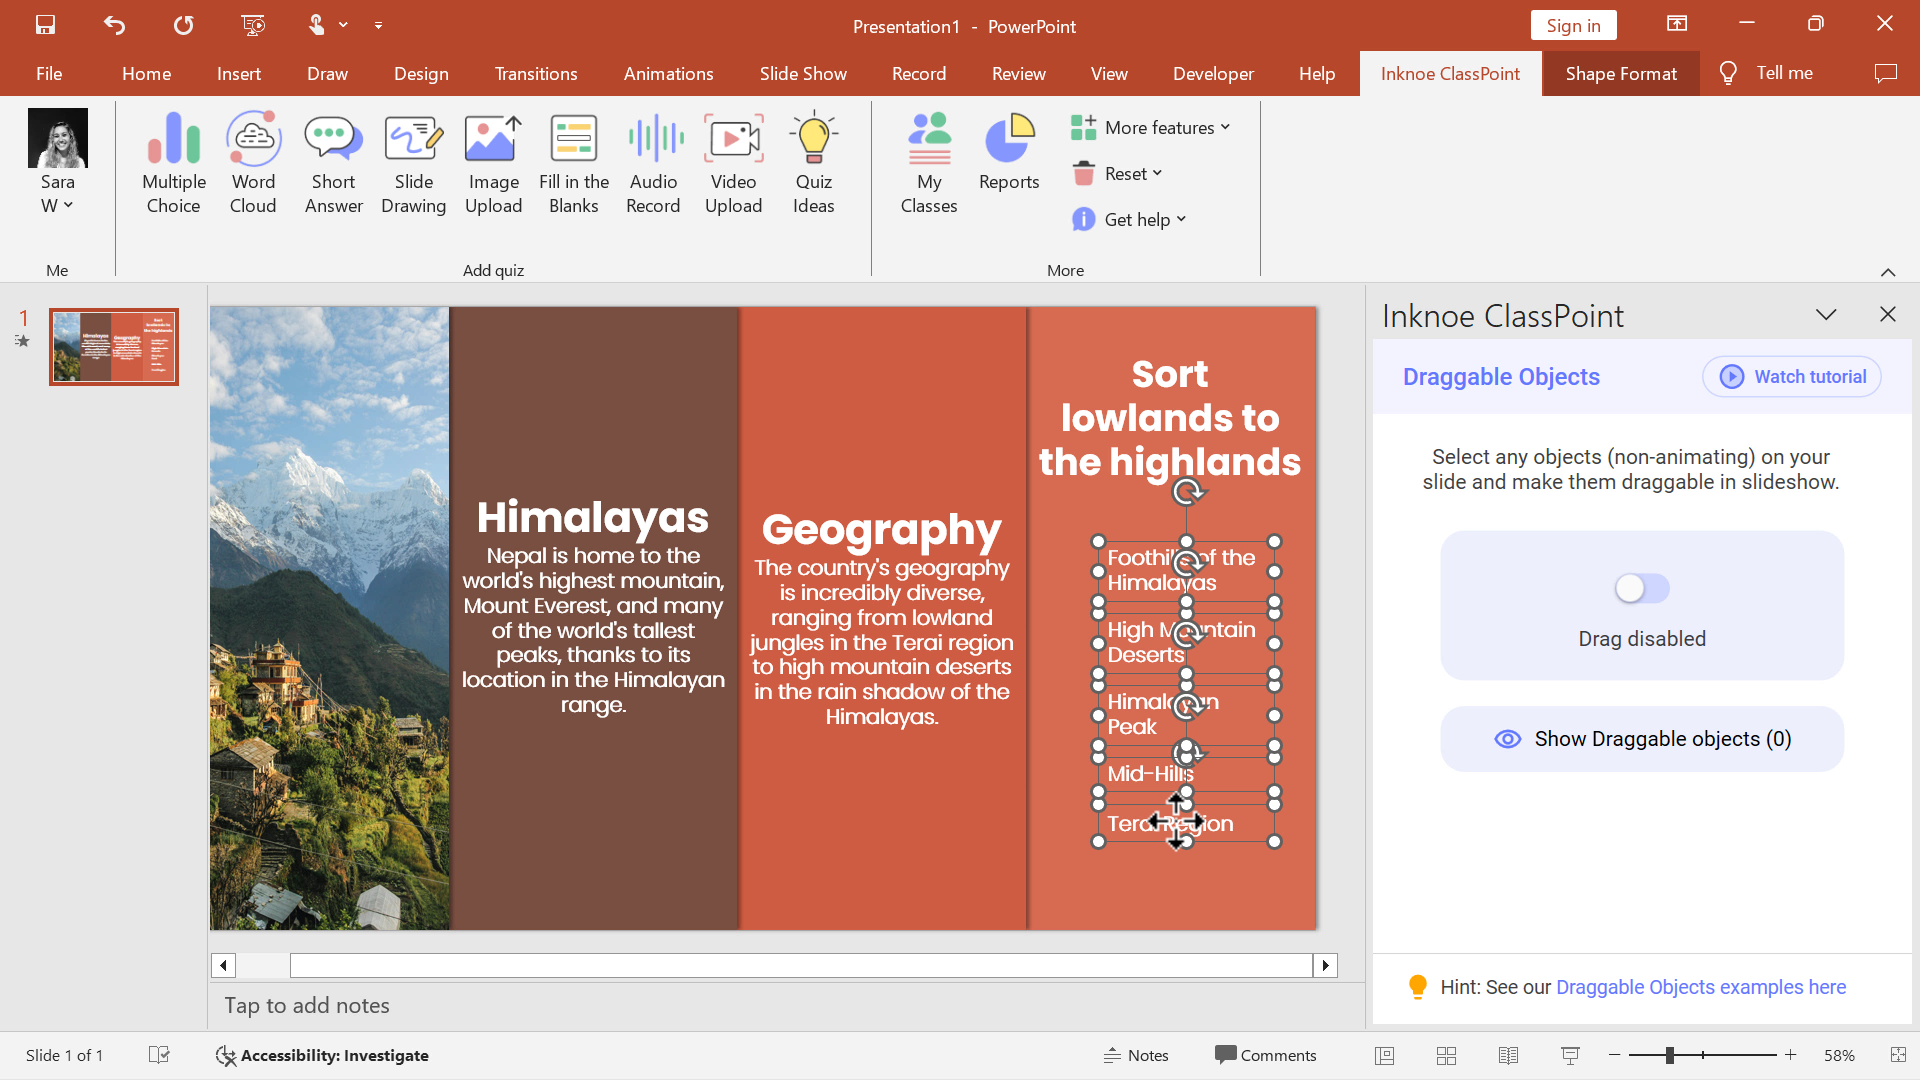
ClassPoint is a free PowerPoint add-in to make any presentation more interactive and engaging. Once downloaded and installed (it’s free), to set up draggable objects on your slide, select the text, shape, or images that you want to be draggable.
data-title="Add ClassPoint to Your PowerPoint" data-description="Join 800,000 others who are transforming their presentations with ClassPoint. Pair creative PowerPoint animations with ClassPoint's interactive tools for a truly dynamic and engaging experience!" data-cta-text="" data-cta-link="">
Click on the More Features → Draggable Objects → then, toggle on.
During your presentation, click on the Draggable Objects icon on the toolbar and begin moving your items around the screen.
data-title="Add ClassPoint to Your PowerPoint" data-description="Join 800,000 others who are transforming their presentations with ClassPoint. Pair creative PowerPoint animations with ClassPoint's interactive tools for a truly dynamic and engaging experience!" data-cta-text="" data-cta-link="">
Creative Animations in PowerPoint Trick #2: Rise Up Animation
The Rise Up animation adds a dynamic feel, perfect for showcasing a sequence of events or emphasizing key points.
Step 1: Insert Shape
Insert four rectangles on your slide.
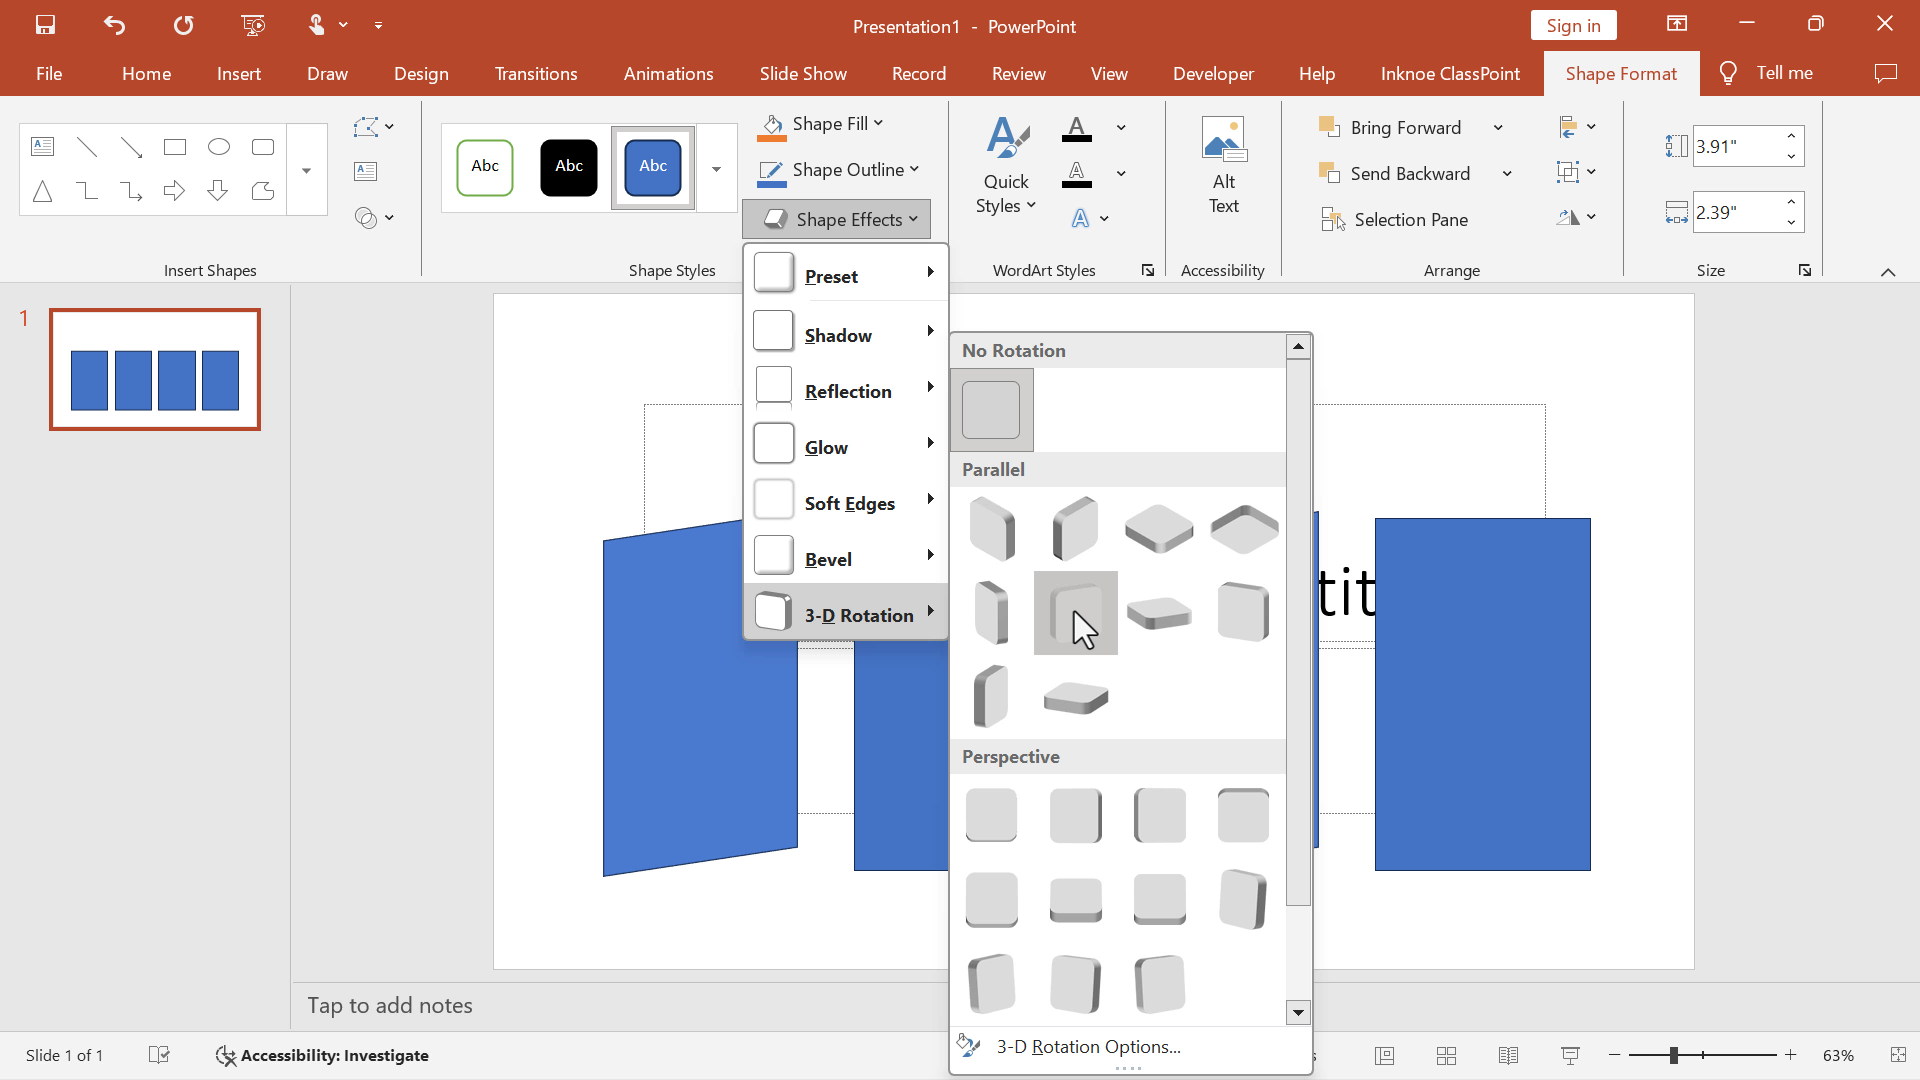
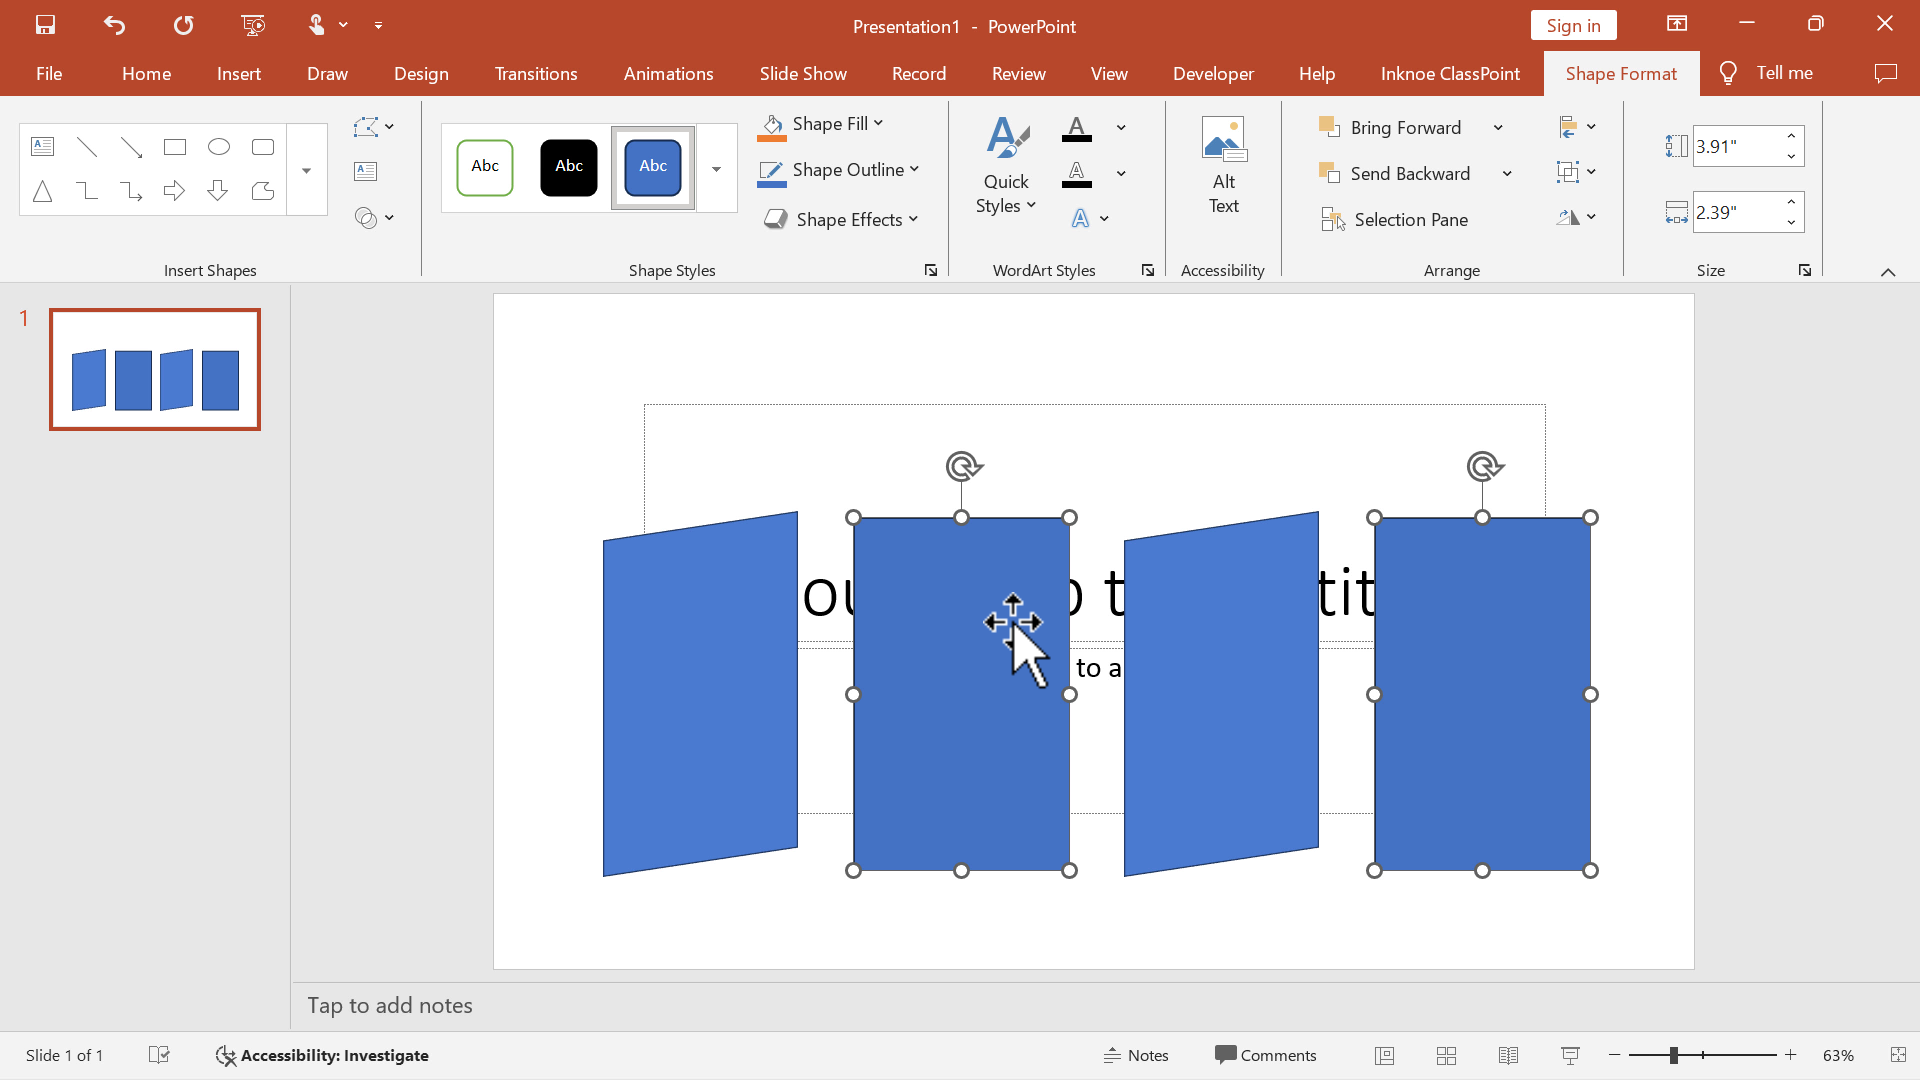
Step 2: Format Shape
Select both the 1st and 3rd rectangle on your slide (SHIFT + Click).
In the Shape Effects, Off Axis 1 Right.
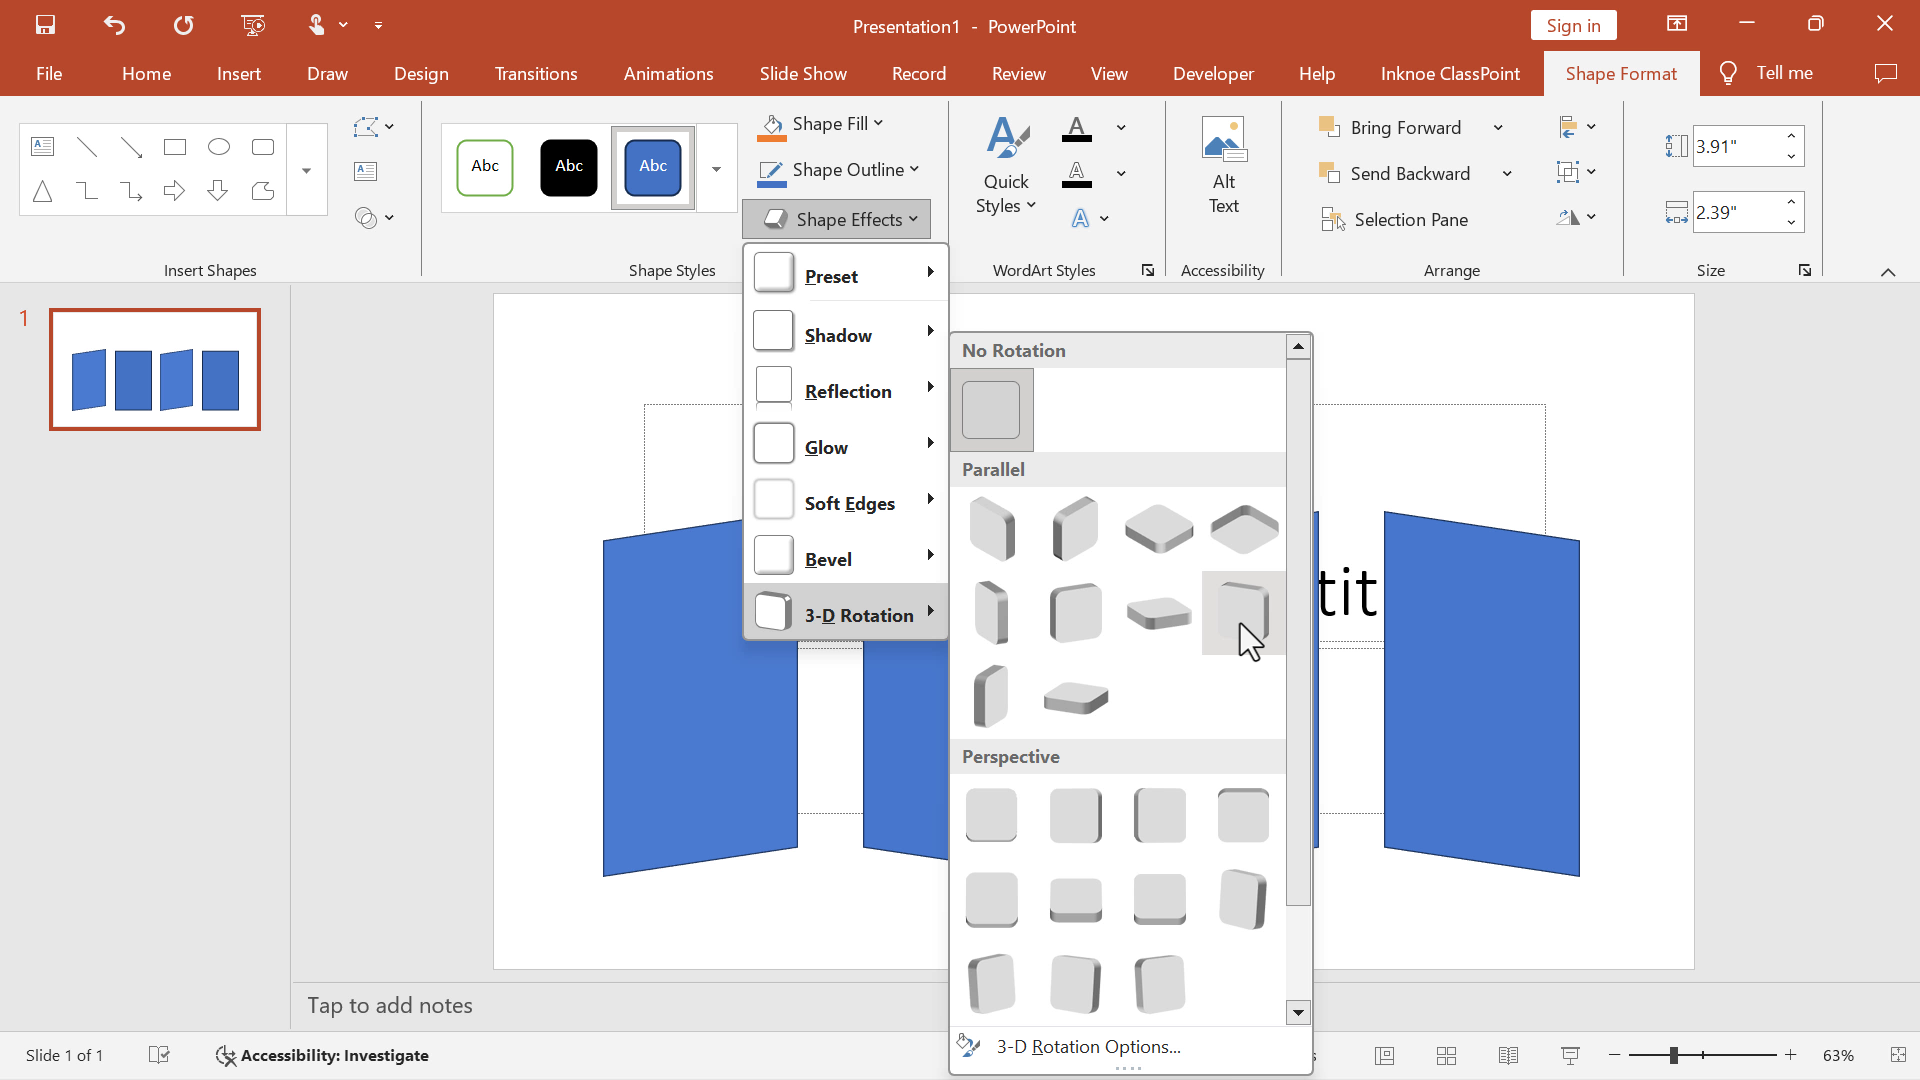
Select both the 2nd and 4th rectangle on your slide (SHIFT + Click).
In the Shape Effects, Off Axis 2 Left.
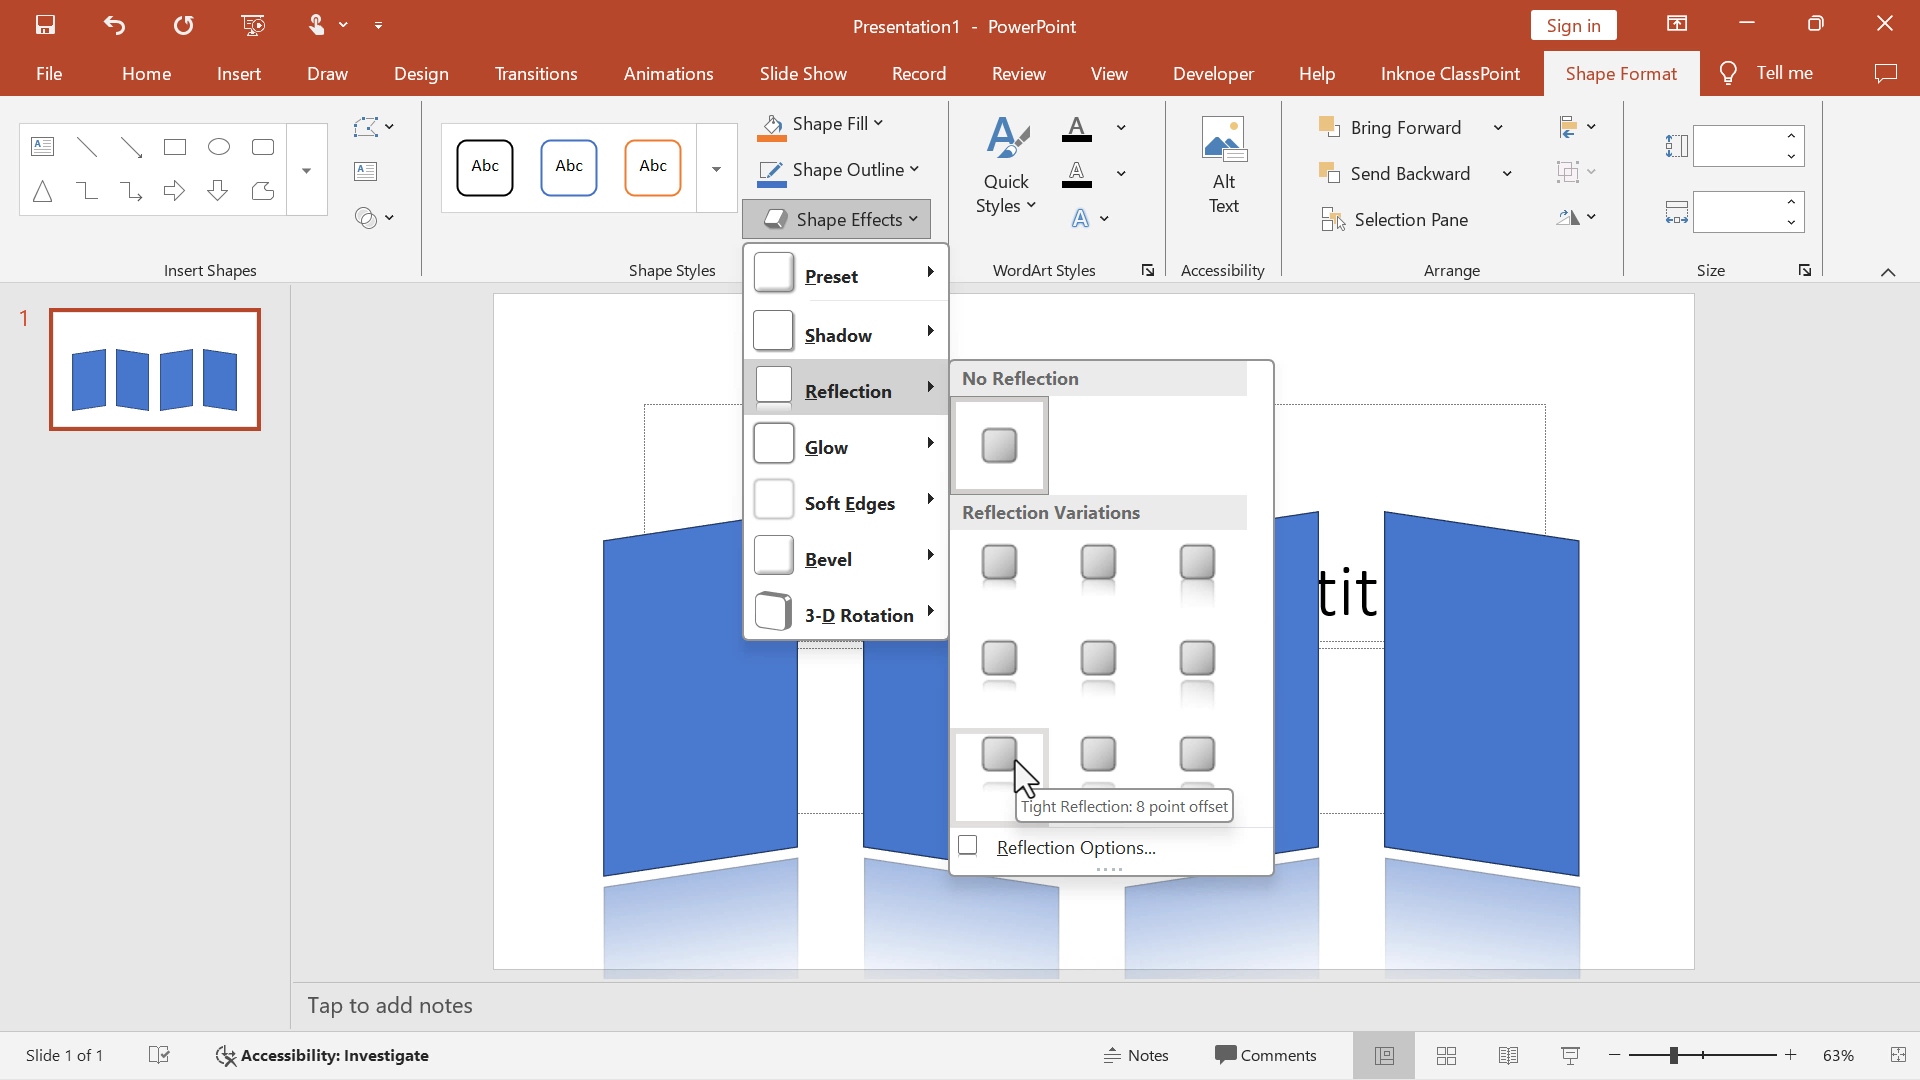
Then, Select all the shapes, and in Reflection, select Off Bottom.
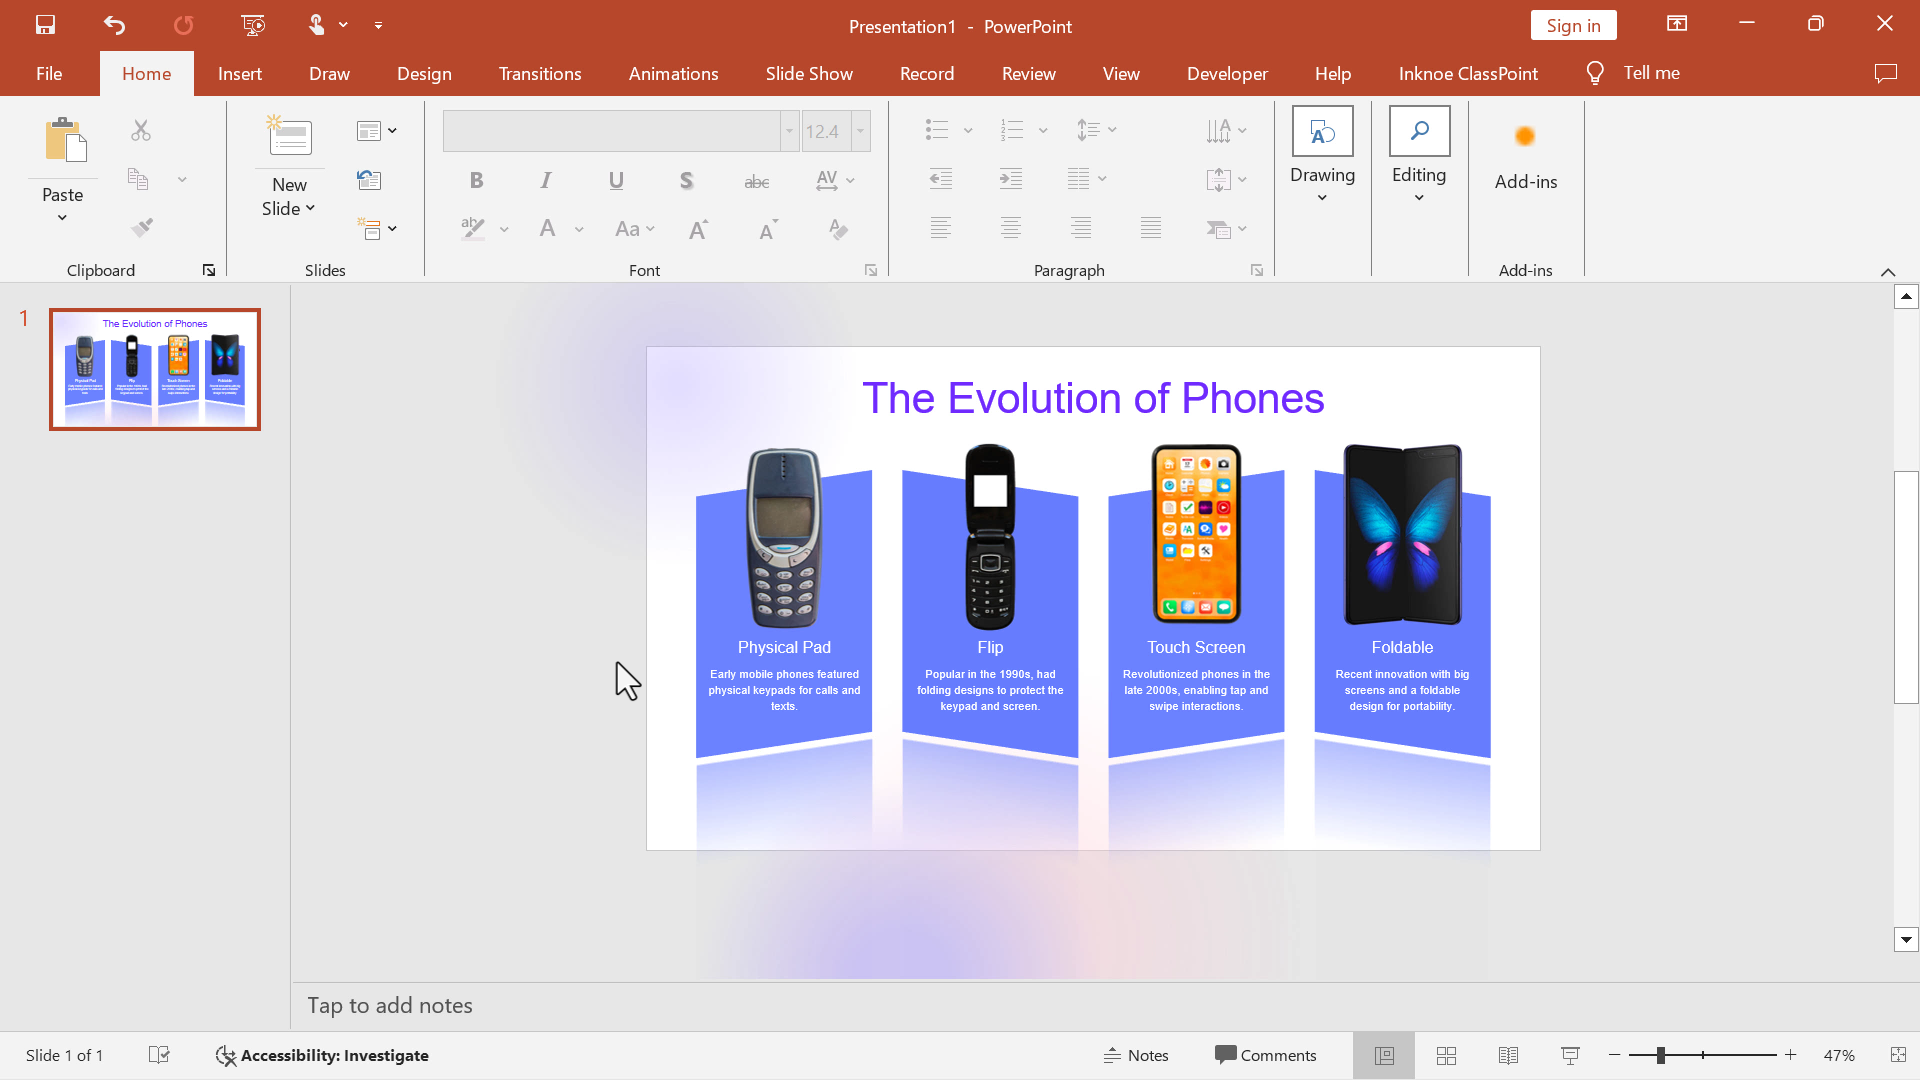
Step 3: Add Content
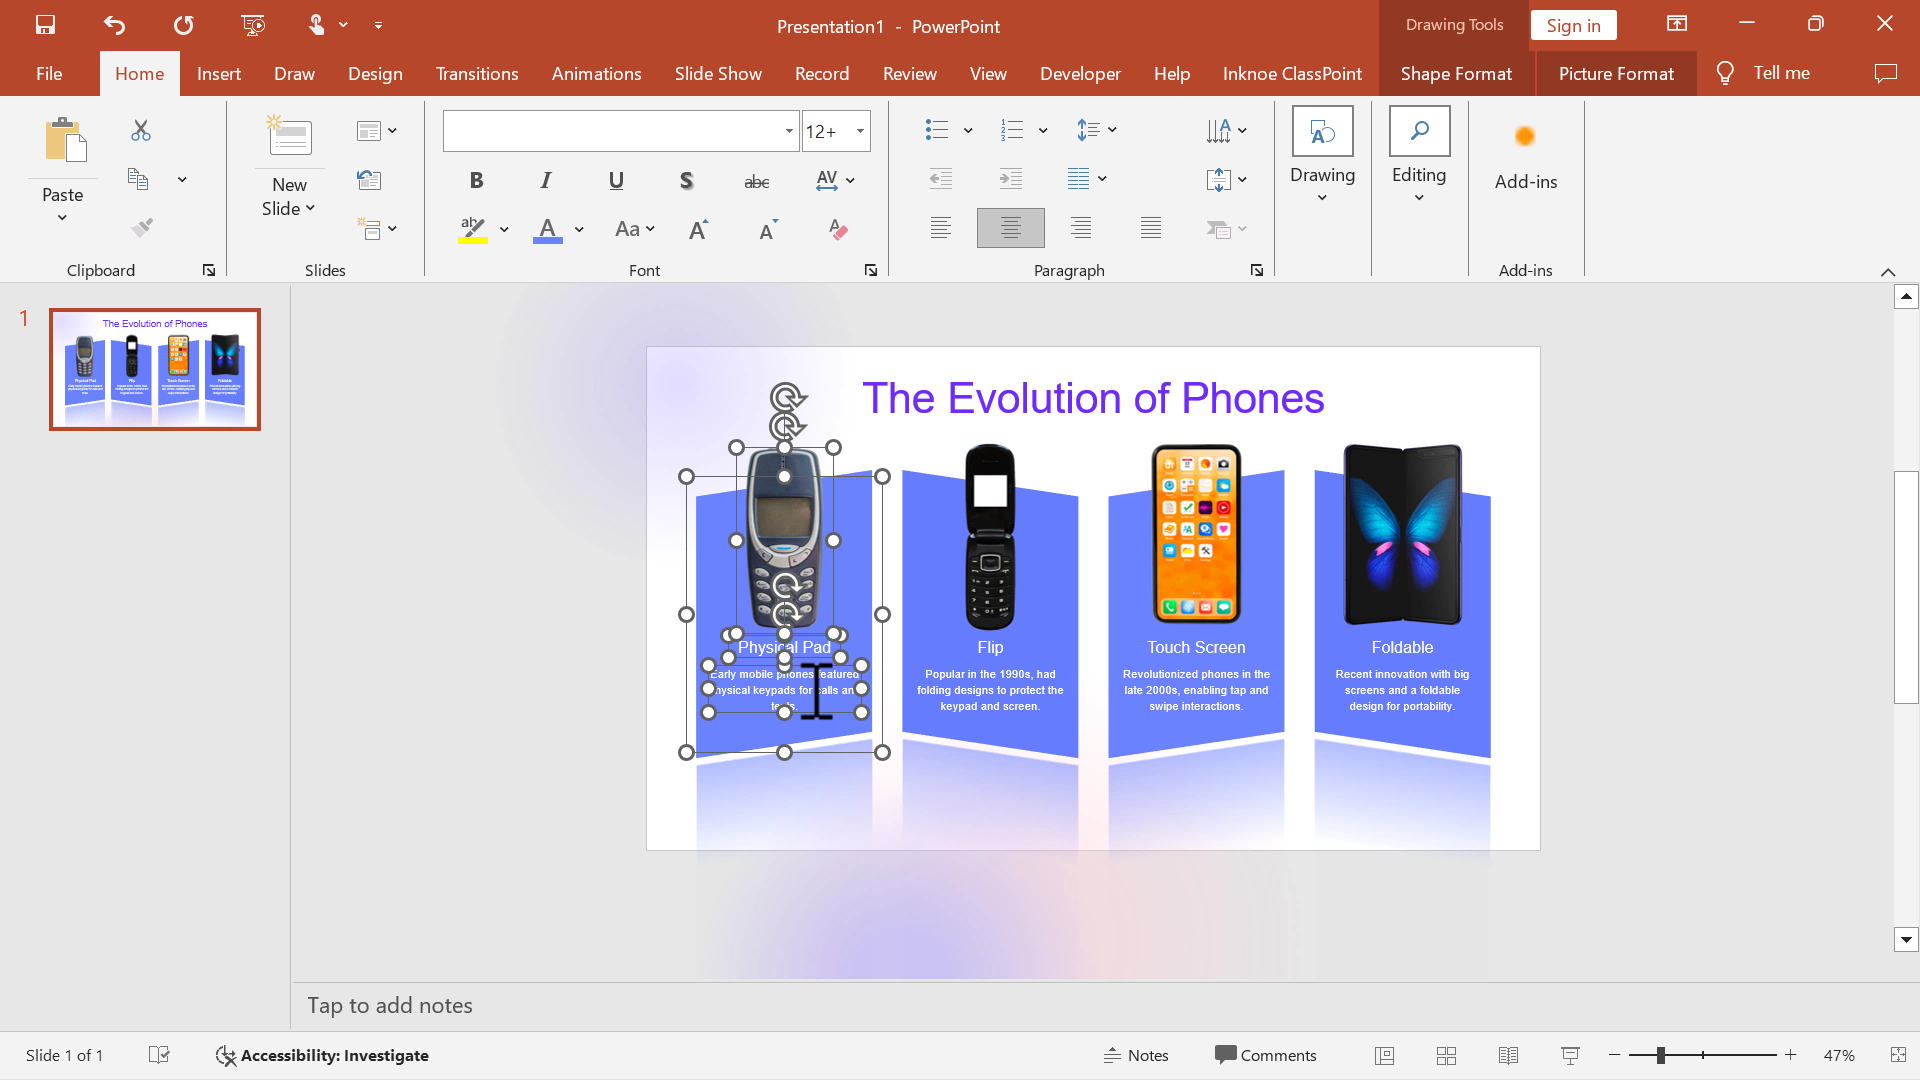
Add any images or text to each rectangle.
Once all the content is added, Group each content to its respective shape (CTRL + G).
Step 4: Add Animations
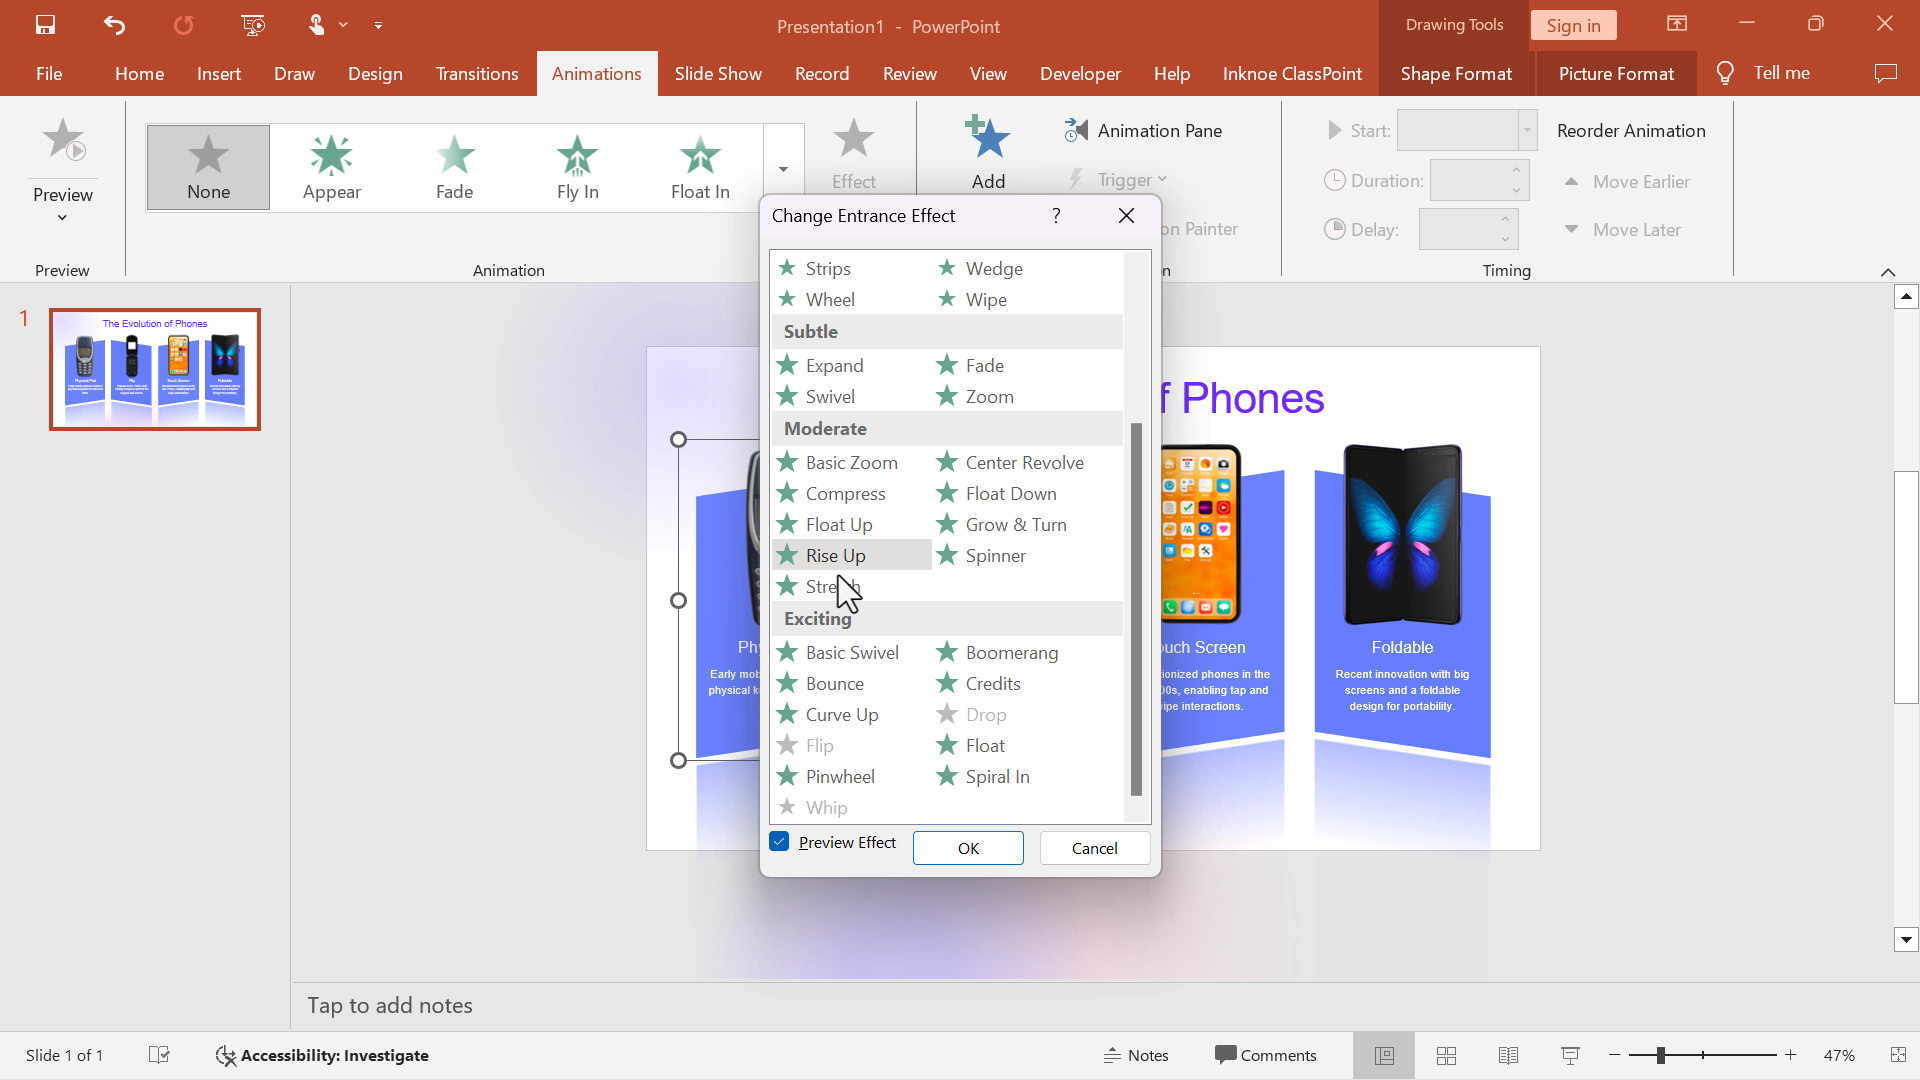
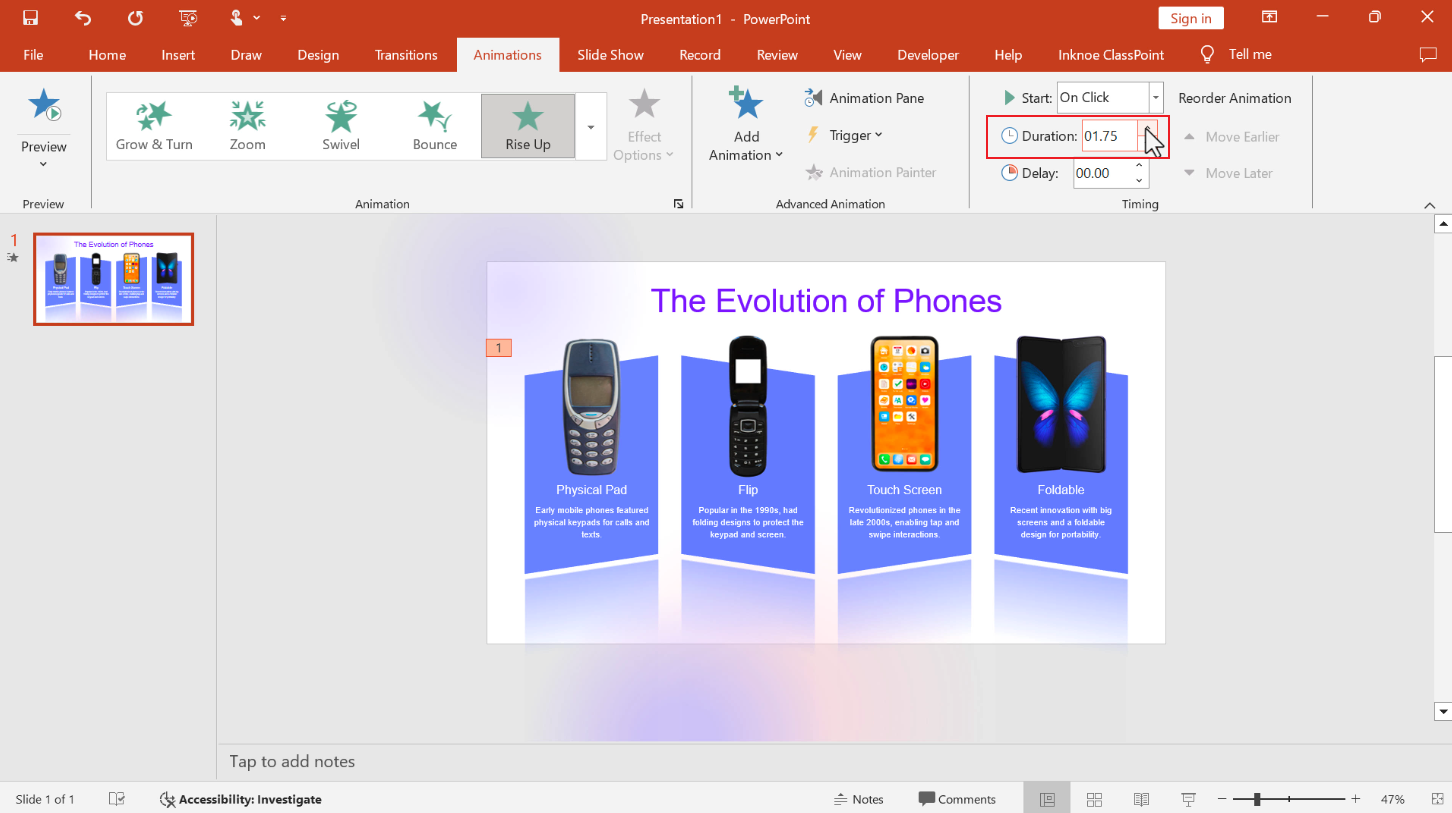
Now, to animate each Group, select the group, click the Animations tab in the PowerPoint ribbon, and Select Rise Up.
Don’t see Rise Up? Click the More Animations button, then find Rise Up in the Entrance Animations section.
Then, set the duration to 1.75.
Step 5: Repeat
Repeat Step 4 for each Group so that they all have their own animation set up.
💡 Bonus Interactive Tip:
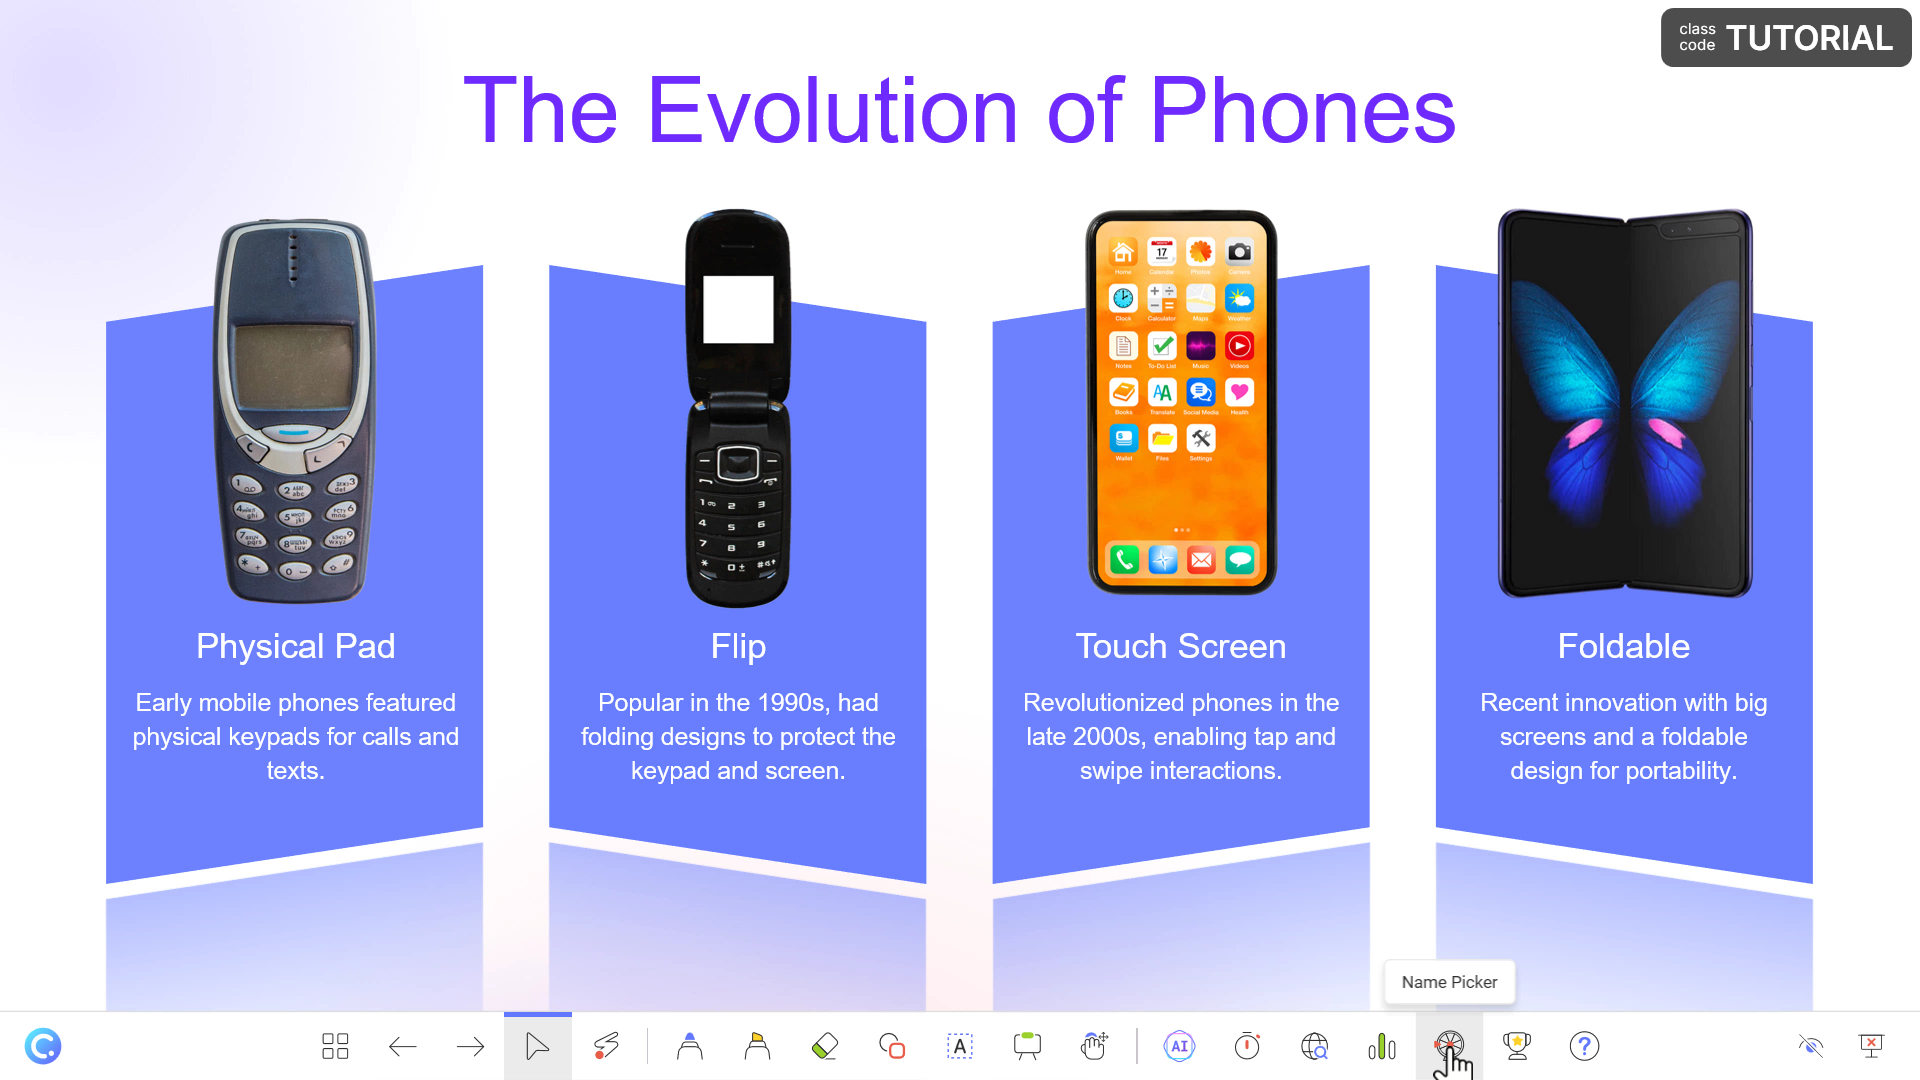
You can also get your students to ‘rise up’! Randomly spin a wheel of names to pick a student to answer a question or participate in an activity. With ClassPoint’s Name Picker, you can spin a wheel of names right inside PowerPoint.
data-title="Add ClassPoint to Your PowerPoint" data-description="Join 800,000 others who are transforming their presentations with ClassPoint. Pair creative PowerPoint animations with ClassPoint's interactive tools for a truly dynamic and engaging experience!" data-cta-text="" data-cta-link="">
Creative Animations in PowerPoint Trick #3: Zoom Animation
Use the Zoom animation to create emphasis on key text or images, making complex ideas stand out.
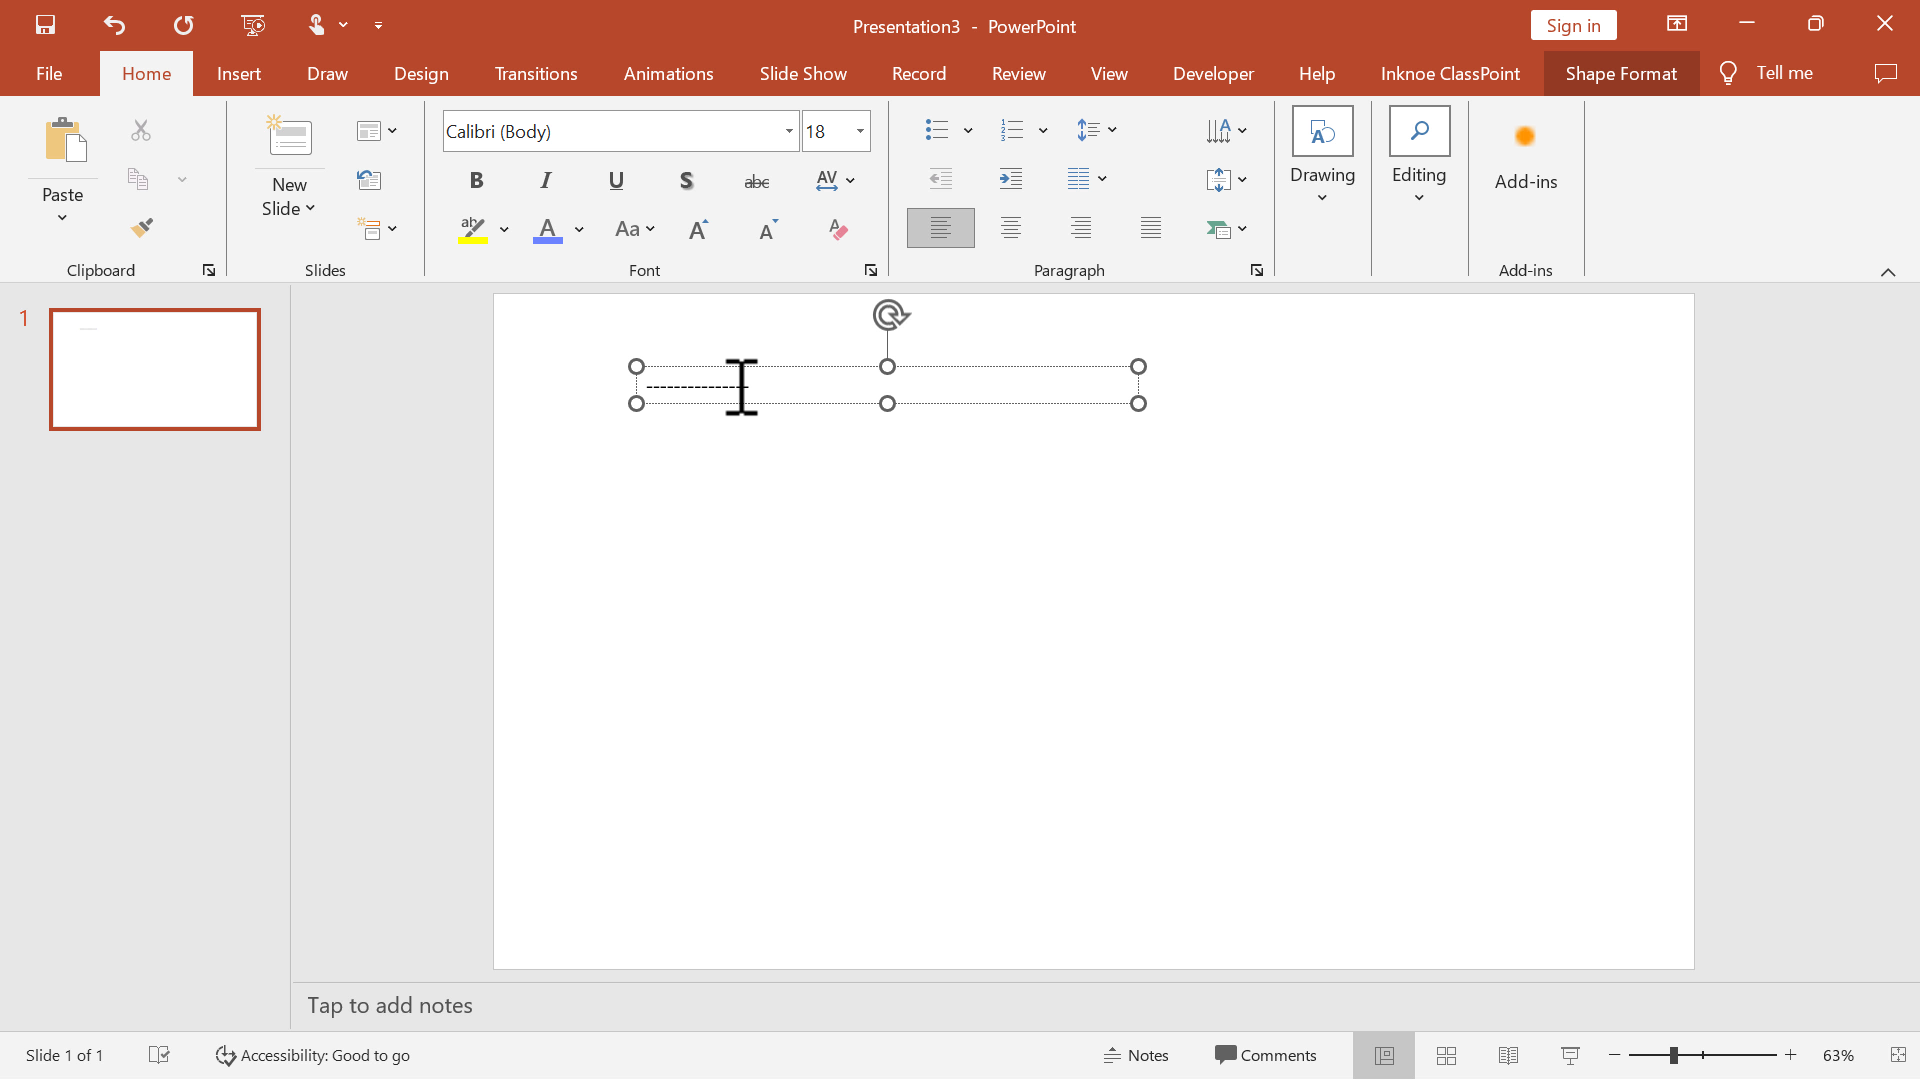
Step 1: Add Text Box
Insert a Text Box and type 15 ‘-’ on the slide.
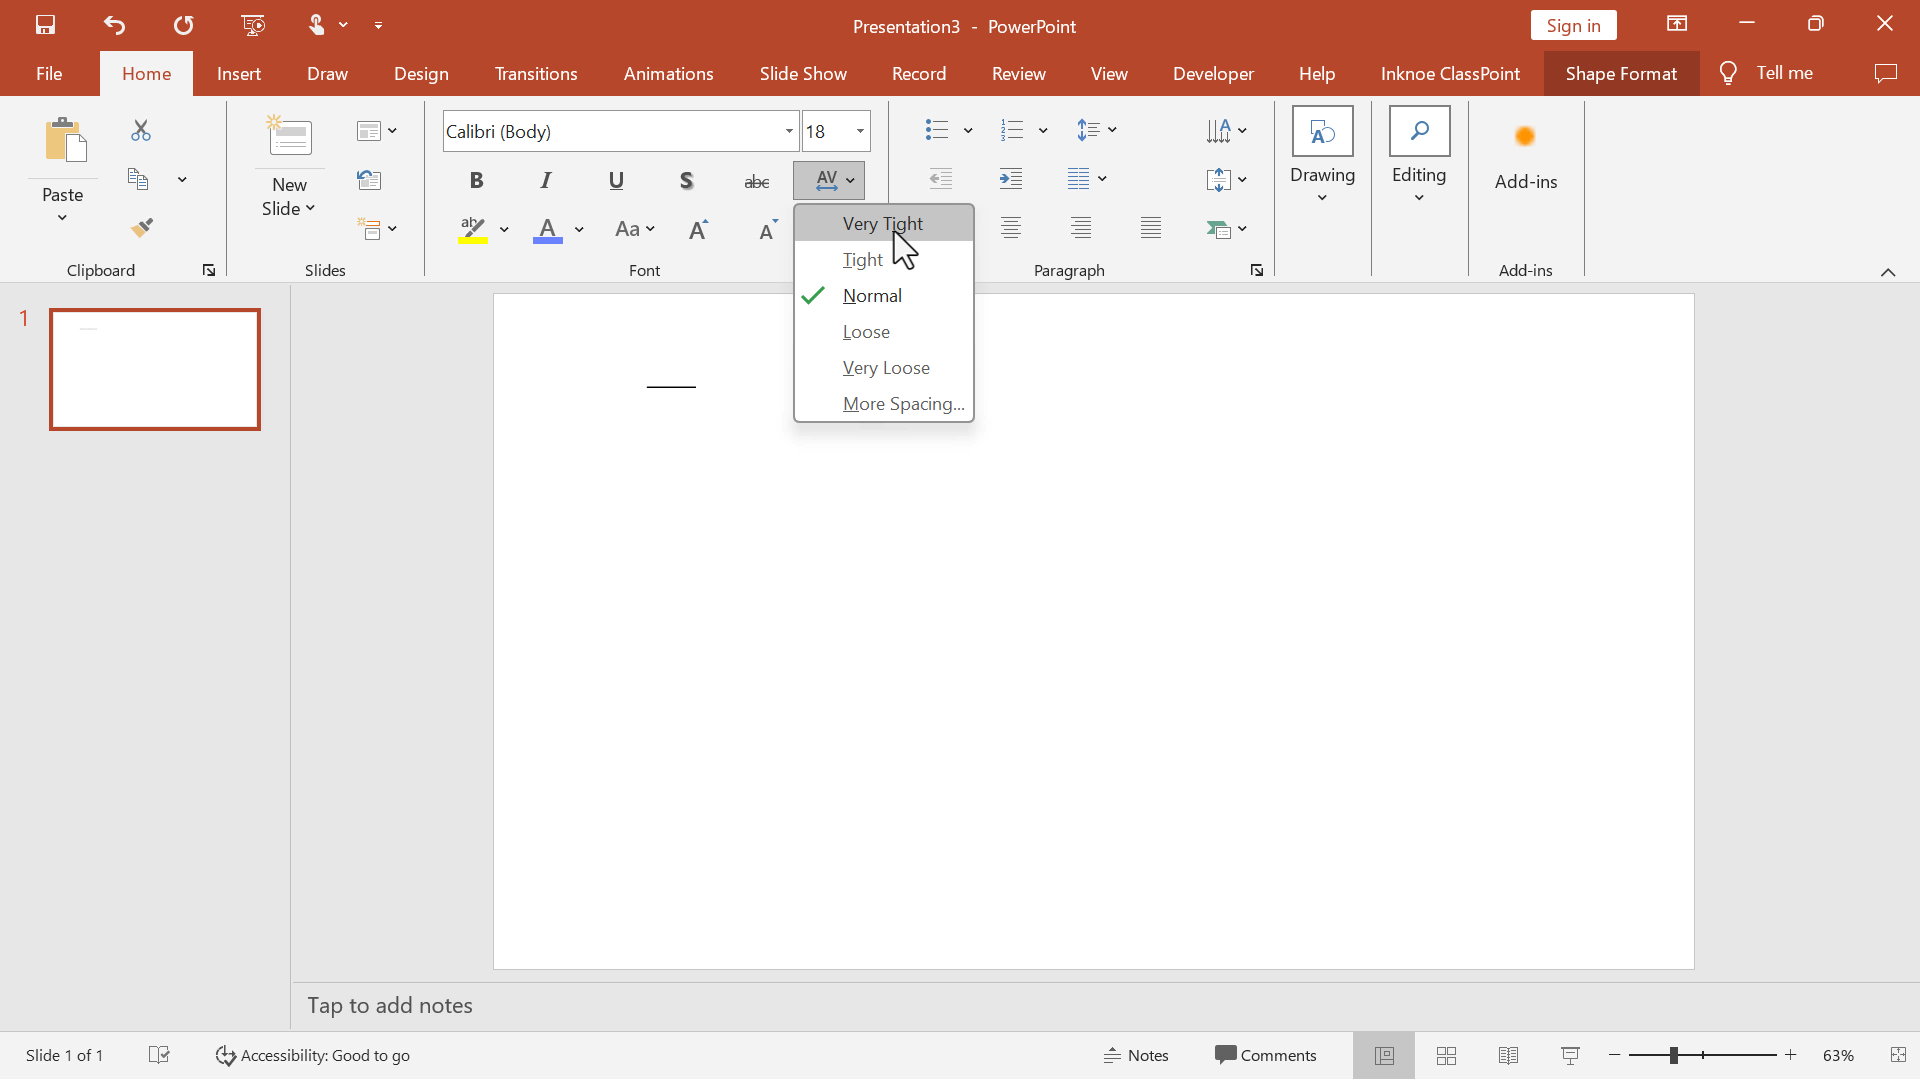
Step 2: Format Text
In the Character Spacing format box, select Very Tight.
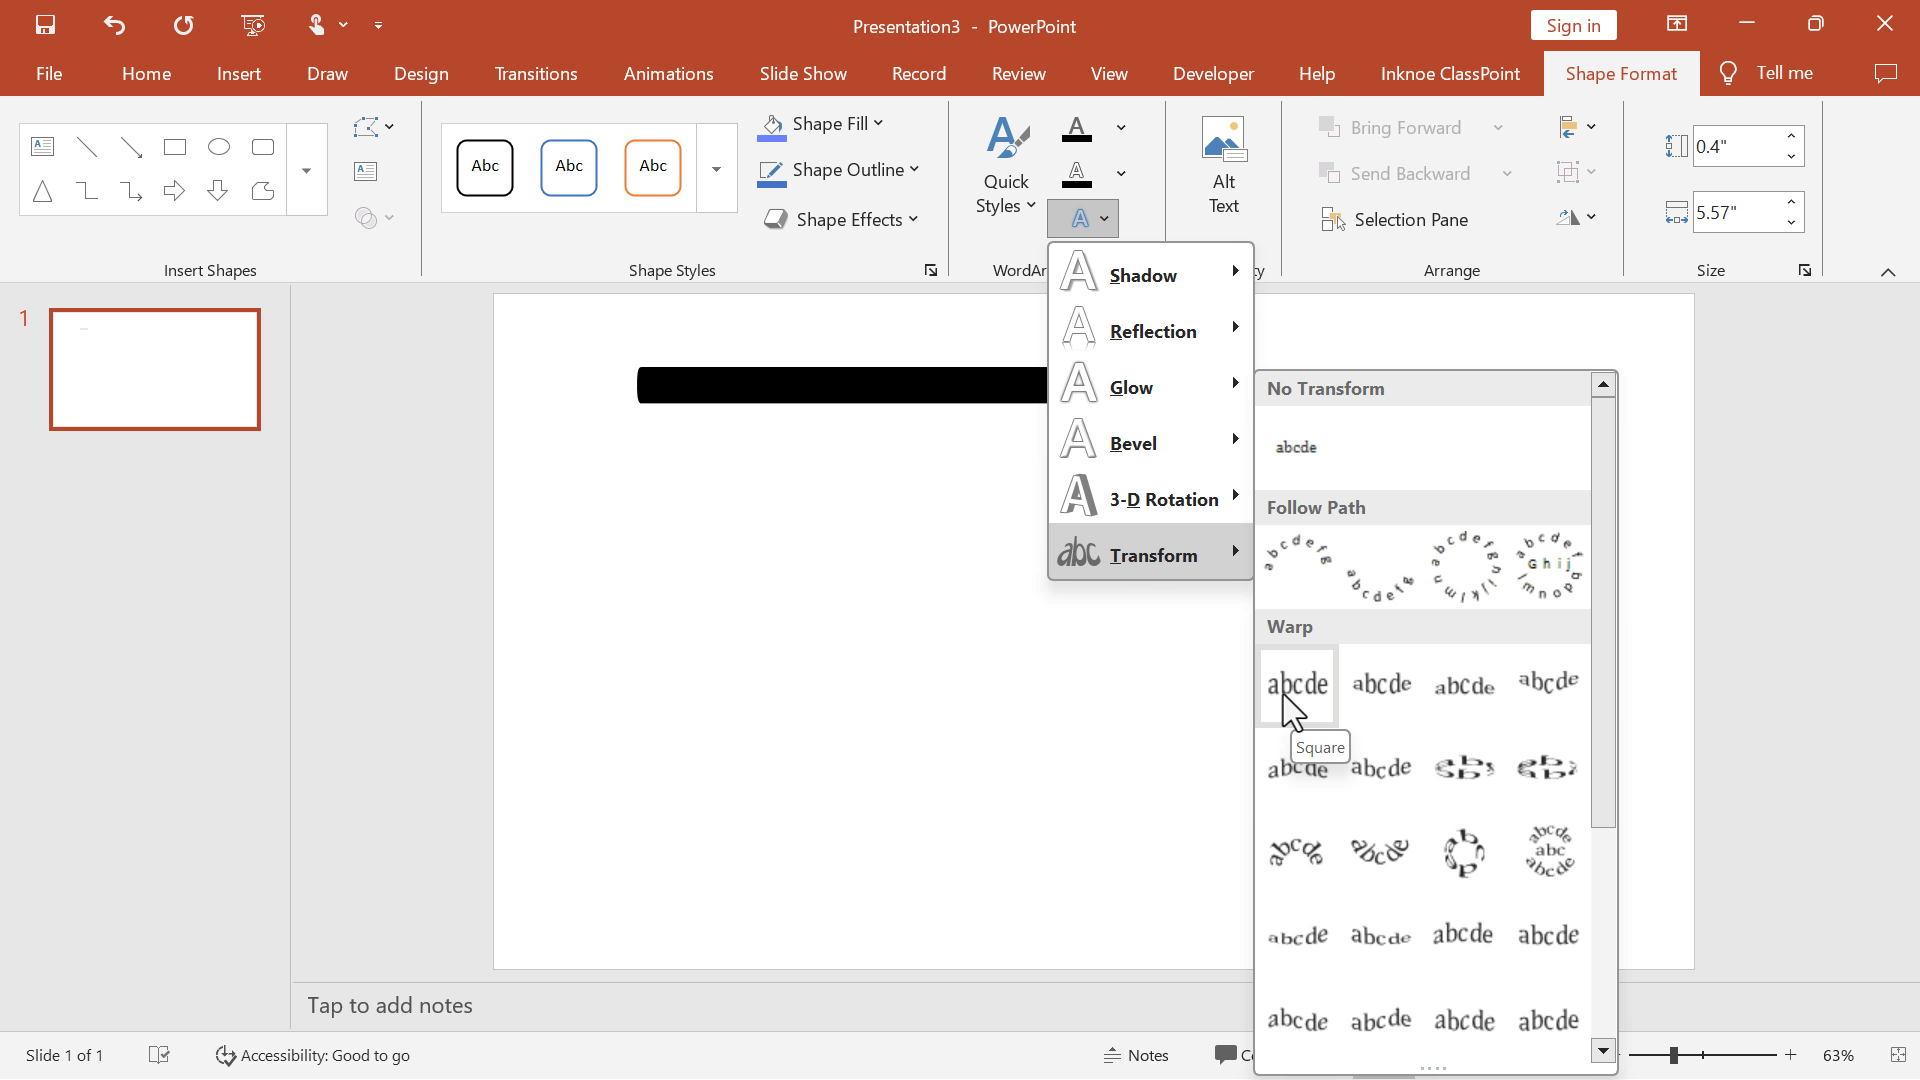
Next, let’s adjust the Text Effects. In the Shape Format, select Transform and set it to Square.
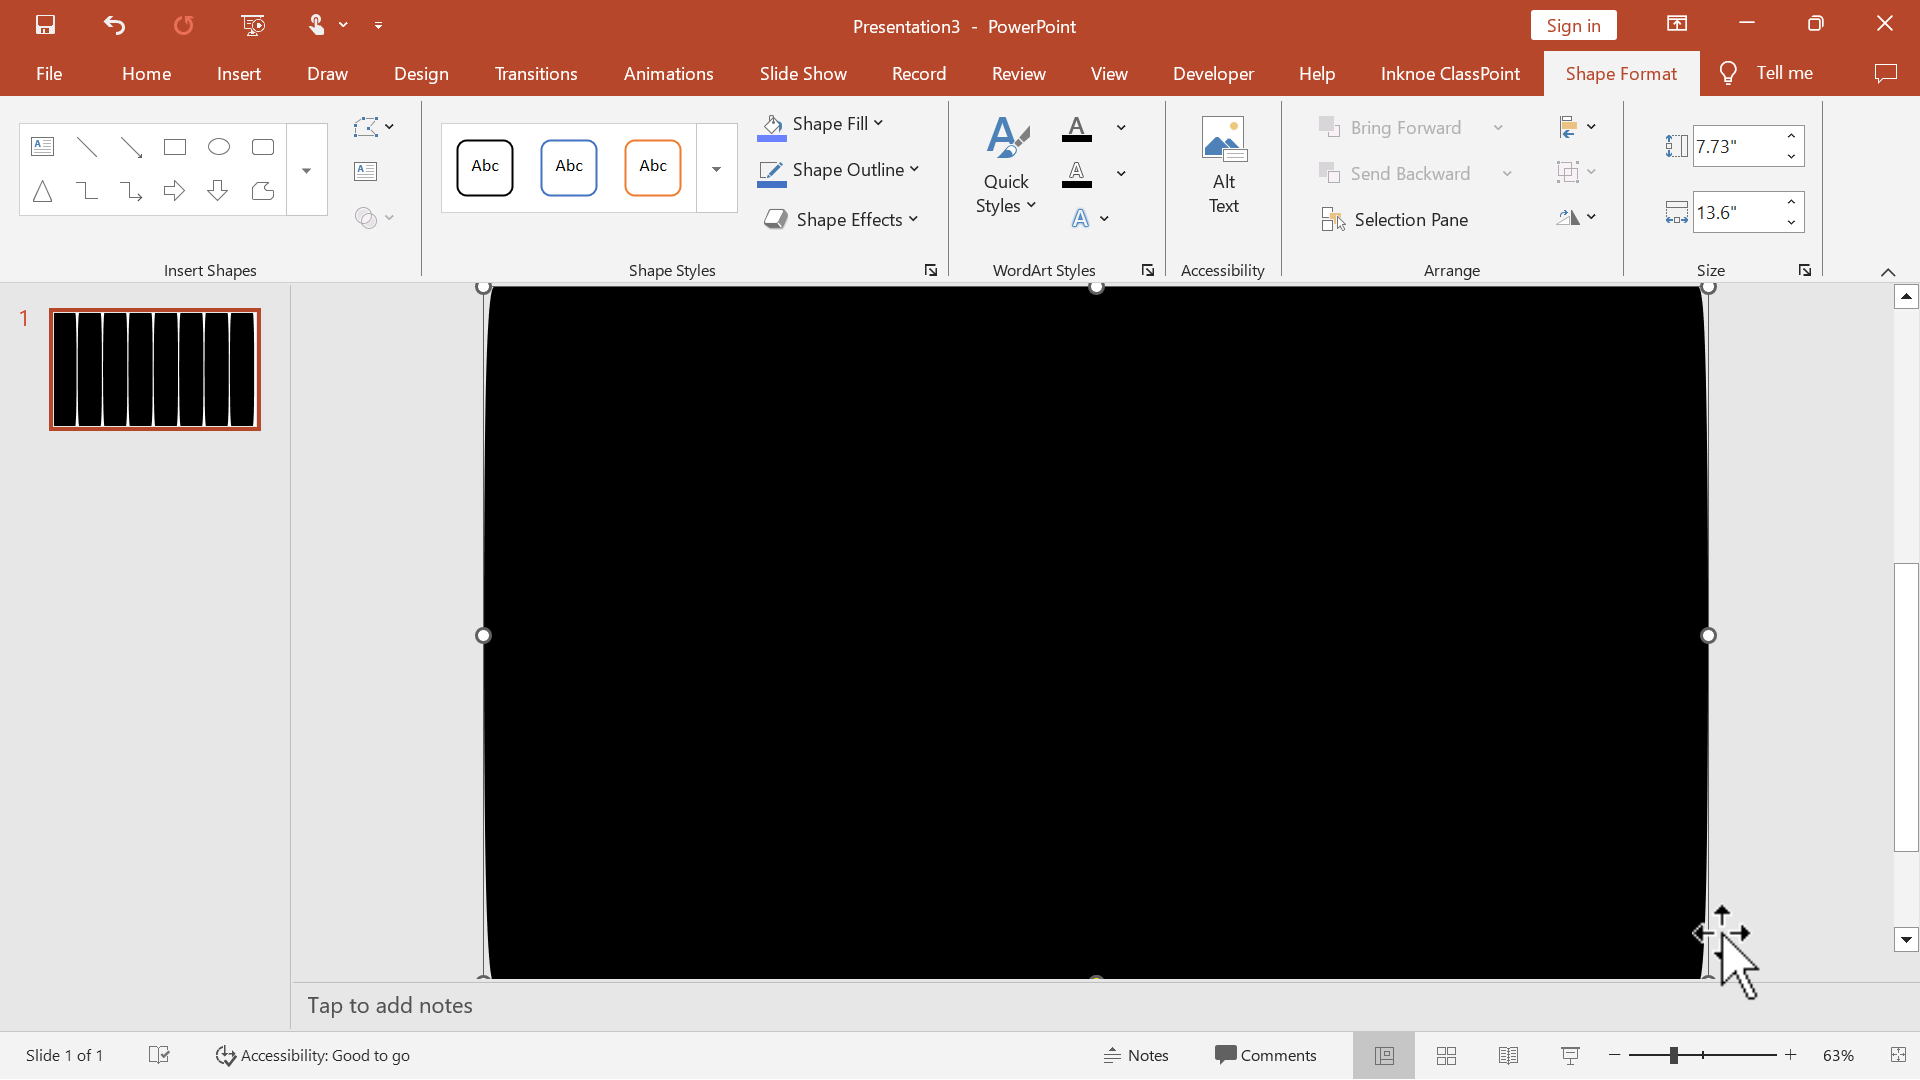
Lastly, fill the whole slide with the text box.
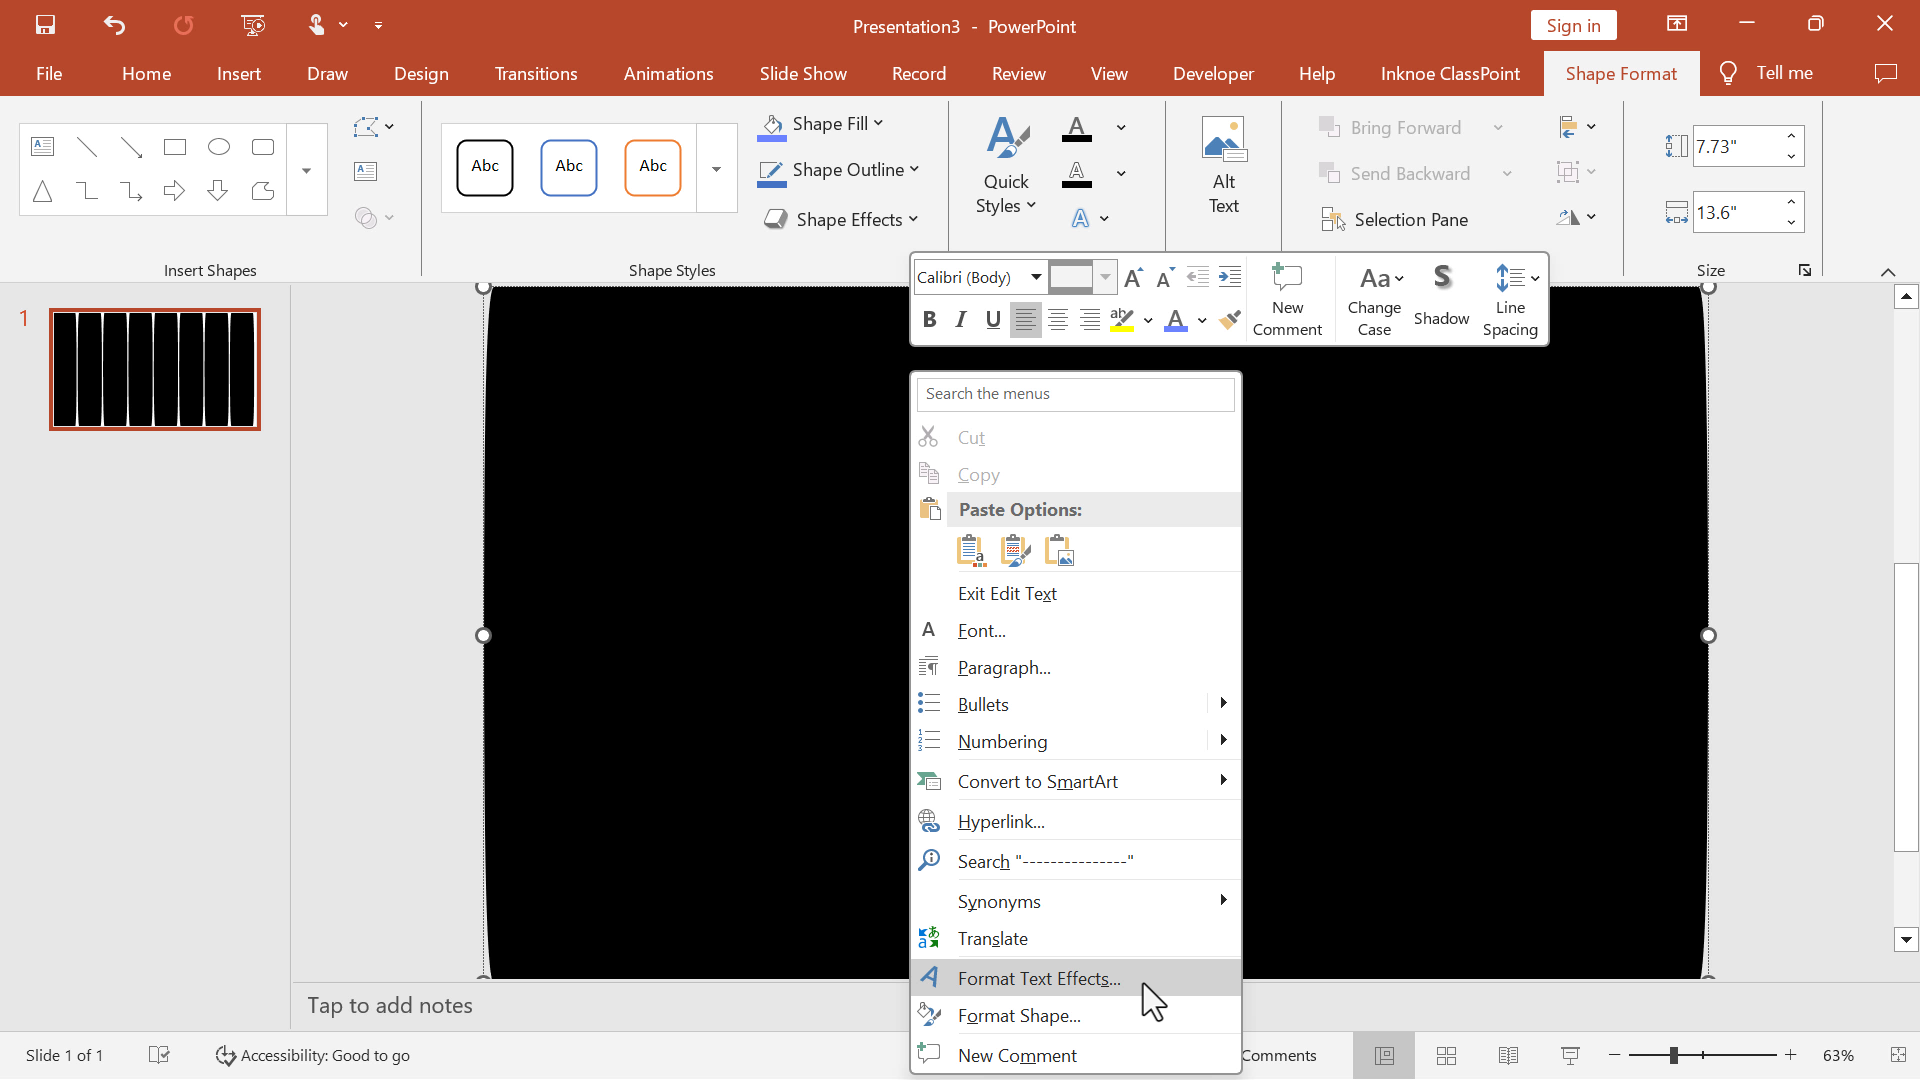
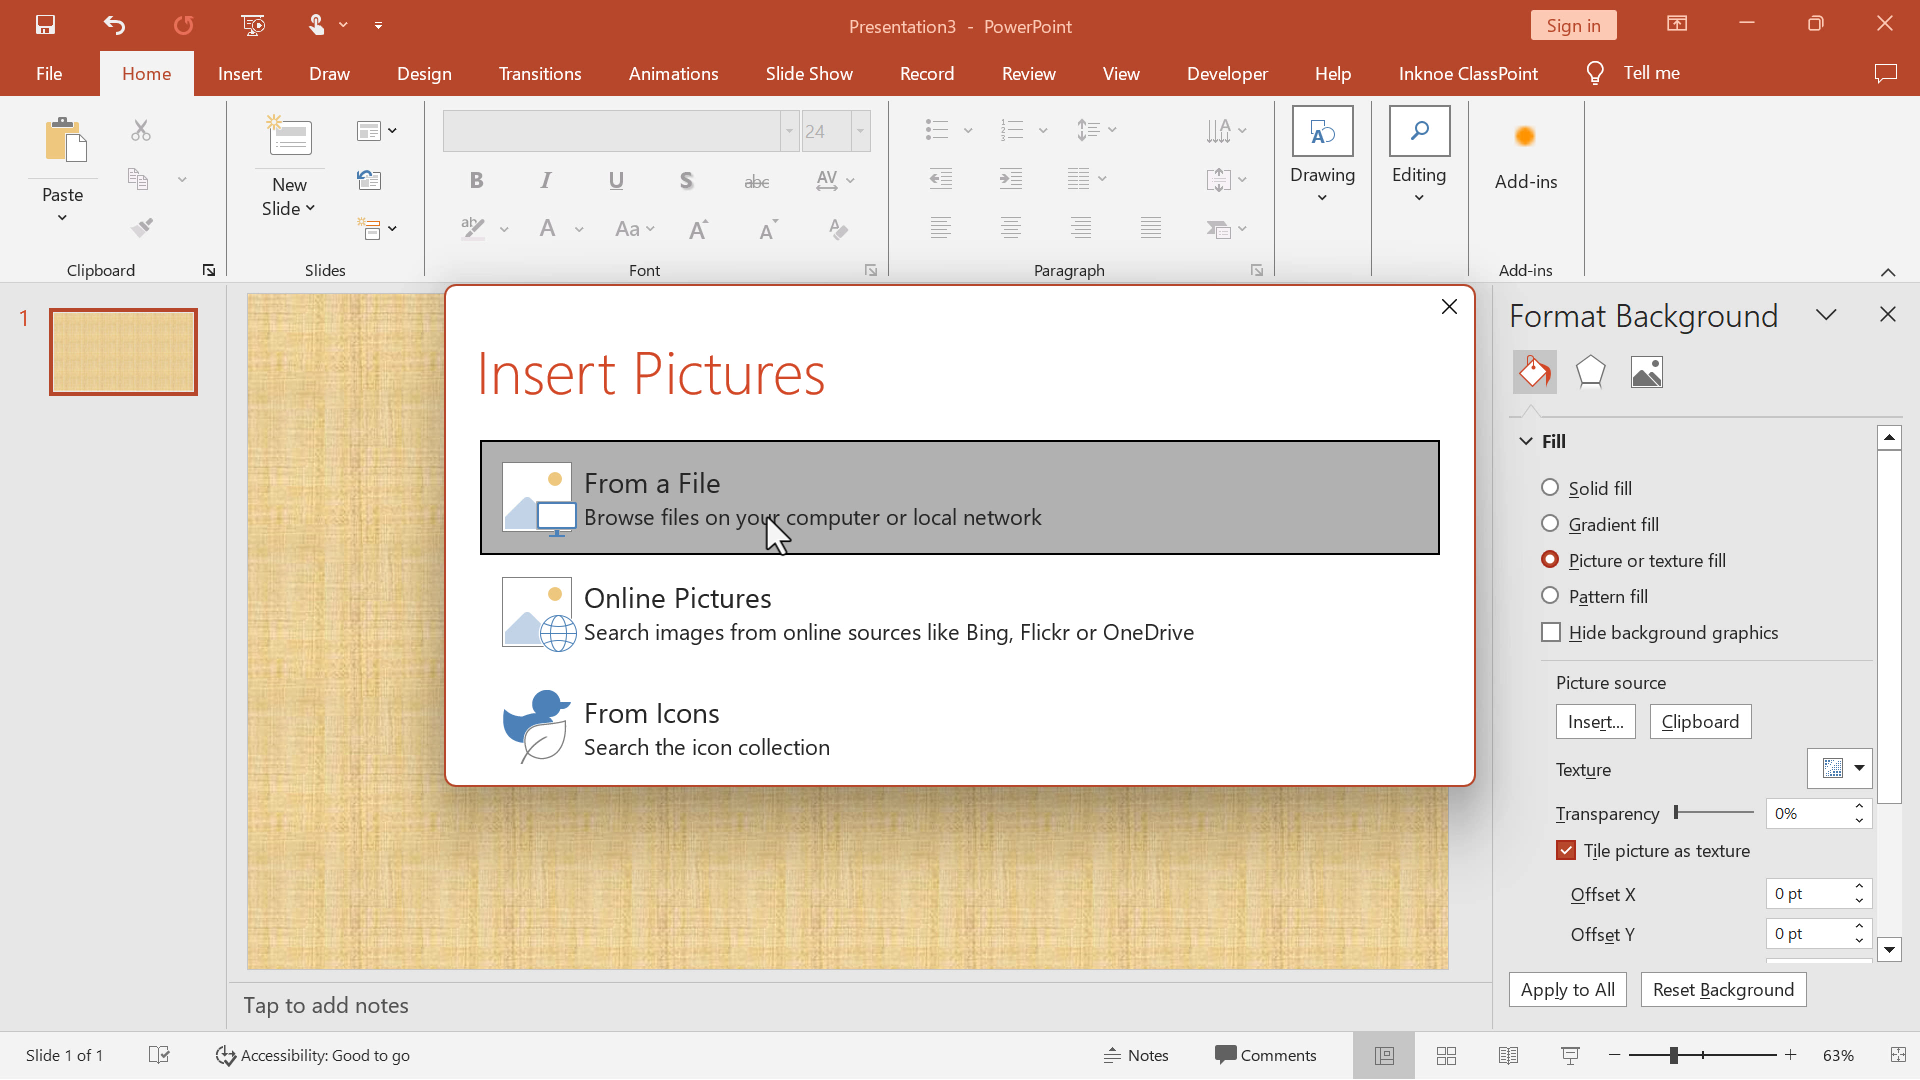
Then, right-click on the text box, and select Format Text.
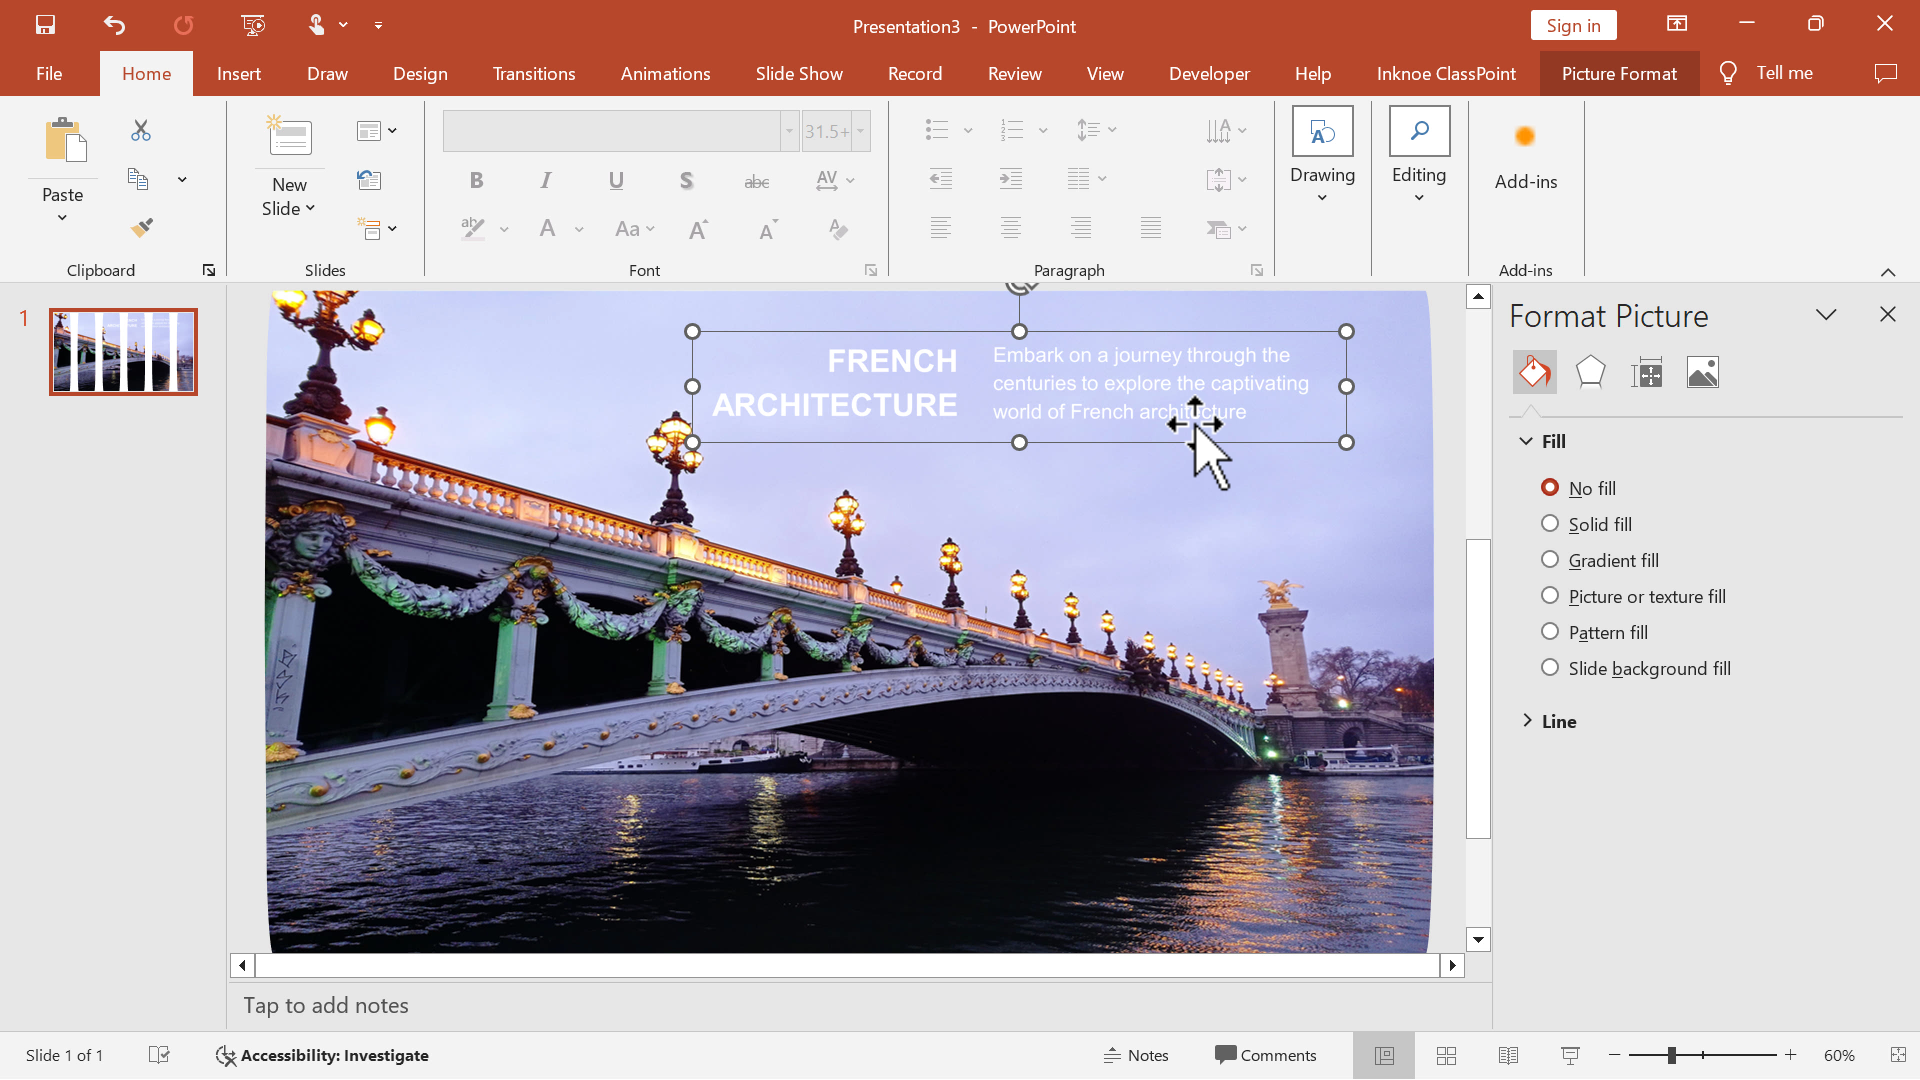
Insert a picture as the background fill.
Step 3: Add Content
Add text boxes to fill your slides with your content.
Step 4: Add Animations
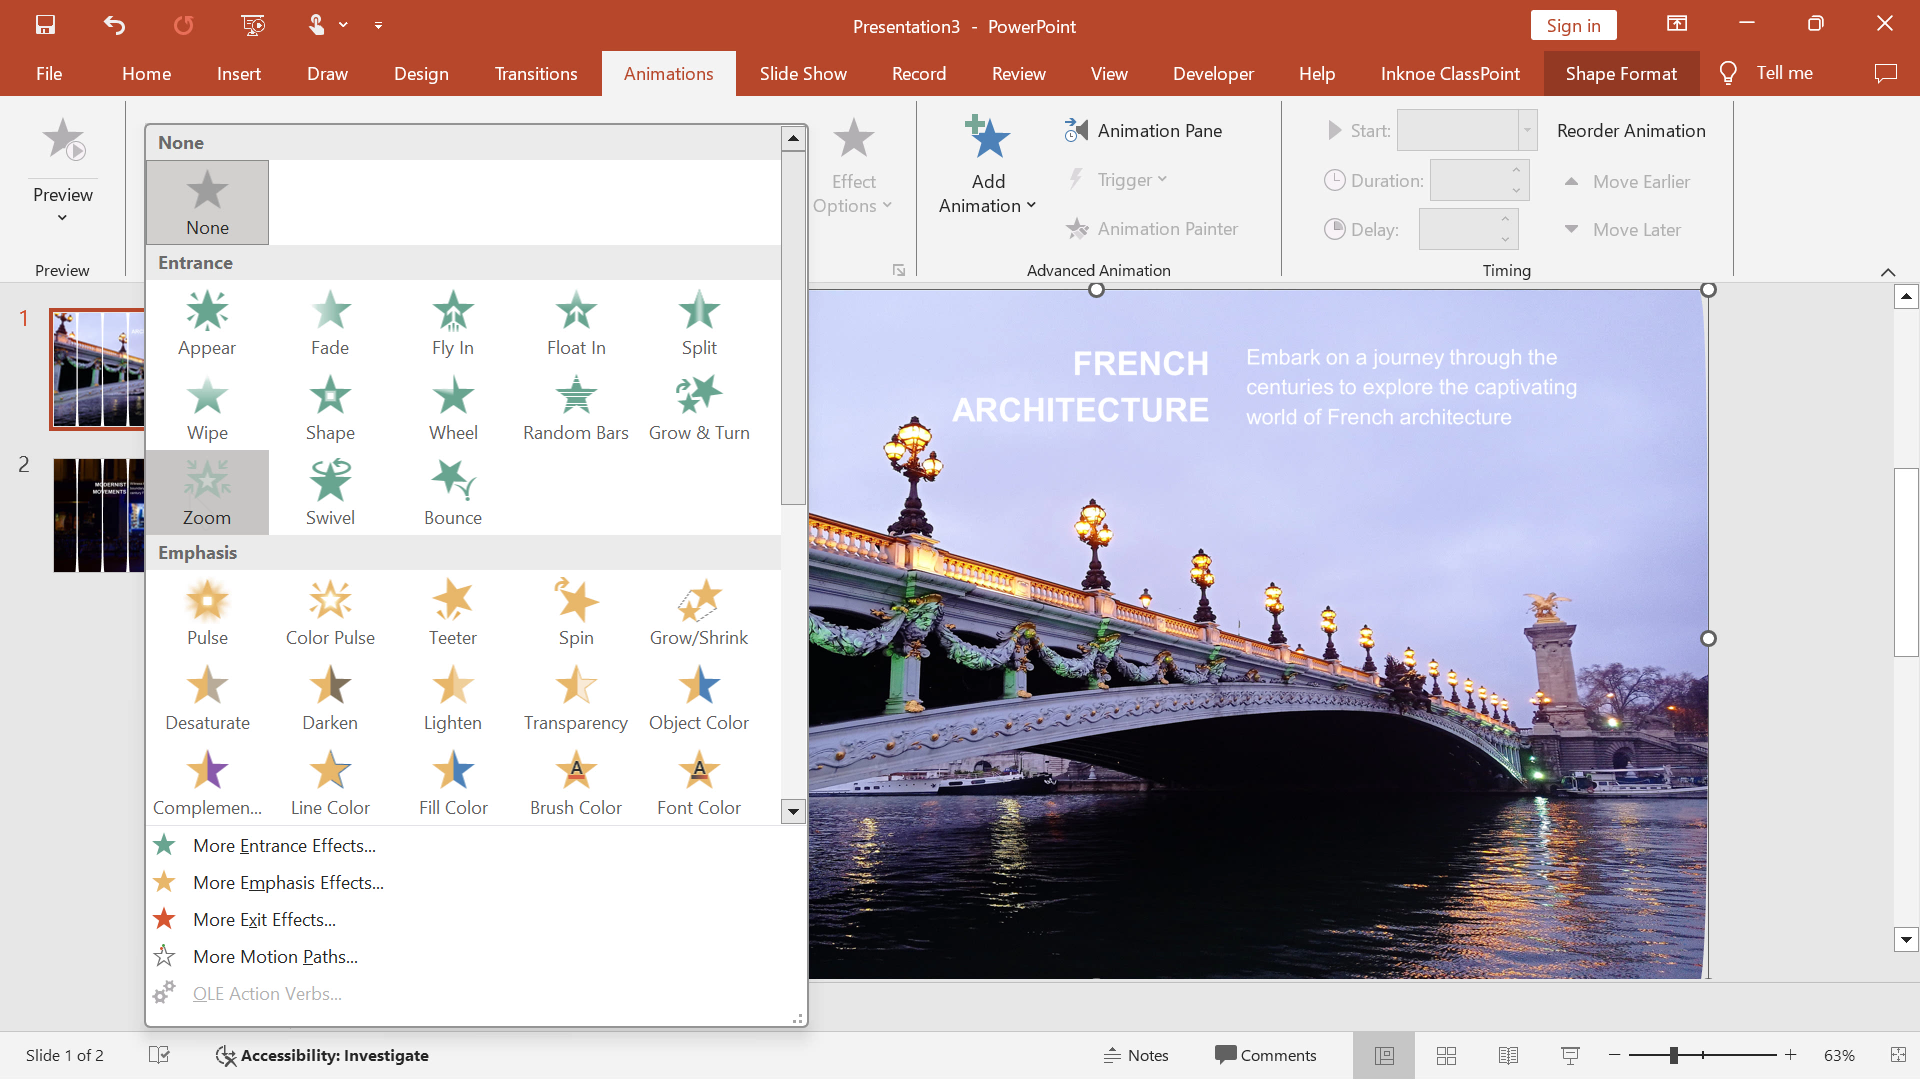
First, select the text box. Then, go to the Animations tab and select Zoom.
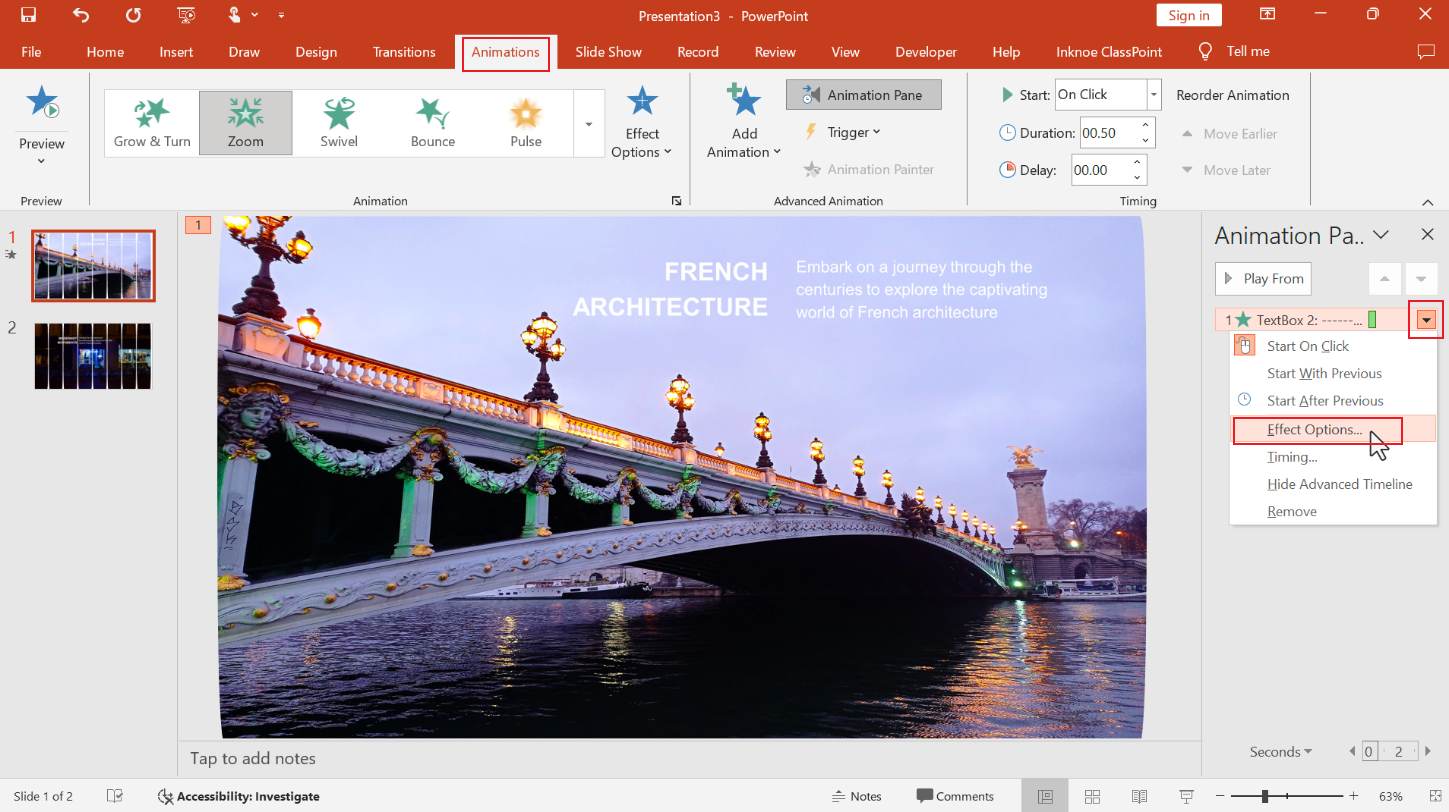
Enhance this further by going into the Animation Pane, and clicking on More Effects for the animation.
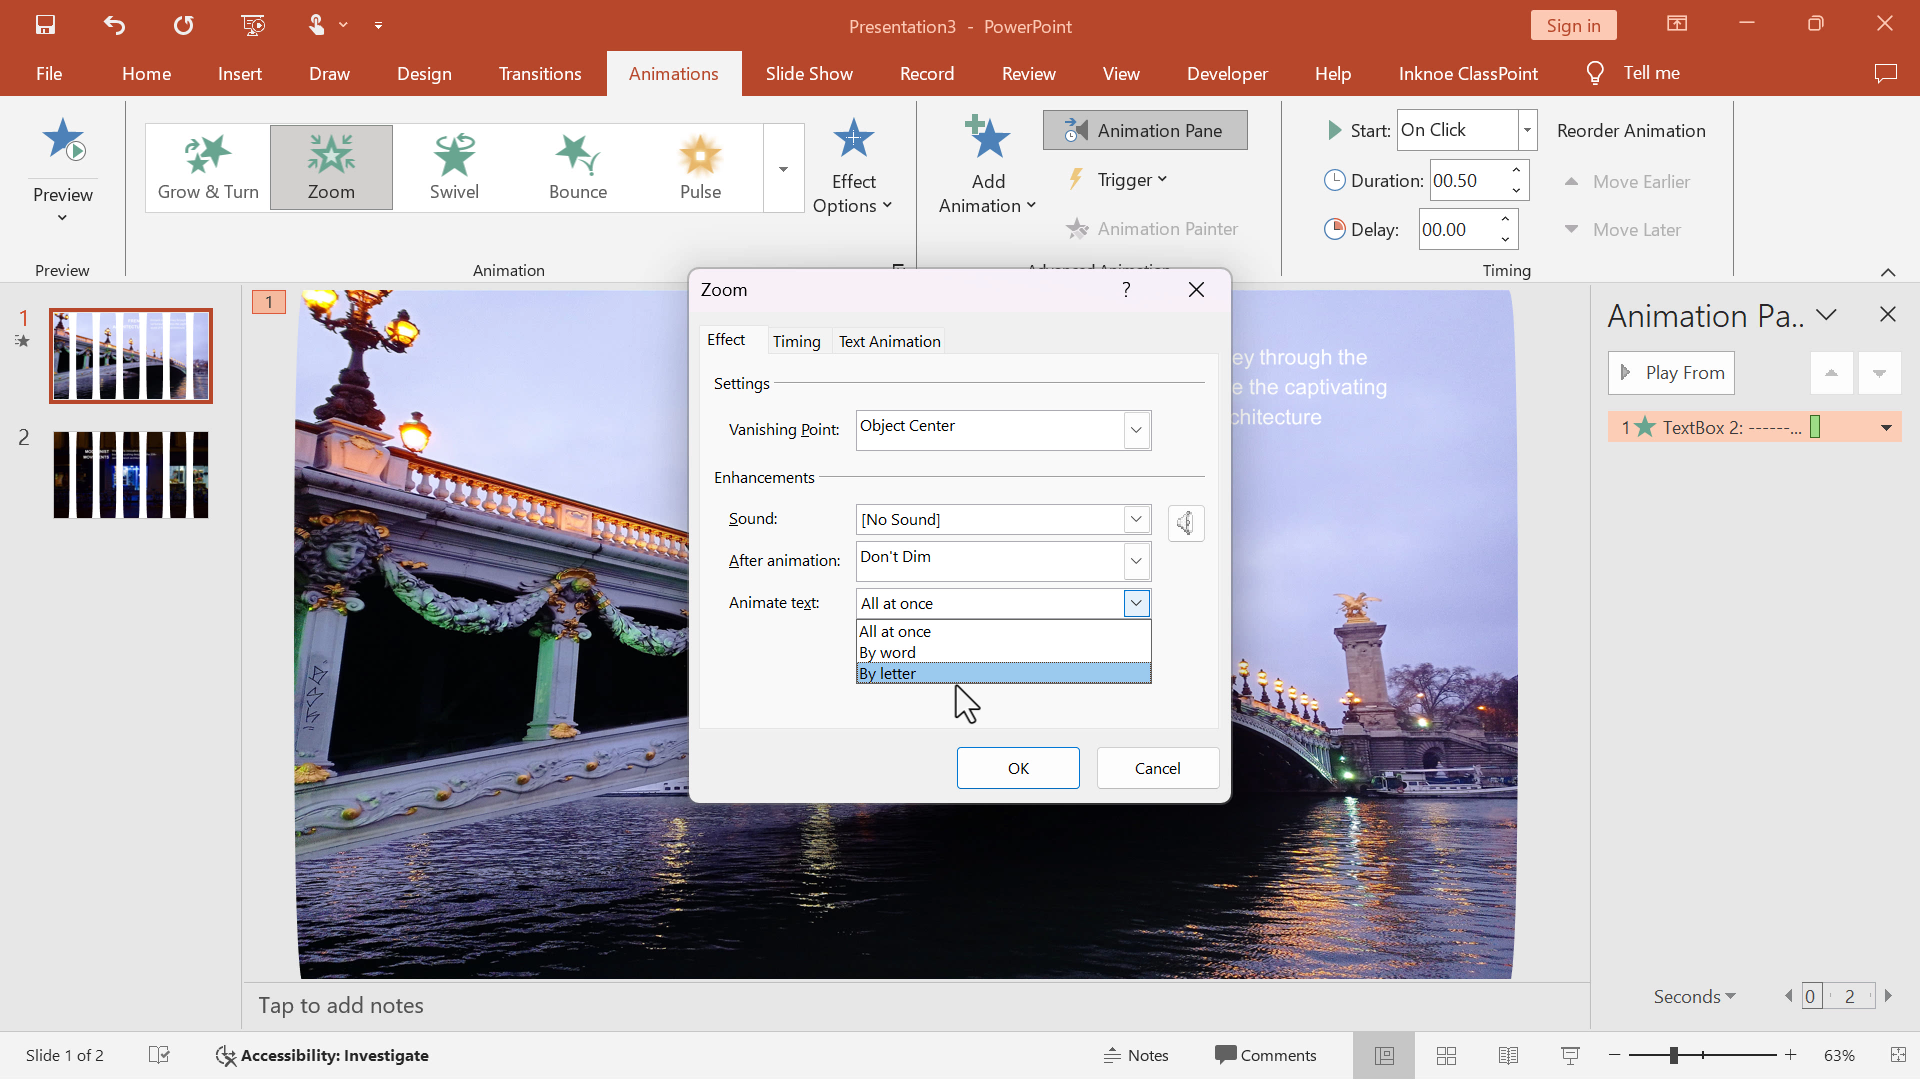
In the Effect Options, animate by letter.
Step 5: Repeat
Repeat this process for each slide in your presentation as desired.
💡 Bonus Interactive Tip:
Add interactive questions without taking time to edit slides using AI. With ClassPoint AI, your slide content is analyzed, and then a quiz question is generated for you to get real-time audience feedback.
Simply click on the AI button on your slide from the ClassPoint toolbar, then insert the question slide and start getting immediate feedback from your class.
data-title="Add ClassPoint to Your PowerPoint" data-description="Join 800,000 others who are transforming their presentations with ClassPoint. Pair creative PowerPoint animations with ClassPoint's interactive tools for a truly dynamic and engaging experience!" data-cta-text="" data-cta-link="">
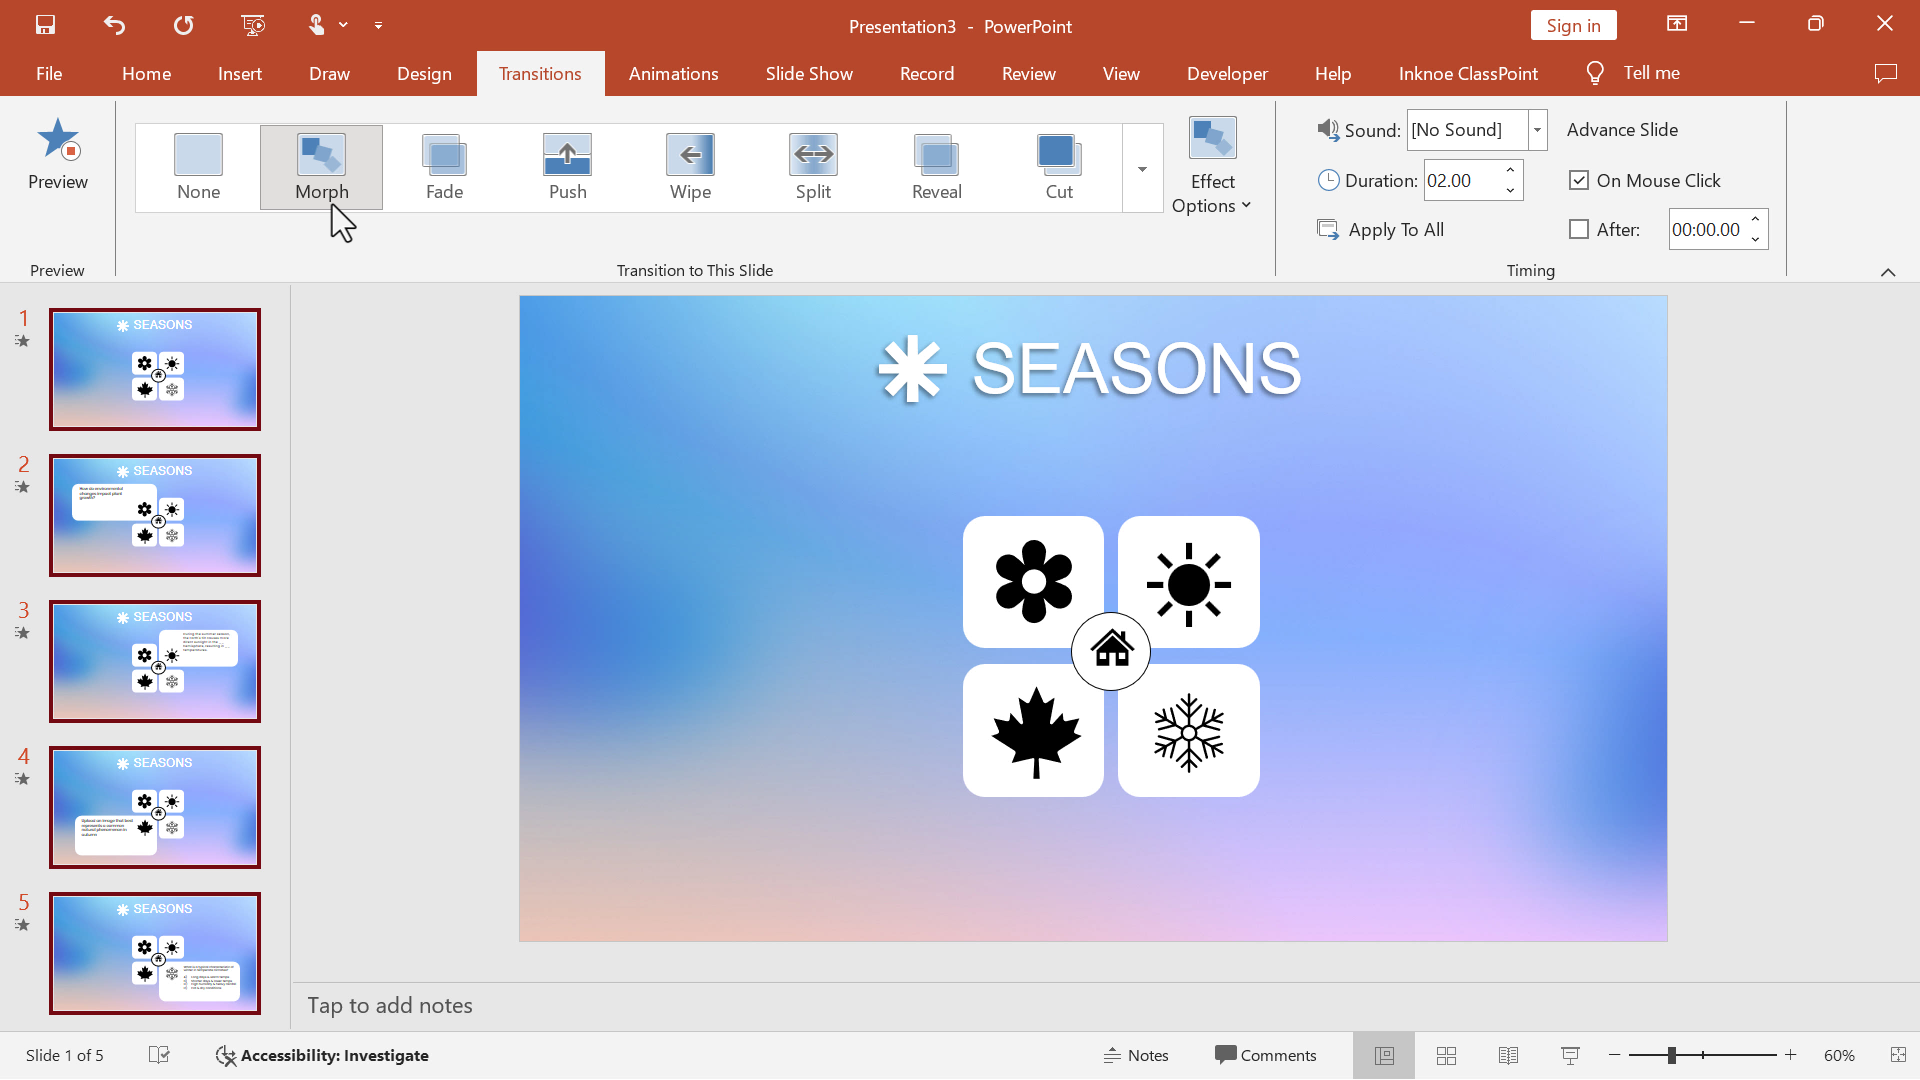
Creative Animations in PowerPoint Trick #4: Hyperlinked Morph
Morph transitions can create smooth movement between slides, making it look like the elements on your slide are animated.
Set 1: Insert Background
Insert an image or a color as the background.
Step 2: Add Title
Add a text box and type your title. Format as desired.
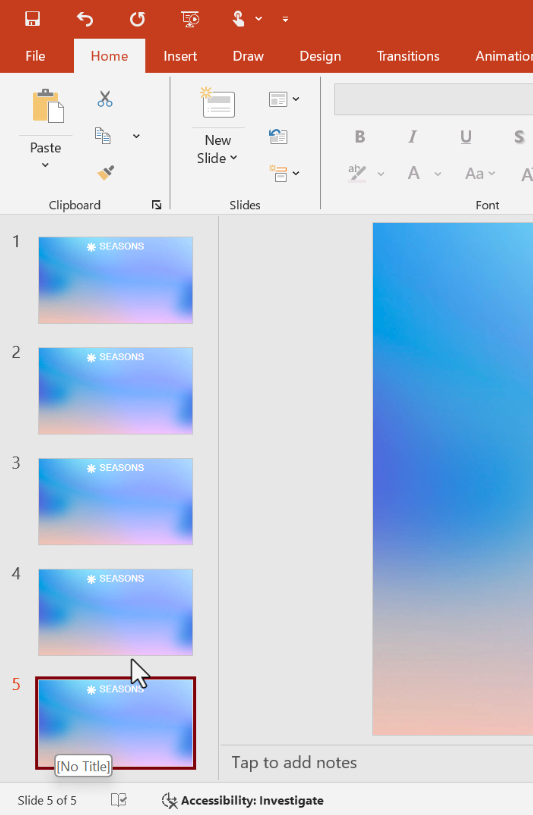
Step 3: Duplicate
Duplicate the 1st slide 4 times.
Step 4: Insert Shape
Add 4 rounded rectangles and a circle in the middle of the rectangles.
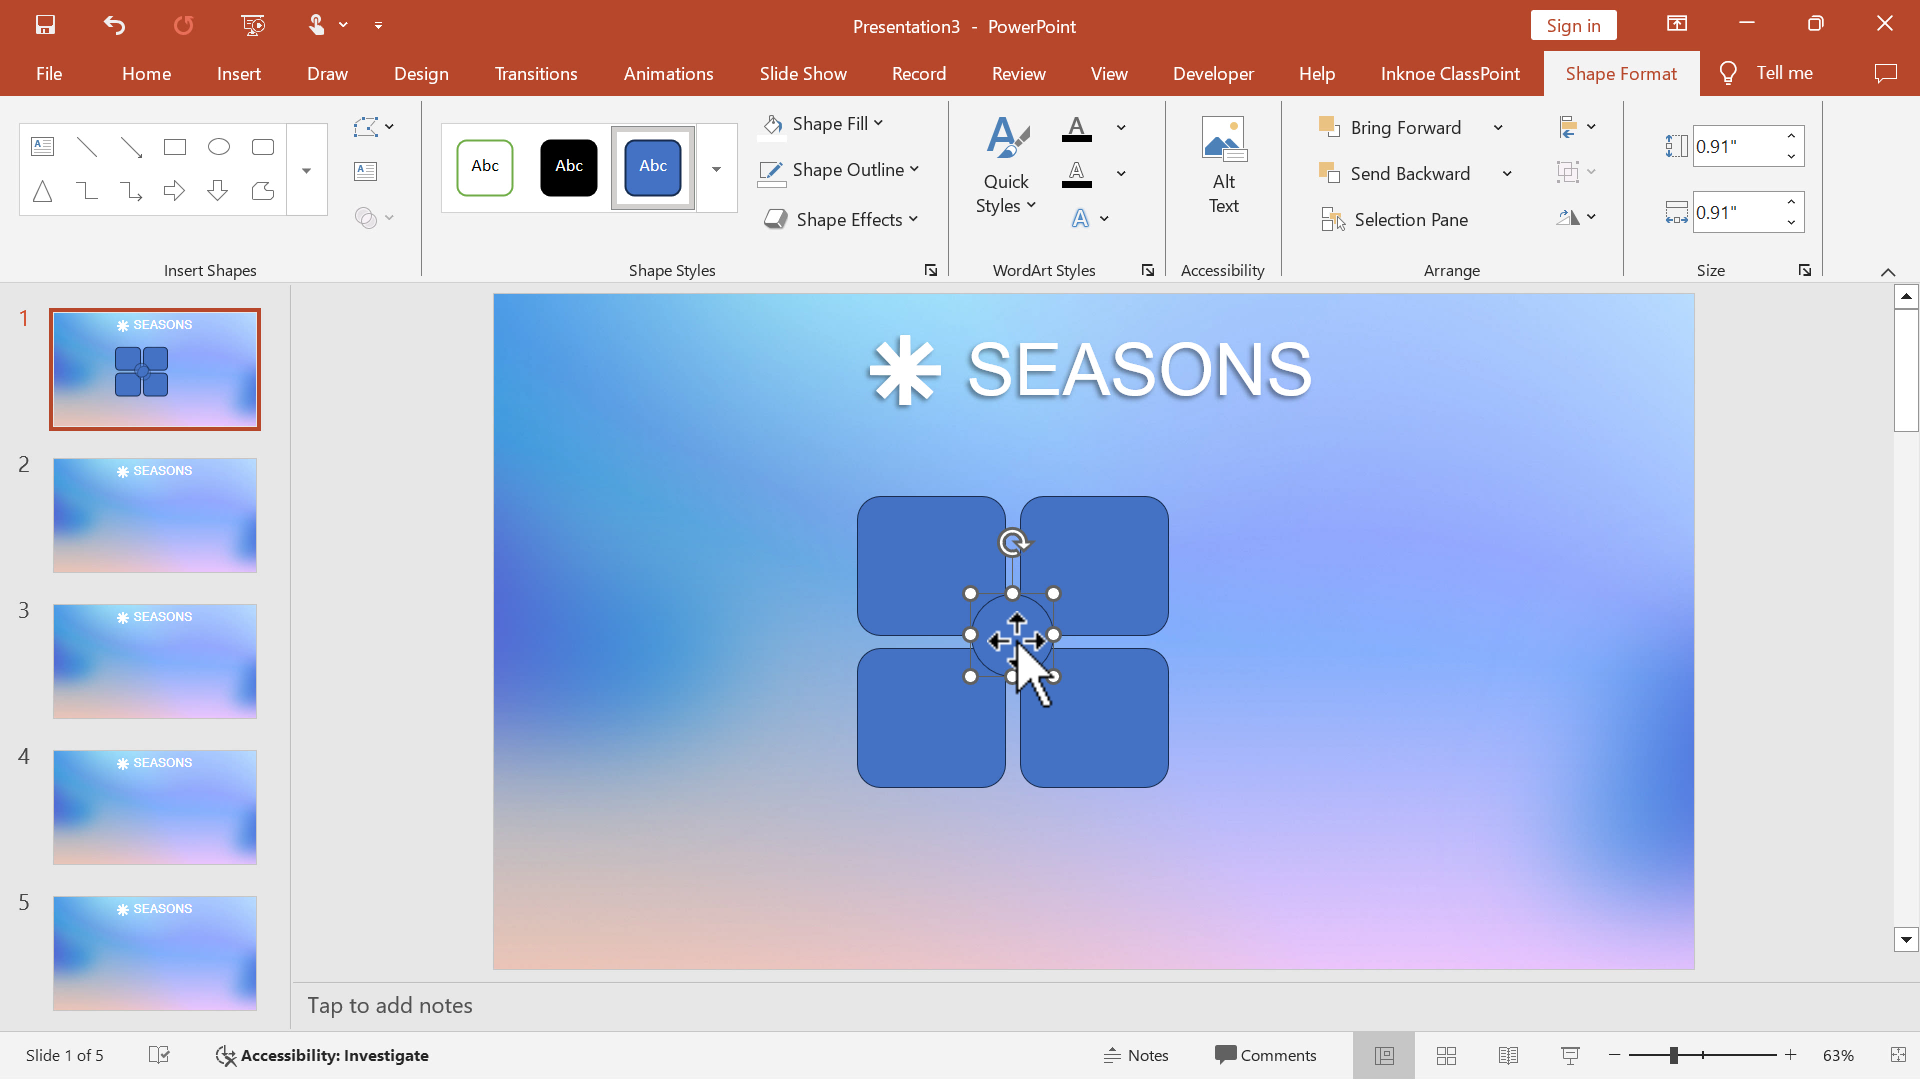
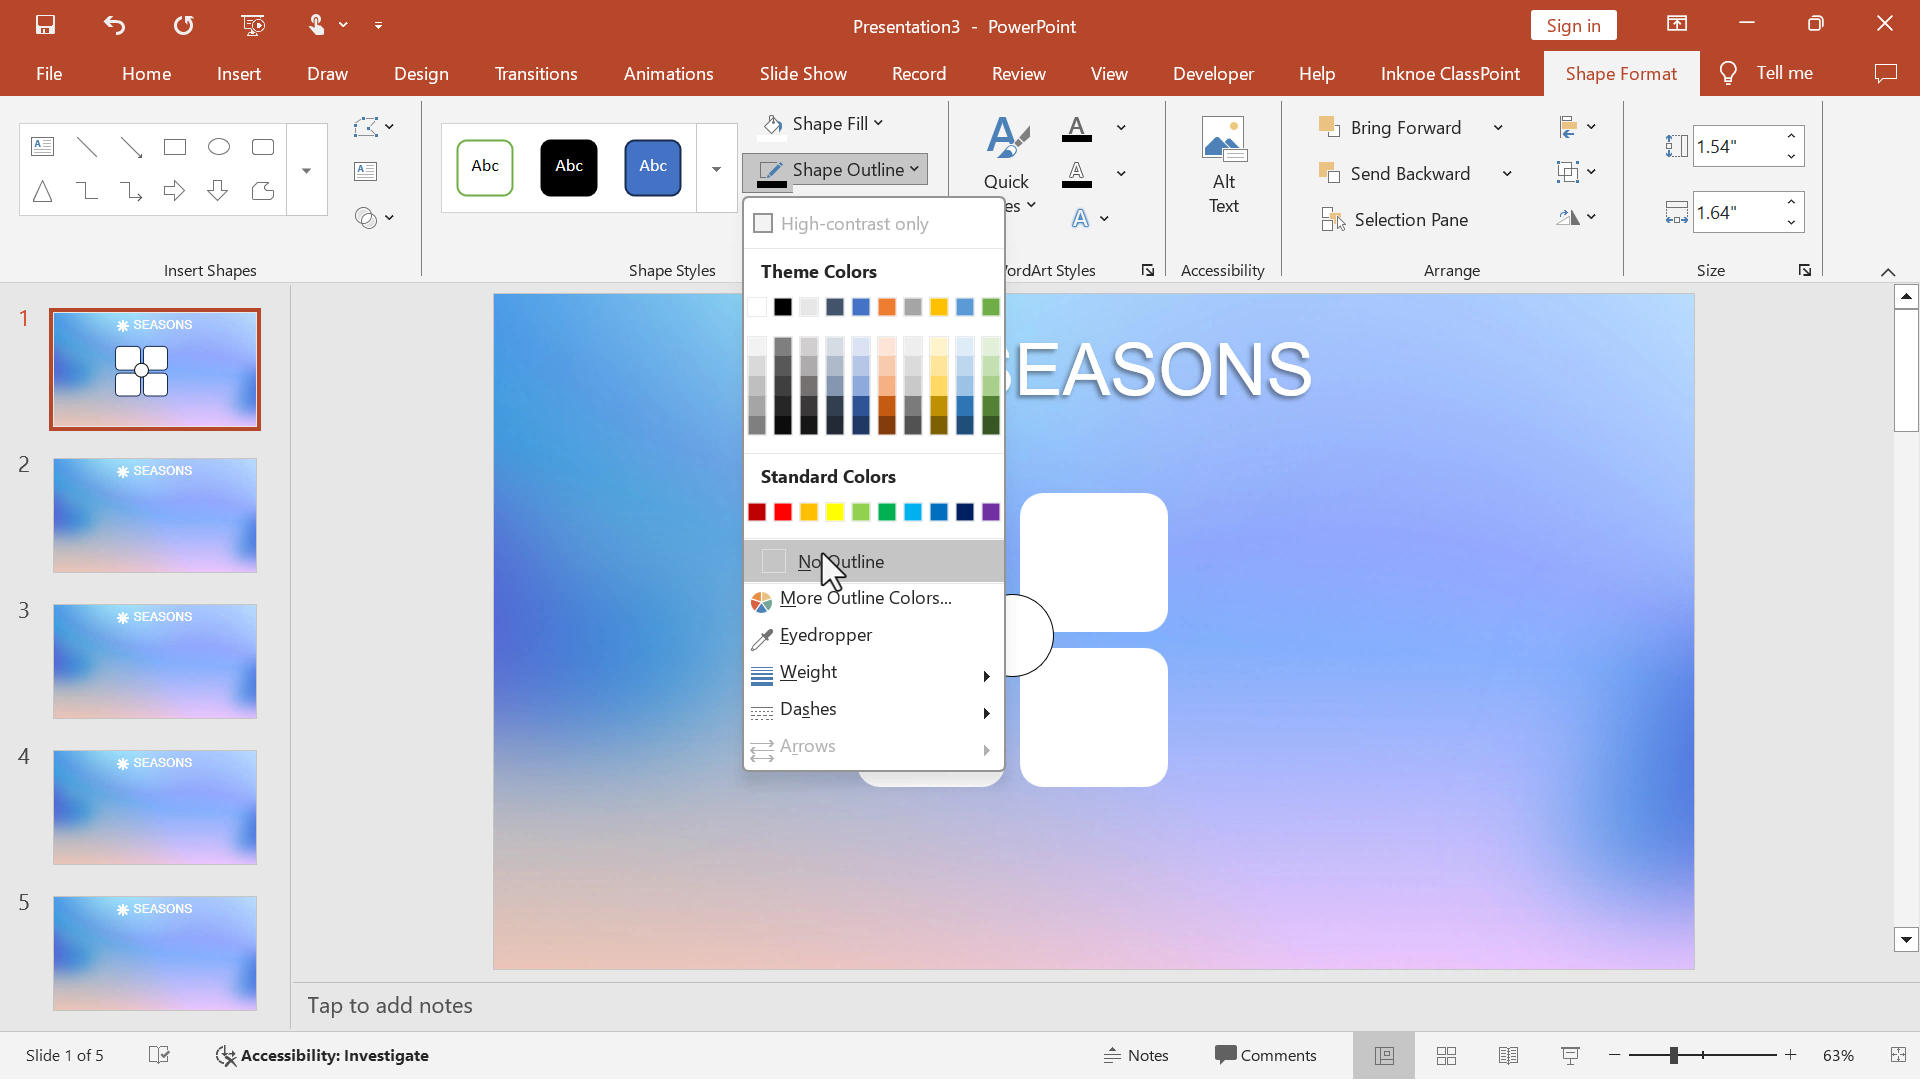
Step 5: Format Shape
Adjust the Fill and Outline color of each shape.
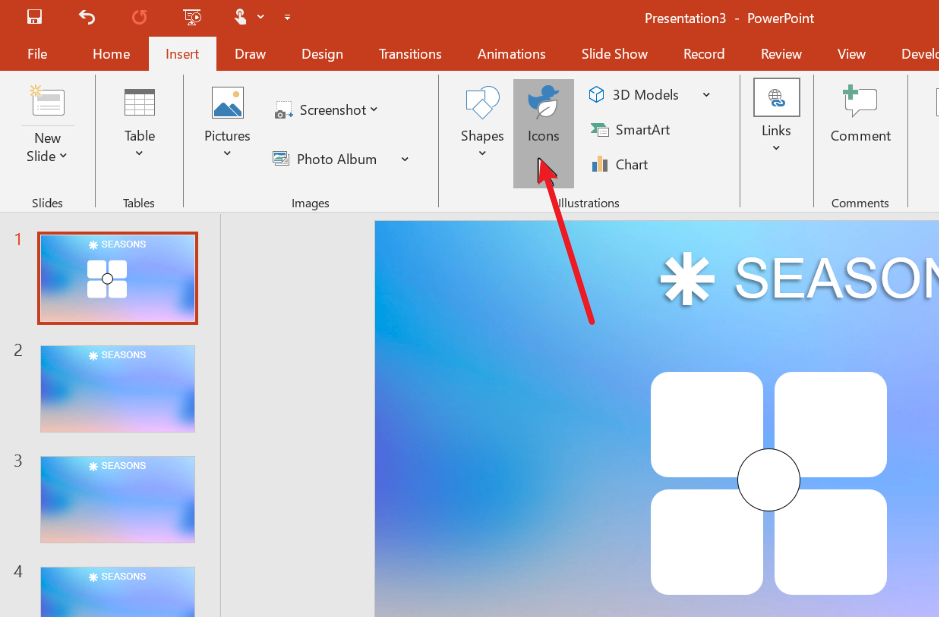
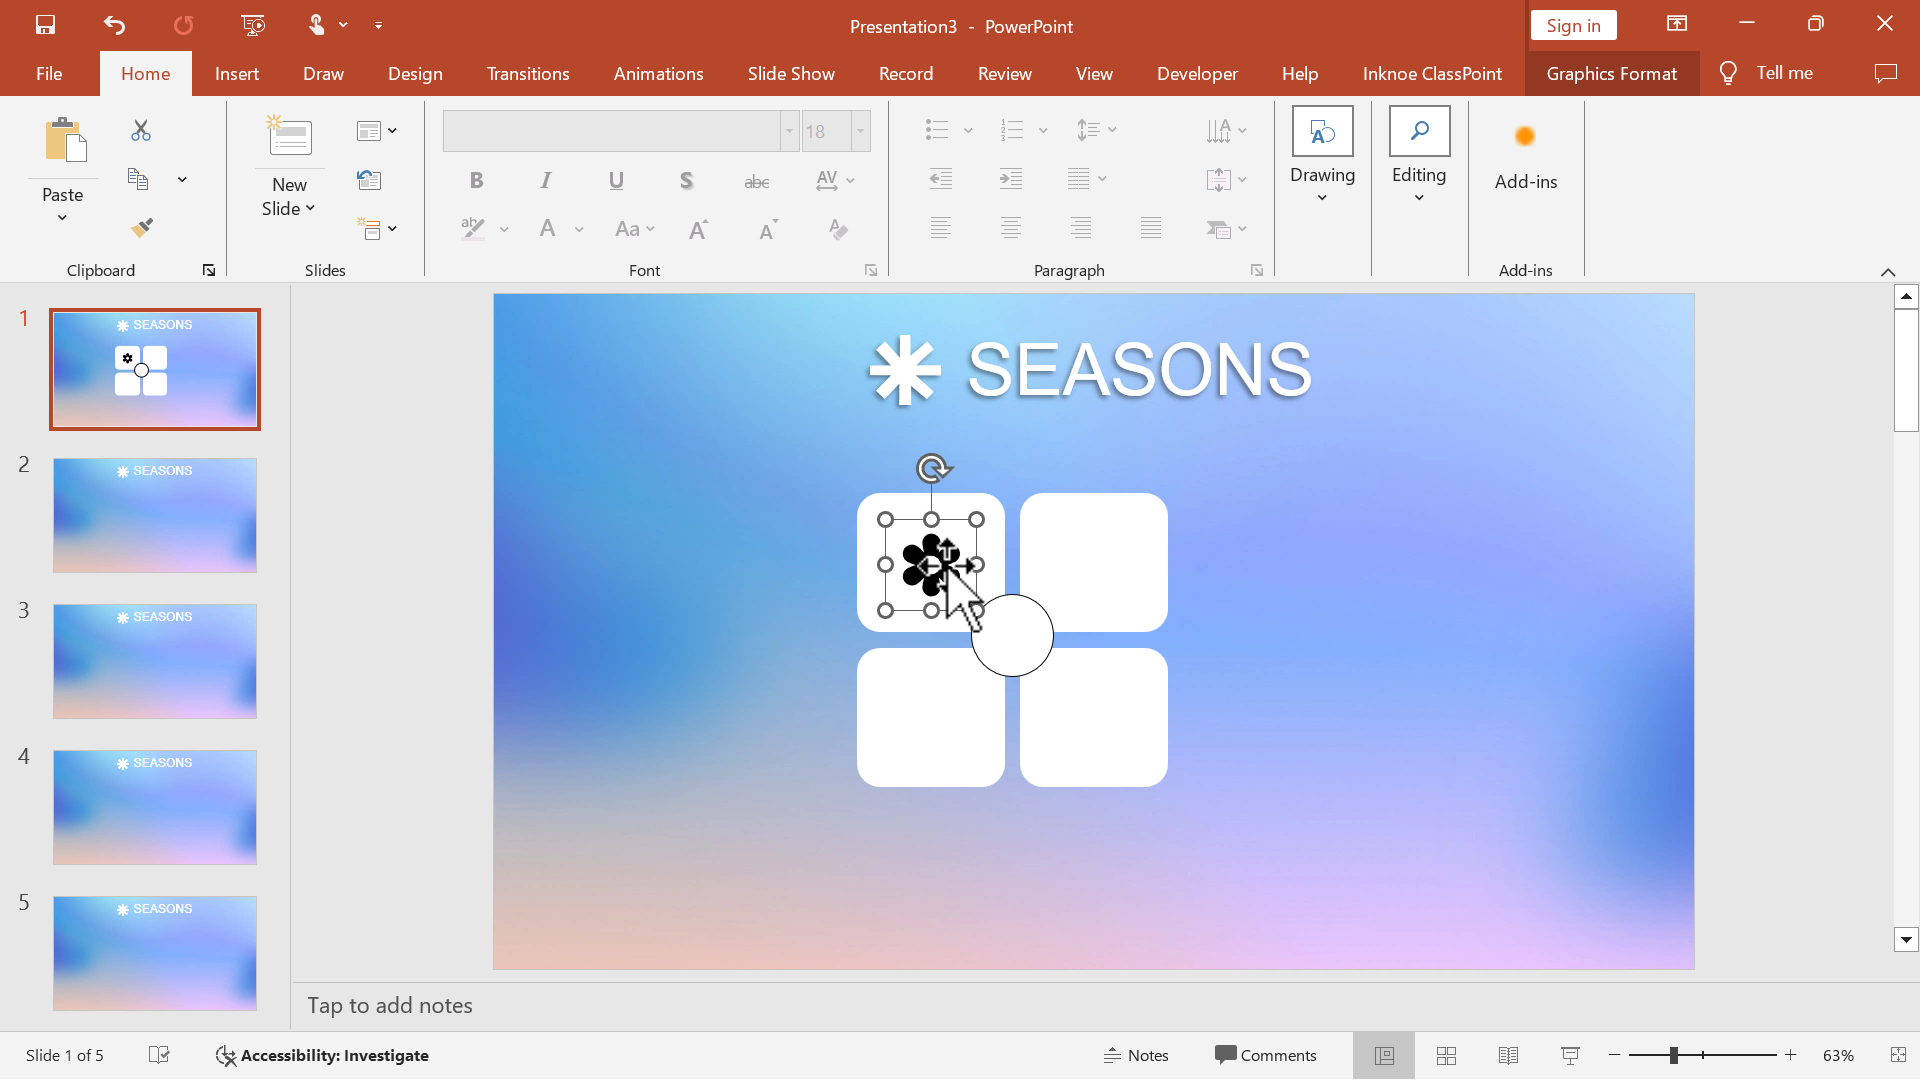
Step 6: Add Icons
Select the Insert tab and Icons.
Add corresponding icons to each shape depending on your topic and a Home icon in the center circle. For example, an icon to represent each season.
Step 7: Link to Slides
Now, we will link each icon and shape to its corresponding slide (we will go over this more in the next steps.)
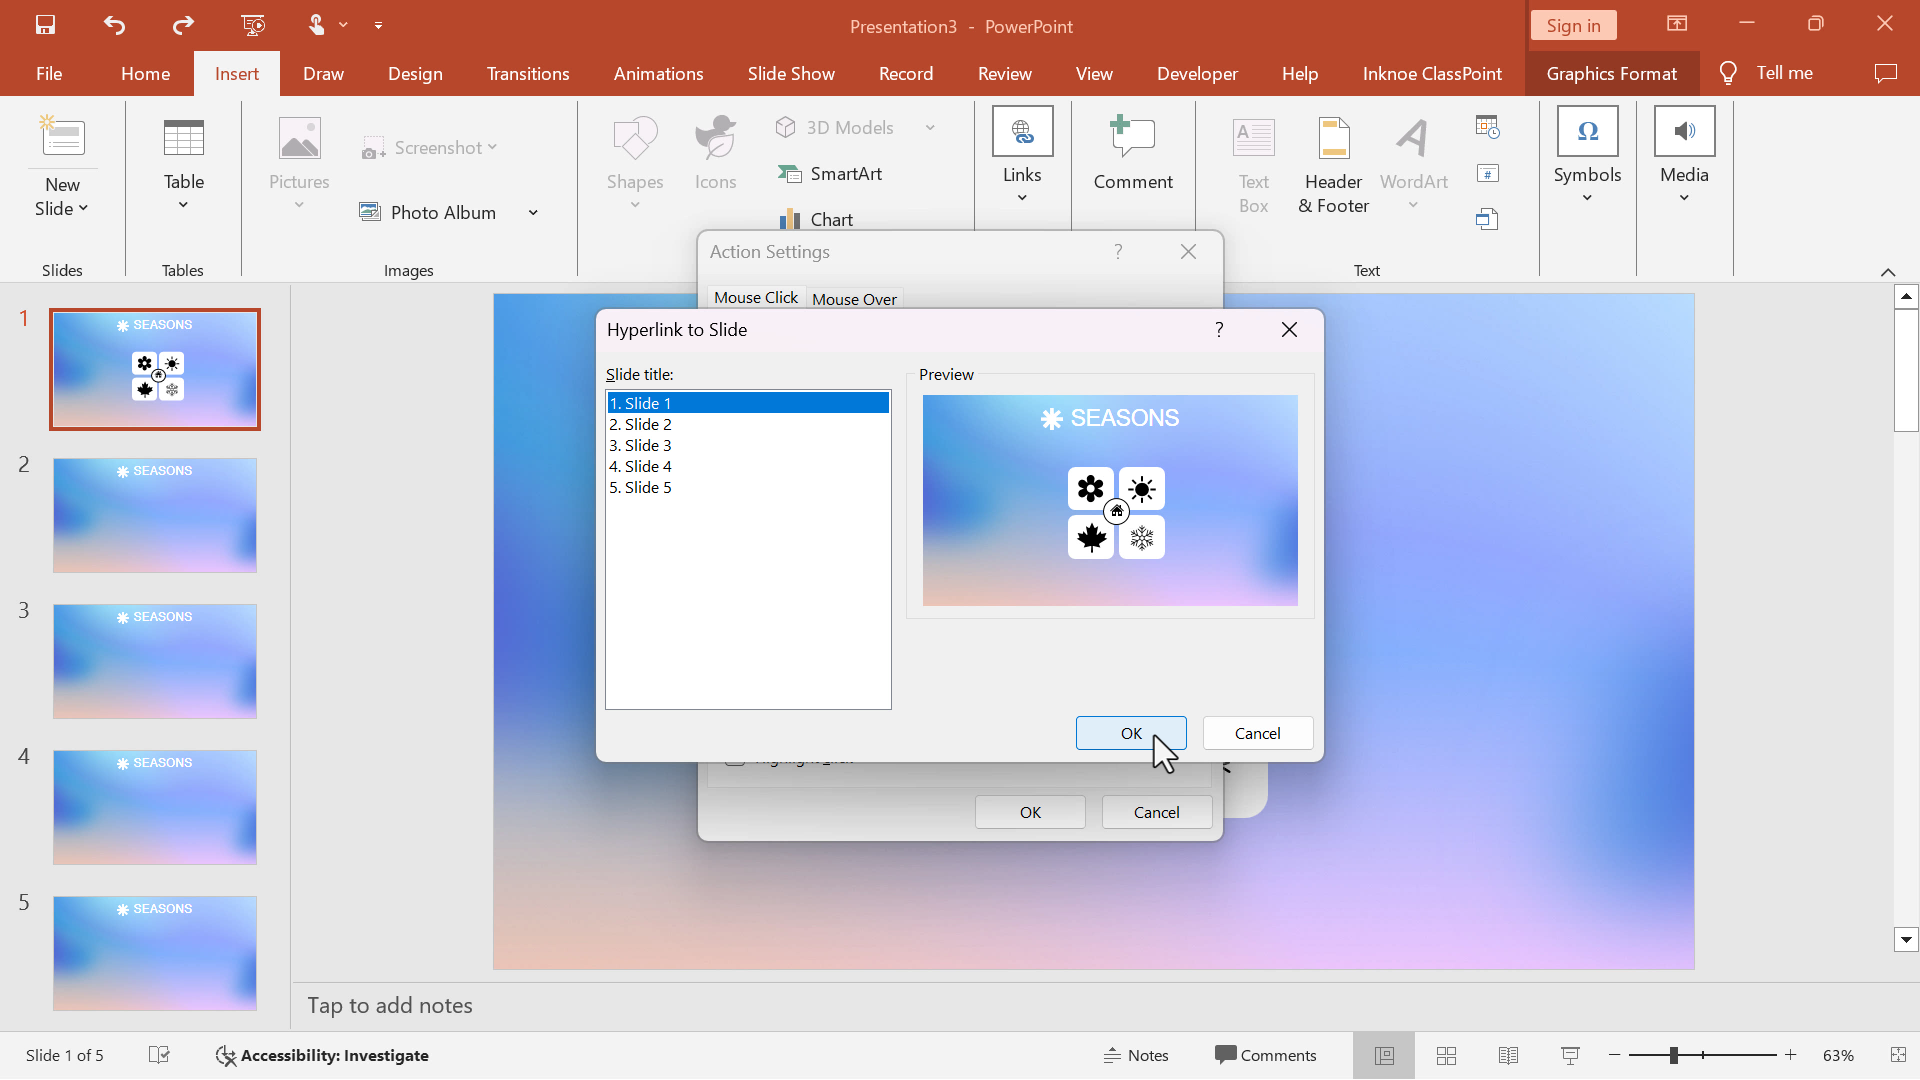
For each shape, go to Insert → Action → Link.
Then, link that shape to its corresponding slides. Remember, the Home icon should be linked to Slide 1 (your current slide)
Continue this for each shape, so that they are all linked to a different slide.
Step 8: Copy to All Slides
Now, we want to add these linked shapes to the rest of the slides in our presentation. This way everything is linked, no matter which slide you jump to in the presentation. For example, if I am on Slide 4 and select the home icon, it will take me to Slide 1.
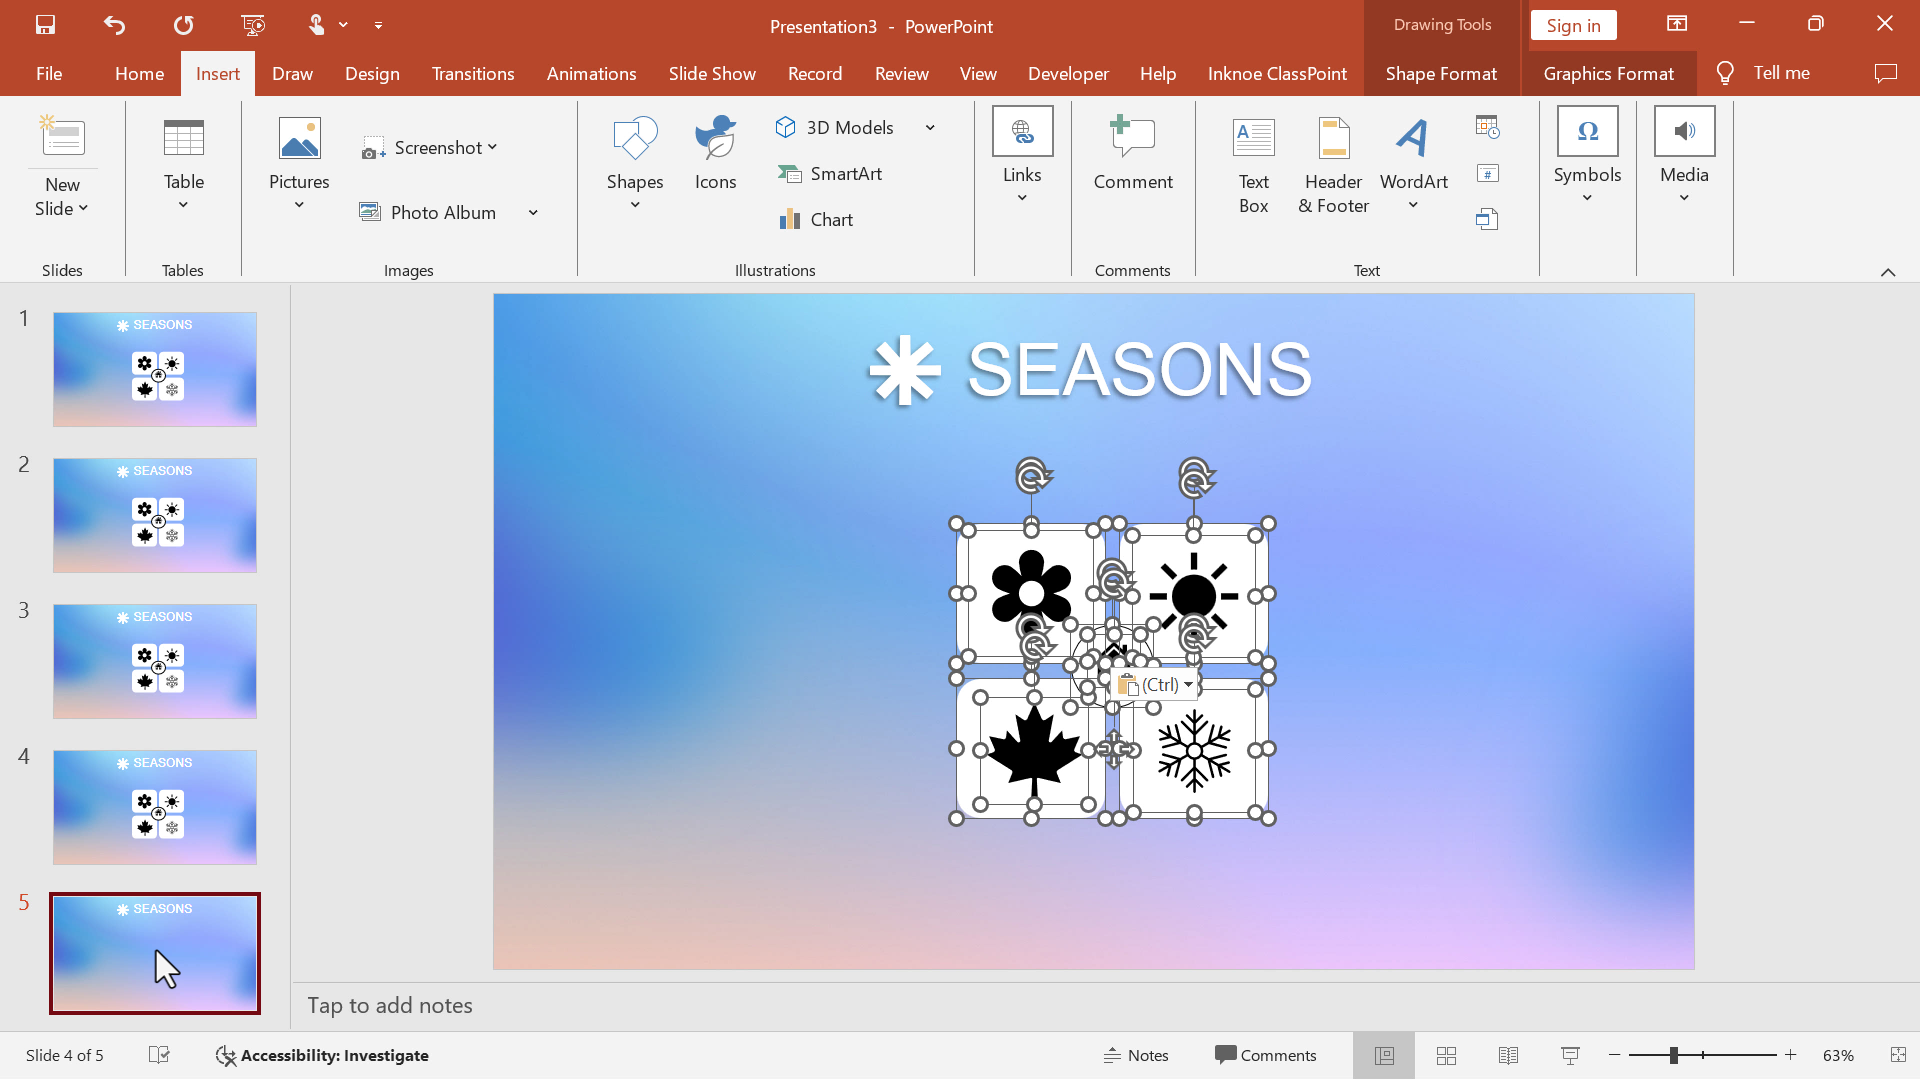
To do this, select all the rectangles and center circle and Copy (CTRL + C)
Paste these shapes onto each of the duplicated slides (CTRL + V)
Step 9: Add Content to Each Slide
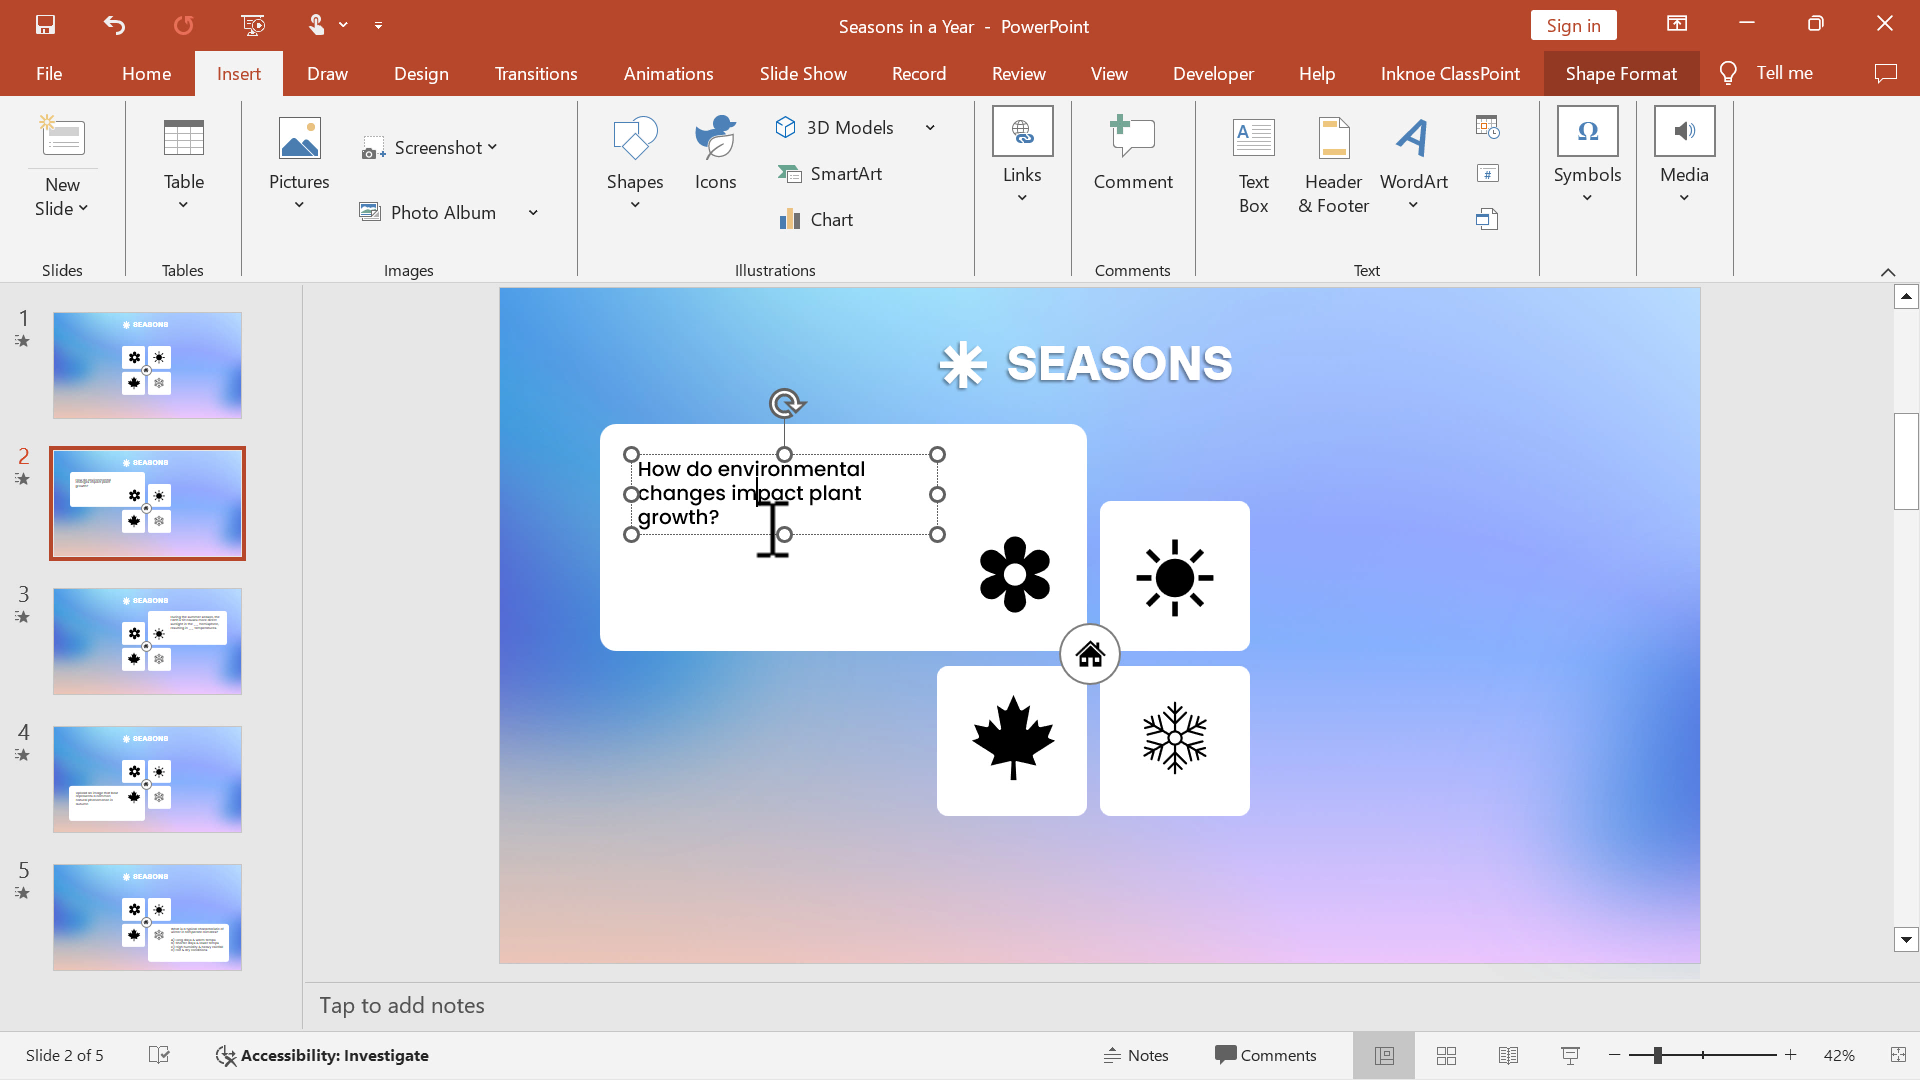
Start at Slide 2, make the top-left rectangle larger, and add content inside.
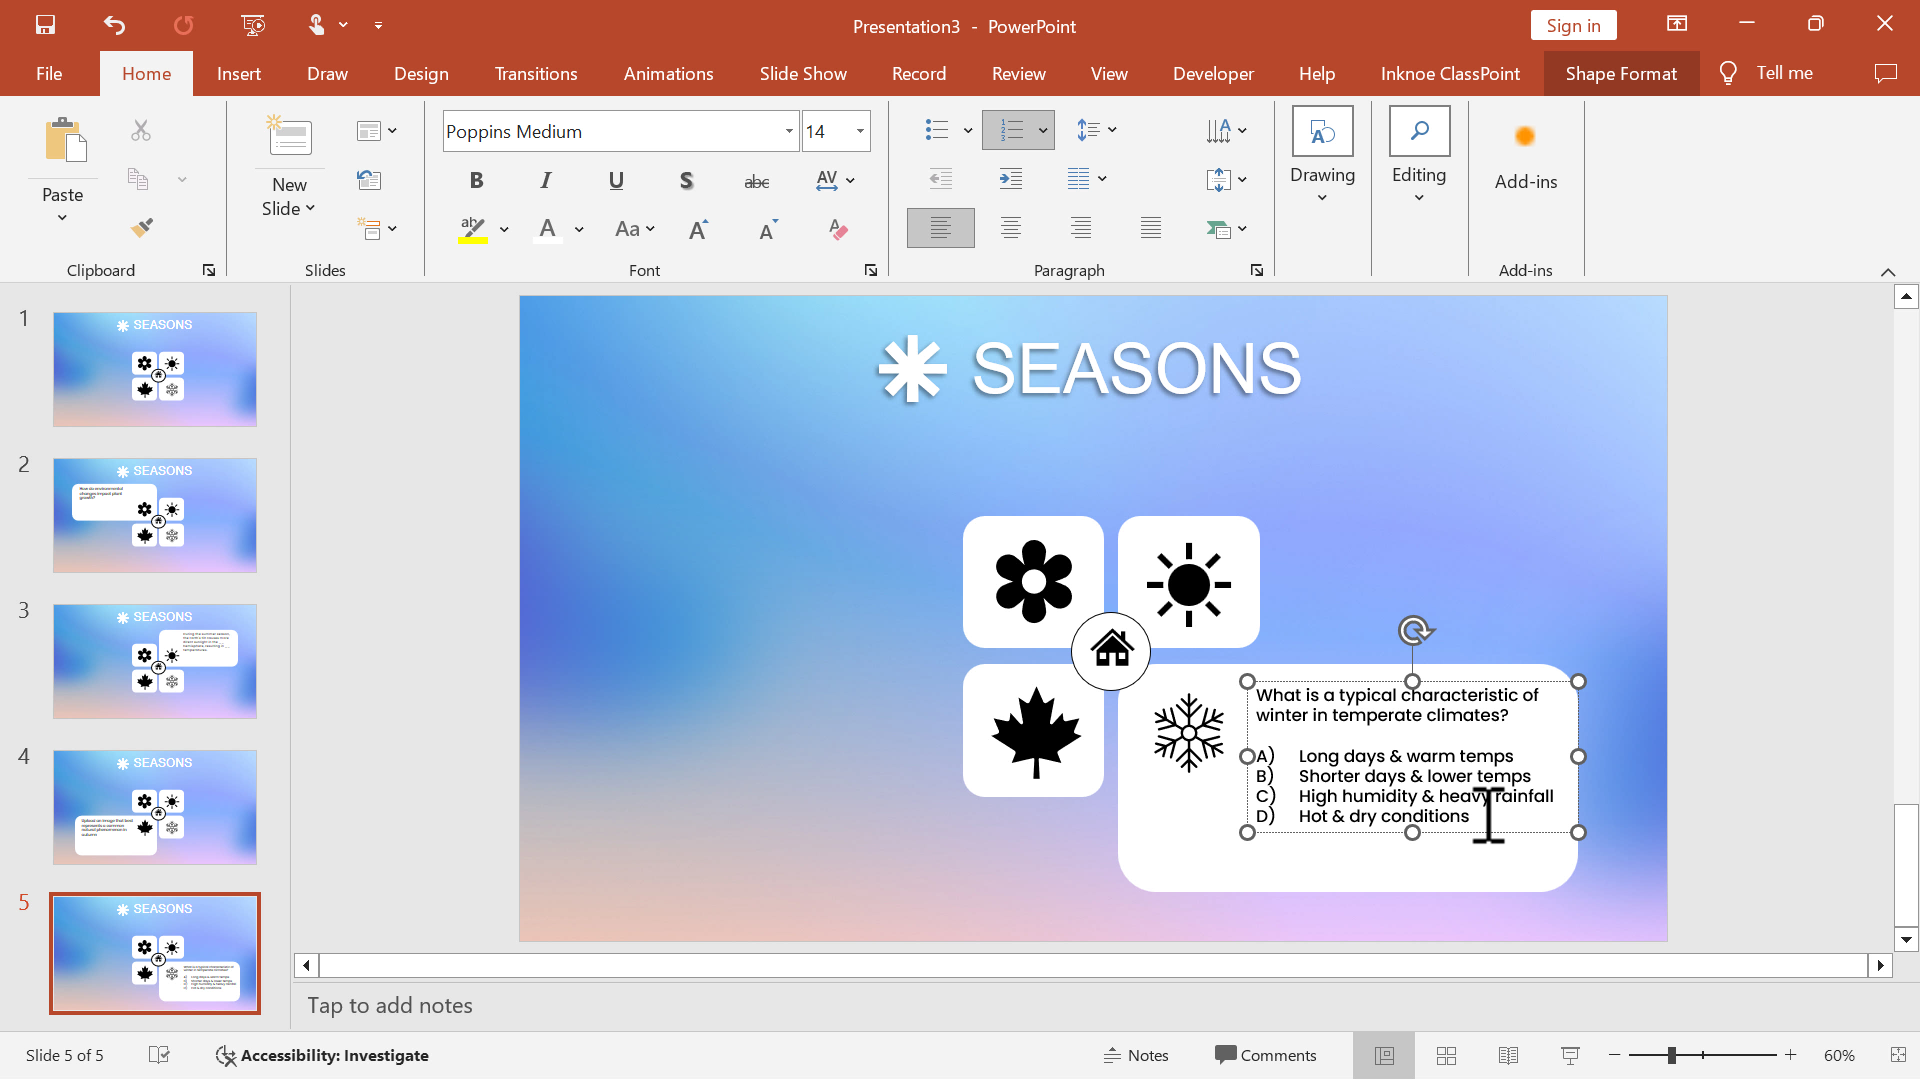
Then, continue this process for the rest of the slides. For example, in Slide 3, make the top-right rectangle larger and add in your content. Continue until each slide has the content for a particular rectangle.
Step 10: Add Morph
Select all your slides (CTRL + A)
In the Transitions tab of the PowerPoint ribbon, select Morph. You will see a quick preview of these rectangles morphing to show the added information.
💡 Bonus Interactive Tip:
Add interactive quiz questions to each slide! This way, as the shapes morph a new question appears. With ClassPoint, you can add up to 8 different question types, perfect to keep your audience engaged and touch on all the learning types.
To add a question to your slide:
Type the question
Add the corresponding ClassPoint button
Interact with your audience once they’ve joined the class!
data-title="Add ClassPoint to Your PowerPoint" data-description="Join 800,000 others who are transforming their presentations with ClassPoint. Pair creative PowerPoint animations with ClassPoint's interactive tools for a truly dynamic and engaging experience!" data-cta-text="" data-cta-link="">
Best Practices for Using Animations in PowerPoint
To maximize the effectiveness of your animations, keep these best practices in mind:
Avoid Overuse
Ensure every animation adds value to your presentation. When everything moves, blinks, or slides, students may struggle to identify the main points or keep track of what’s being said. Stick to a few purposeful animations per slide to guide attention, rather than overload it. Think of animations as visual cues—use them to emphasize, not overwhelm.
Keep It Simple
Choosing the right animations can help your content flow smoothly. These help direct focus without drawing attention away from the content. Avoid flashy or over-complicated effects like Swivel or Bounce, as these can seem out of place in a classroom setting and may detract from the professional tone of your lesson.
Time Your Animations
If animations are too slow, they can make the presentation feel sluggish, too fast, and students may miss important details. Aim for a moderate speed (between 0.5 to 1.5 seconds), and consider adding delays between different elements to create a natural progression. Use the animation pane in PowerPoint to control the order and timing of your animations for a polished delivery.
Combine with Interactivity
Pair animations with quizzes, polls, and draggable objects to encourage active learning and participation. For instance, after introducing a concept using the Fly-In animation, follow up with a quick quiz using ClassPoint to check understanding. This keeps students engaged and reinforces learning through immediate application.
Test Before Presenting
Even the best animations can go awry if not tested beforehand. Run through your entire presentation to spot any glitches, timing issues, or out-of-sync elements. If you’re using interactive elements, test these as well to ensure smooth functionality during class. A quick rehearsal will save you from scrambling in front of your audience and ensure your presentation runs seamlessly.
data-title="Add ClassPoint to Your PowerPoint" data-description="Join 800,000 others who are transforming their presentations with ClassPoint. Pair creative PowerPoint animations with ClassPoint's interactive tools for a truly dynamic and engaging experience!" data-cta-text="" data-cta-link="">
Wrapping Up
PowerPoint animations aren’t just for show as they are powerful tools that can transform how information is delivered in the classroom. Use the downloadable template provided to experiment with these animations, and don’t forget to check out ClassPoint to supercharge your interactivity!
In the digital age, PowerPoint has evolved far beyond its traditional role as a static slideshow tool. It has emerged as a versatile canvas where creativity knows no bounds, and where education and entertainment can seamlessly co-exist. Imagine captivating your audience not just with information but with an interactive journey that sparks curiosity, competition, and camaraderie. This is the magic of PowerPoint games. 📸 Picture this: a classroom abuzz with excitement as students eagerly participate in a trivia quiz that feels more like a game show. Or a virtual conference where attendees don’t just listen passively, but actively engage with the content, making choices that shape the narrative. The secret behind these captivating experiences lies not just in PowerPoint itself, but in the innovative tools that unlock its true potential. In this blog, we will explore the art and science of creating games that educate, entertain, and leave a lasting impact. We will delve into the pri...
Are you looking for a fun and engaging way to test your students’ knowledge across various subjects? Look no further than the classic Fill in the Blank game! This timeless activity is perfect for students who love a good challenge and those looking to stimulate their minds with quick and fun questions to answer right on the spot. In this blog, we’ve compiled over 100 Fill in the Blank questions spanning a wide range of categories, from Grammar and Vocabulary to Science, History, and even Pop Culture. Towards the end, we’ll show you how can play this right inside PowerPoint with a ready-made sample template that you can download for free! Ready to dive in? Take a look at some of our other fun question lists: ▶️ 100+ Short Answer Questions Across Bloom’s Taxonomy Levels ▶️ 131 Most Hilarious Family Feud Questions and Answers of All Time ▶️ 240+ Best Paranoia Questions for School Friends and Students ▶️ 90+ Truth or Dare Questions for Kids to Unleash Laughter in the Classroom ▶️ 150 ...
In today’s fast-paced digital age, educators constantly seek tools to streamline their workflow and efficiently gather information . Many have turned to artificial intelligence as a solution. While ChatGPT has gained popularity for many tasks, it’s not the only AI tool available. Did you know that you can use Perplexity AI for teaching? Perplexity AI is a powerful tool designed to simplify information retrieval and provide accurate, concise answers. Think Google, but MORE – a summary of all the webpages, only providing you with the information you need and with sources to ensure reliable information. In this blog, we’ll explore how to use Perplexity AI for teaching and lesson prep, research, with your students and so much more, like how to turn this information into interactive content for students. What is Perplexity AI? Perplexity AI is an innovative tool that simplifies online searches. Unlike traditional search engines, Perplexity AI provides users with...


Comments
Post a Comment